

")
I’ve always loved Coraline.
Like A LOT.
I also recently, with the help of Brad Mondo’s videos on Facebook that I watch at 1 a.m., took my hair to a wild blue and purple ombre combo.
THIS MEANS I AM OBLIGATED TO BE CORALINE. Lol. But REALLY!
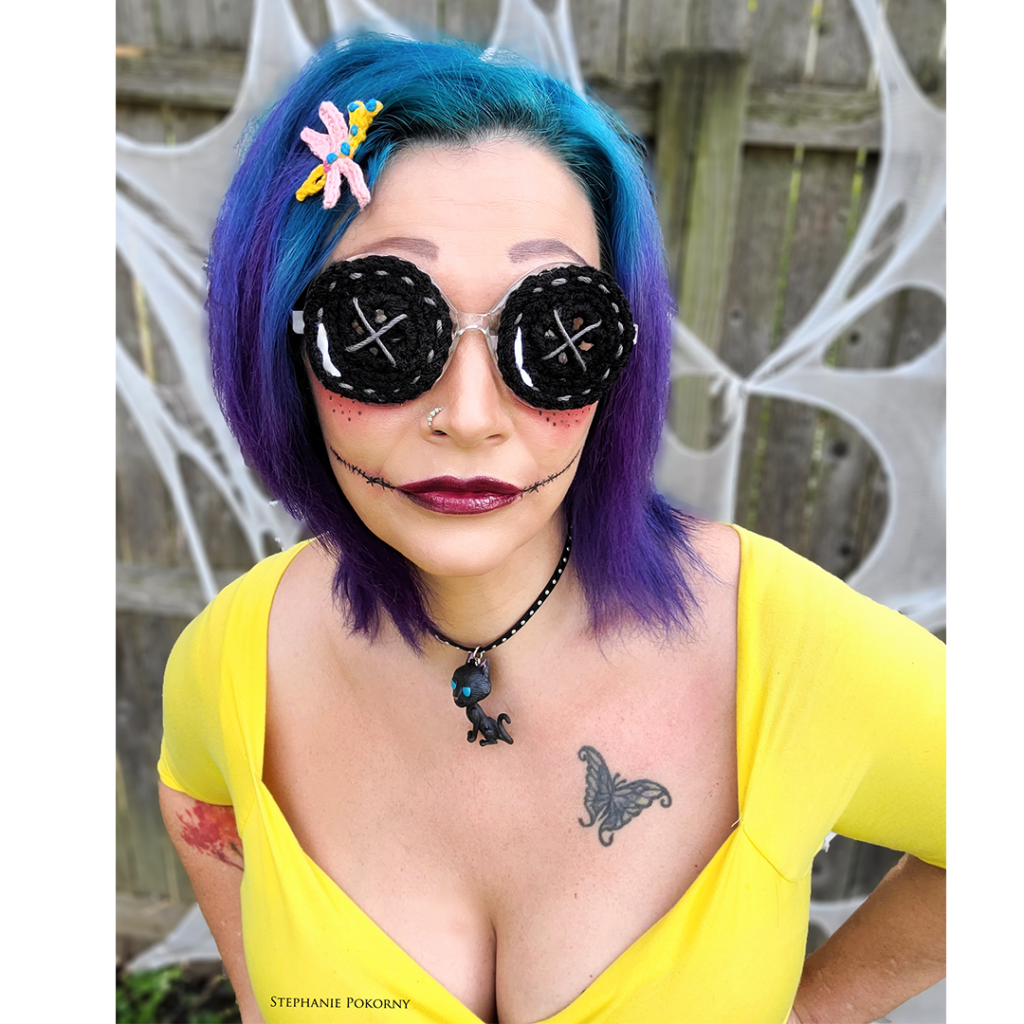
I wanted to do a quick cosplay and I am sharing the pattern for the button eye glasses AND the dragonfly hair clip! For FREE! I ask that you always share the link to this post and never copy and past the info within. Your lovely visits here allow me to keep the proverbial “lights on” and continue to offer you free patterns!
No blue hair? No problem, grab a blue bob wig on Ebay, you can get them for super cheap, like 10 bucks!
The sweet Wuss Puss cat choker I am wearing? I got that from Etsy here: https://www.etsy.com/shop/WickedWeirdCreations No affiliation, just love the product! Support small artists always!
AND YES I CAN SEE! Hey, I wouldn’t drive a car, but I made these in a way that you willlllll be able to see through them! Woo hoo! Functional and kick a$$!
What You Need:
- 50 yards black worsted weight yarn (shown is Red Heart Super Saver Black)
- Size F (3.75mm) crochet hook
- Size D (3.25mm) crochet hook
- small amounts DK weight yarn (OR use worsted like Red Heart and separate one of the plies out and only work with 3 of them! Tricksy tip!) in golden yellow, light pink, bright pink, turquoise, gray, white (I used Paintbox DK cotton in my sample)
- tapestry needle, scissors, stitch marker
- hot glue sticks and glue gun
- bobby pins or barrette
- ANY round frame glasses frame. I got mine on Ebay for a less than 10 bucks. Search “round frame glasses” NOT sunglasses, you want clear lenses. The button measures 2 3/8″ in diameter, but they can overhang or be a little less than the frame of the glasses and still look good.
Instructions (US Terms):
FIRST, The Button Eye Pattern (Make 2):
Finished Size: about 2 3/8″ diameter
Do not turn rounds, mark with stitch marker to keep track if needed.
With the black yarn and G hook, make a magic ring, ch 1:
Round 1: (sc in the ring, ch 3) four times total, sl st to 1st sc made. (4 sc and 4 ch-3 spaces)
Round 2: ch 1, 2hdc in same st as ch-1, 3sc in nxt ch-3 sp, (2hdc in nxt sc, 3sc in nxt ch-3 sp) three times total, sl st to 1st hdc made. (20 sts)
Round 3: ch 1, sc in same st as ch-1 and nxt 2 sts, 2sc in nxt st, (sc in nxt 3 sts, 2sc in nxt st) four times total, sl st to 1st sc made (25)
Round 4: ch 1, scblo in each st around, sl st to 1st st made. It will cup a little but you want that. Cut yarn leaving a 20″ tail. (25)
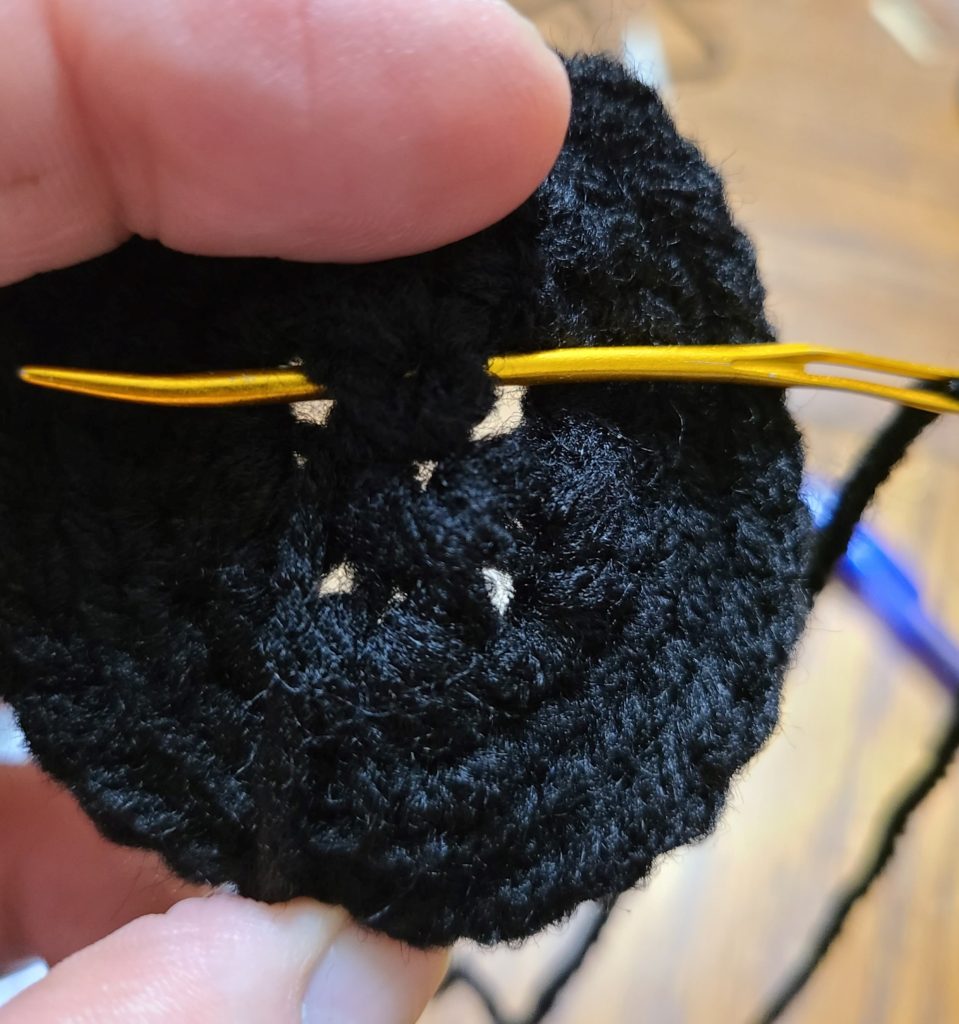
Using the tail just cut and tapestry needle, we will enhance the button holes so they are easier to see through and look better. You will sew, ;ooping the yarn around, the post of the sc that is between each ch-3 space from round 1 to bring it in tightly. Moving the yarn by weaving it on the reverse of the button in the stitches, do the same around each sc on round 1. Weave the ends in.
This photo shows the needle getting ready to wrap around one of the single crochets to enhance it:
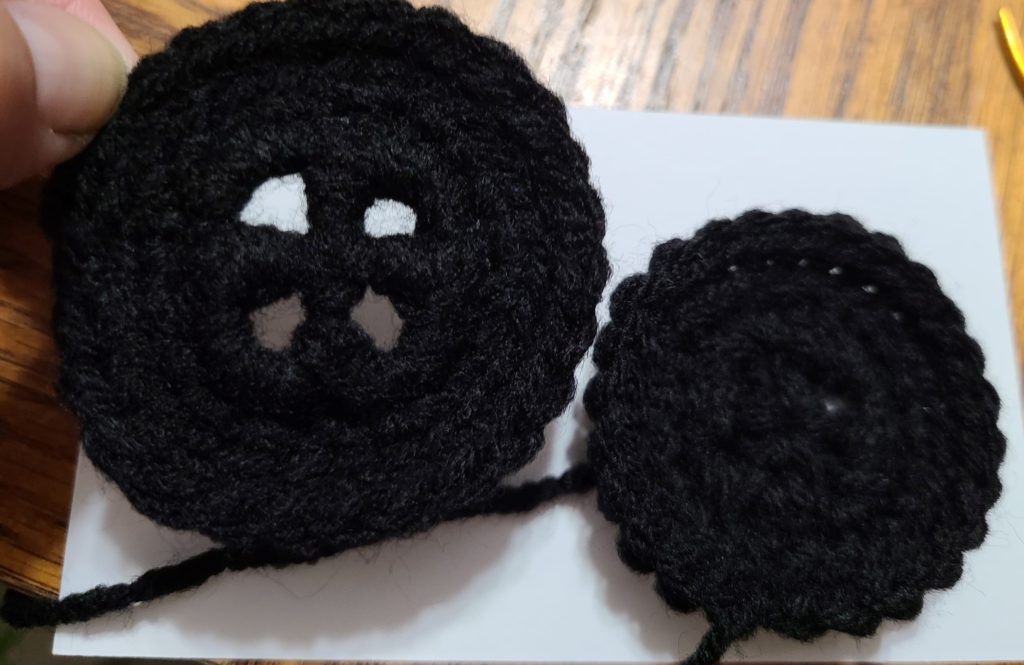
This photo shows the left eye all done with the sc stitches wrapped with the tail end of the yarn tightly in comparison to the undone one. It really helps.
With tapestry needle and gray yarn, sew small stitches 1 st wide, the skip the next st, around the perimeter of the button just below the remaining front loop from the last round made. Then sew an “X” across the button holes. Yes technically it should go in the holes, but we have eyes and they kinda wanna see, so it will get the point across. Finally, take a strand of white and sew a sparkle on each eye. Use the photo as a guide. The open ends of the X should face 12 and 6 oclock and the white sparkle should be between 3 and 4 oclock on each button eye.

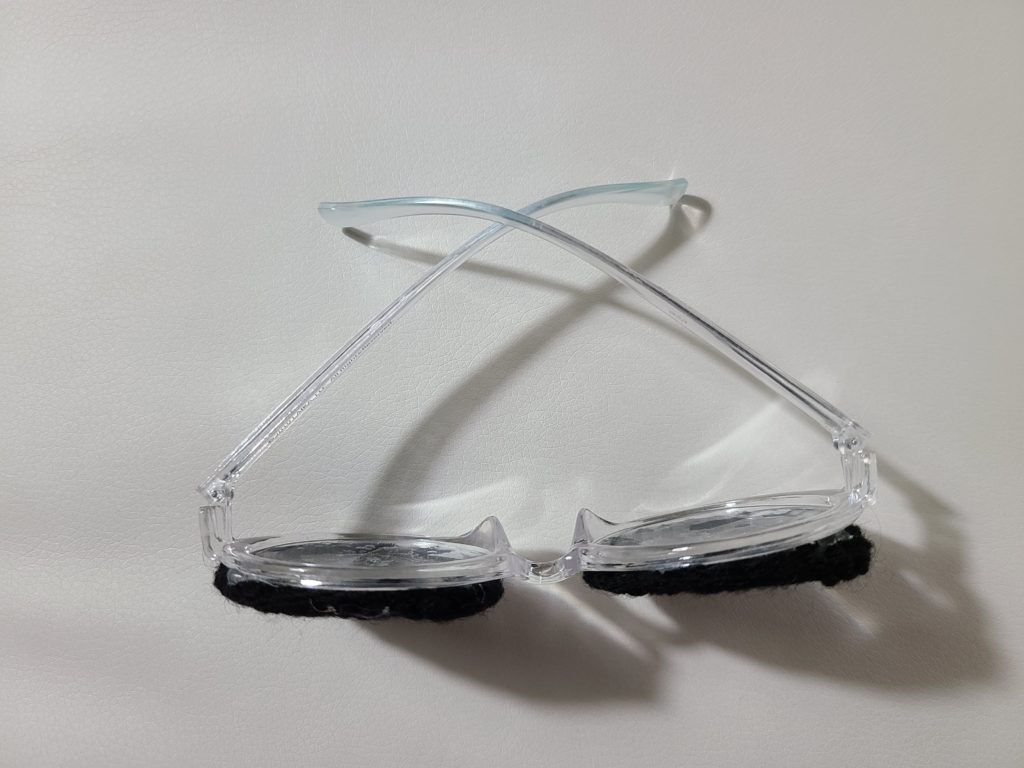
Then using the hot glue making sure you keep it away from the center holes, glue a button to each lens with the open ends of the X facing 12 and 6 and the white sparkle at 3 and 5 on both.
The DragonFly Clip Pattern:
Finished Size: about 2.5″ head to tail and 2 1/4″ wide.
With D hook and single strand golden yarn, ch 14:
I work in the BB or BACK BUMP for this. If you turn your chain over, there is a horizontal bmp, that is the BB. If you prefer work in the chain as normal.
Rnd 1: sl st in 2nd bb from hook and nxt bb, ch 3, sk nxt 3 bb, sl st in nxt 8 bb, ch 4, sl st in 2nd bb from hook and nxt 2 bb, sl st in the same ch at the base of the ch 4, ch 4 again, sl st in 2nd bb from hook and nxt 2 bb, sl st once more in the same ch at the base of the ch 4, sl sl in the nxt 6 sts, cut yarn.
Wings:
With the right side of the stitches of the body facing up, join single strand pink yarn in the 3rd last sl st made on the end of rnd 1, ch 8, sl st in 2nd bb from hook and nxt bb, sc in nxt bb, hdc in nxt 2bb, sc in nxt bb, sl st in last bb, sl st in same ch on body you began from, sl st into nxt ch on body, ch 7, sl st in 2nd bb from hook and nxt bb, sc in nxt bb, hdc in nxt 2bb, sl st in nxt bb, sl st in nxt st on golden body and cut yarn.
Turn so the opposite side of the golden body is further from you and the right side of the body is still facing up with looped end to the right and rejoin pink yarn with a sl st in the chain that is opposite the ch you worked the wing closest to the loop end on the other side, ch 7, sl st in 2nd bb from hook and nxt bb, sc in nxt bb, hdc in nxt 2bb, sl st in nxt bb, sl st in same st on golden body you joined to, sl st in nxt st on golden body, ch 8, sl st in 2nd bb from hook and nxt bb, sc in nxt bb, hdc in nxt 2bb, sc in nxt bb, sl st in nxt bb, sl st in same st on golden body this chain 8 emerged from, cut yarn. Weave in all ends.
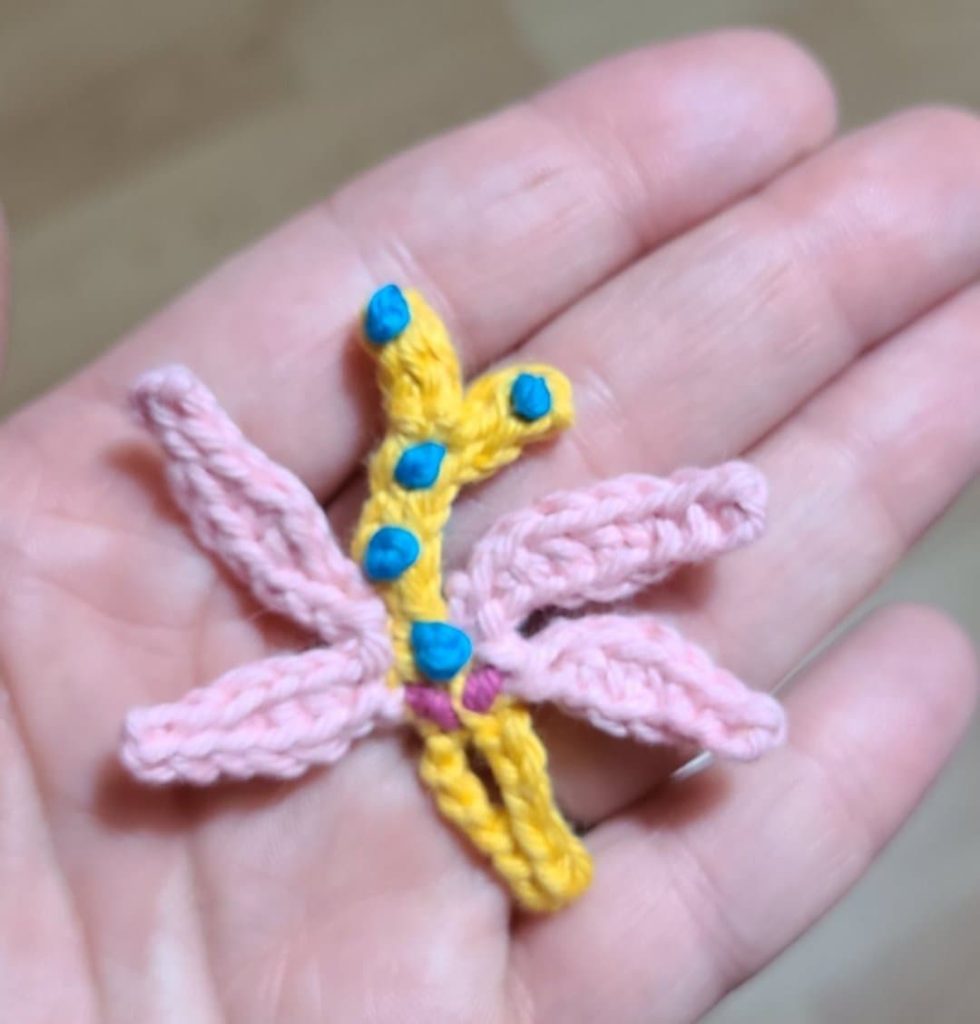
You can do the dots with a few straight stitches or french knots. If you want to try the french knots (what I used) I used this video here to learn: https://www.youtube.com/watch?v=Z5BHO_Cnvzs
With bright pink yarn and tapestry needle sew eyes on the body at the looped end. With light turquoise yarn sew 3 stitches dots the length of the golden body. Sew one turquoise dot on each tail tip. Weave in all ends. You can either glue this to a barrette or bobby pin it in place in your hair.
I hope you enjoy! I would LOVE to see your creations. I am CROCHETVERSE on allll the social medias. Tag me!
MUCH LOVE AND YARN,
Stephanie Pokorny, Crochetverse
Follow me on any of my social media to stay in touch, I would love to have you! Much love and yarn, Stephanie Pokorny (Crochetverse)
The information and photos in this posting are the sole copyrighted property of Crochetverse©2020. Please do not copy and paste any of the information contained within either electronically, verbally, or written in part or in whole. Instead, please share the DIRECT LINK to this posting only, and if you do, I thank you for sharing. You of course may sell anything you make from this pattern that you have made with your own two hands, no contract labor or mass productions are permitted. I need your visits to keep me around creating! Please never screenshot or copy and paste the info within, instead share the link so I may entertain your friends as well! If you credit Crochetverse as the designer that is greatly appreciated!
