


HELLO! Welcome back! Up this week is the start of those beautiful romantic Irish Crochet Motifs!
First, Let’s recap:
If you missed the Info/Supply/Gauge post, you can find that here: https://crochetverse.com/lattice-rose-info-supply/
If you missed Week 1 & 2: Main Shawl – Start & Middle, you can find that here: https://crochetverse.com/lattice-rose-week-1-2/
If you missed Week 3: Main Shawl – Finish, you can find that here: https://crochetverse.com/lattice-rose-week-3/
If you missed Week 4: Edge & Block, you can find that here: https://crochetverse.com/lattice-rose-cal-week-4/
And, here again, is your amazing available translations:
LATTICE ROSE WEEK 5: AFRIKAANS
All right my friends, I’m sure you’ve been sitting there just staring at your amazingly blocked piece of lattice work shawl. It is BEYOND beautiful….
NOW…. What to do…. what to do…. what to do??? Well, let me tell you!
Let’s take it from simple to “I CAN’T BELIEVE YOU MADE THAT!”
We will do that through some beautiful “Irish Crochet Inspired” motifs. This week, we will start them, next week we will finish them, the week after that…. assembly! We are half way there already!
FIRST UP: Look at the finished shawl and use it as a tool to decide which color to choose!

Do you want COORDINATING FLOWERS? You will work the leaves and flowers in the SAME colors as the bottom edge of the shawl. In my case ivory bottom, ivory flowers. You may get a bit of color into them as well based on how many balls are in your gradient! Just use this as a GUIDE only J
Do you want CONTRASTING FLOWERS? You will work the leaves and flowers in a DIFFERENT color than the bottom edge of the shawl. Part of the fun is the decisions like these to make it your OWN!
Our first motif will be the “Open Work Leaf”
Use the gradient ball that is the SAME color as Row 1 of your main shawl body, if you want coordinating leaves. Choose whatever you like, if you prefer different.
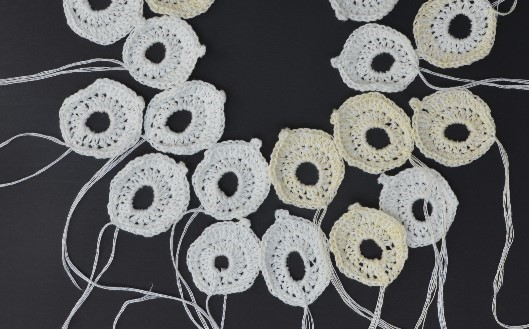
We will create 6 flowers and 18 leaves. Just work in the proper order of your gradient beginning with the color that is on Row 1 of your shawl. I worked through the 1st 3 small gradient balls that came off my cake.
OPEN WORK LEAF: (Make 18) DO NOT turn rounds.
Finished dimensions of each leaf: about 2.5” tall (including the picot) X 2” wide
Ch 10, sl st to 1st made to form ring.
Rnd 1: ch 2 (counts as 1st dc), dc 20 times in the ring (not in the chains), sl st to top of beg ch-2. (21)
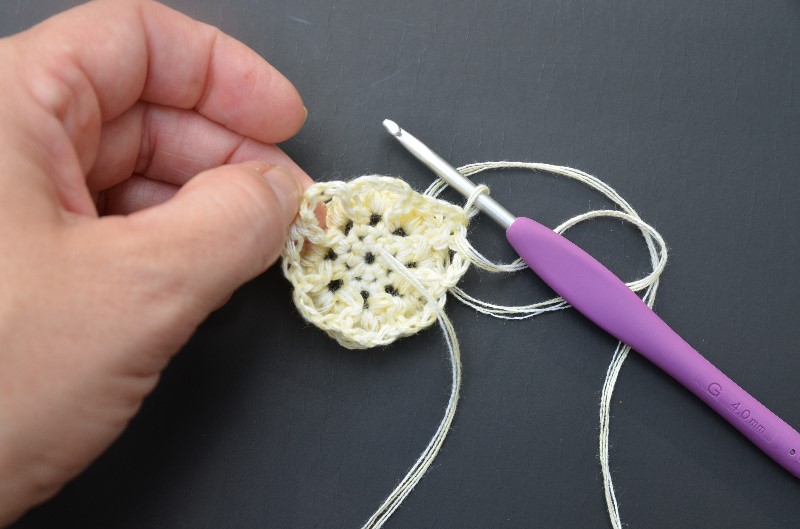
Rnd 2: ch 1, sc in same st, 2 sc in each of nxt 2 sts, 2 hdc in each of nxt 3 sts, 2 dc in each of nxt 4 sts, tc in nxt st, ch 3, sl st into the 2 front bars of the tc at the base of the chain just made (picot made), 2 dc in each of nxt 4 sts, 2 hdc in each of nxt 3 sts, 2 sc in each of nxt 2 sts, sc in last st, sl st to 1st sc made, tie off, leave about an 8-10” tail for assisting in assembly later on.
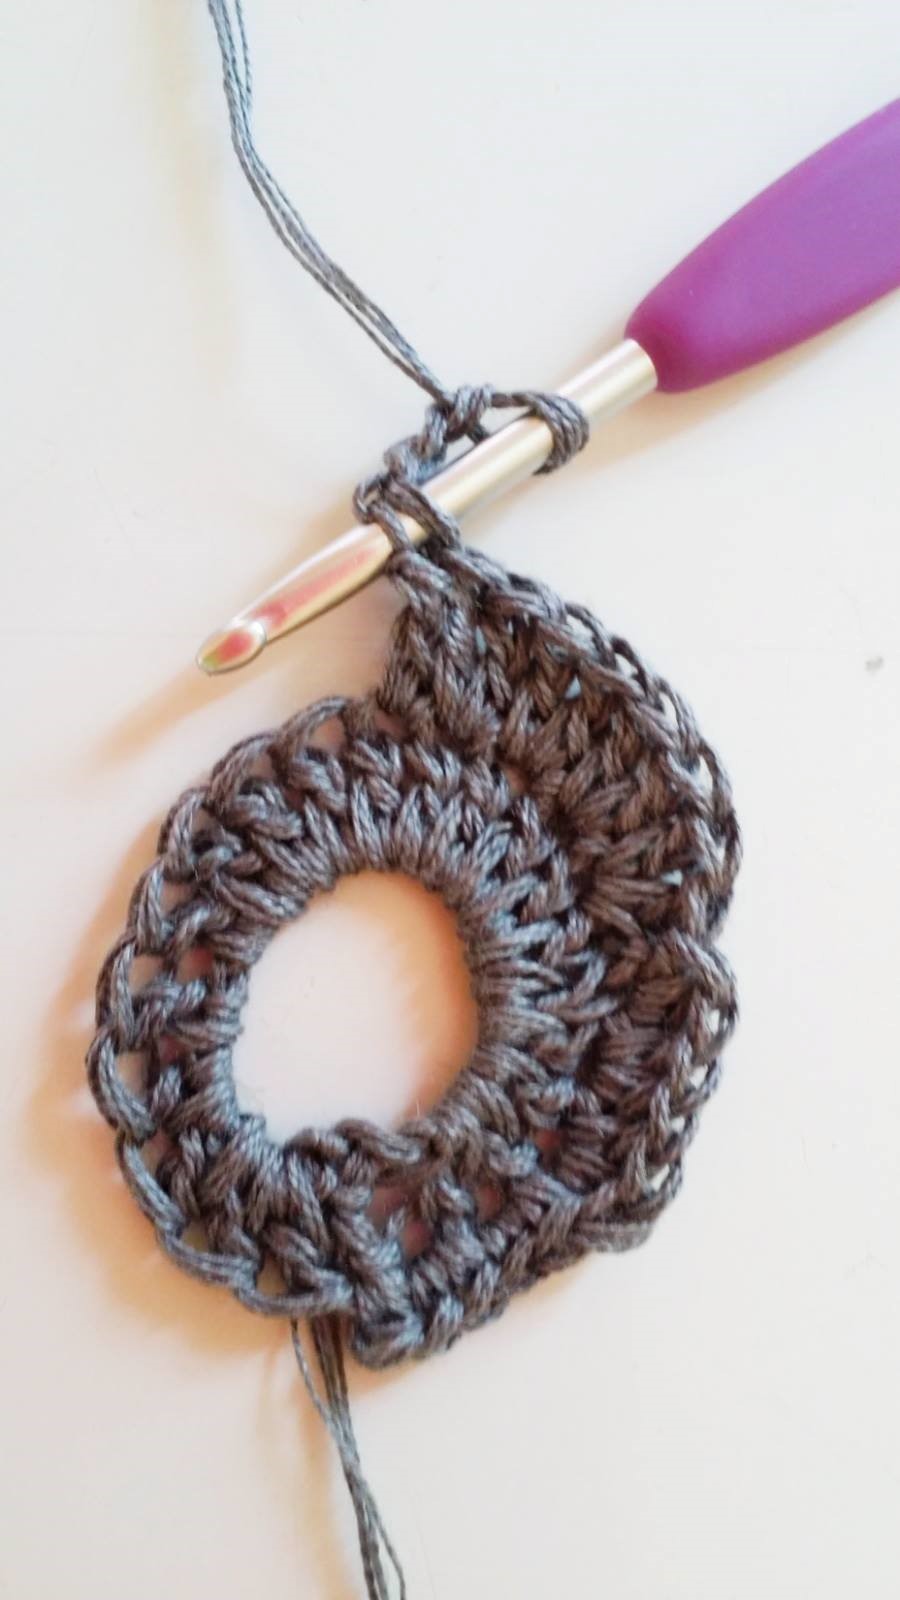
This image shows the spot to insert your hook when closing the picot, under the two front bars of the TC at the base of the ch-3:
Now, we will move onto those gorgeous lush multi-layer flowers. Again, just continuing on with your gradient in its proper order as it came off your ball, for me, balls 1-3.
MULTI LAYER FLOWER (Make 6):
Make magic circle:
Rnd 1: ch 1, 8 sc in ring, sl st to 1st sc to close.
Rnd 2: ch 1 (does not count as st) hdc in same st, ch 1, *hdc in nxt st, ch 1, repeat from *, 6 times more, sl st to top of 1st hdc made. (8 hdc, 8 ch-1 sps)
Rnd 3: sl st to 1st ch-1 sp, 3 hdc in same sp, sl st in next hdc, *3 hdc in nxt ch-1 sp, sl st in nxt hdc, repeat from *. 6 times more, sl st to the 1st sl st made. (24 sts not including the slip stitches, 8 petals)
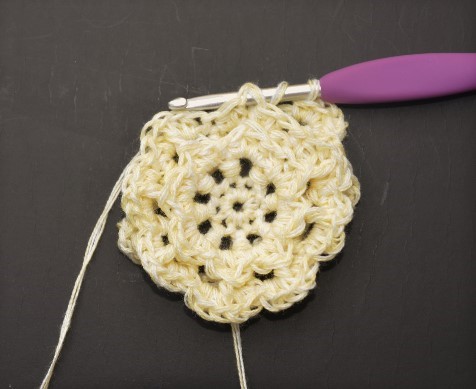
Rnd 4: ch 1 (does not count as st) bpdc around hdc directly below from round 2 from BEHIND the petals of round 3, ch 3, *bpdc around next hdc from round 2 from behind, ch 3, repeat from * 6 times more, sl st to top of 1st bpdc made. (8 bpdc, 8 ch-3 sps)
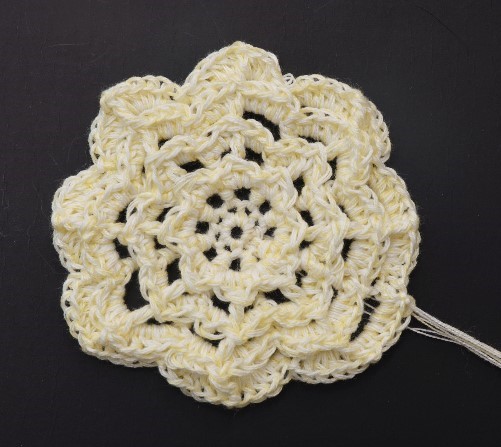
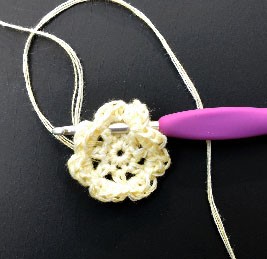
This image below shows how you are working around the hdc from the round below. The hook is inserted from back to front around the hdc (the hdc I am working in this image is BEHIND the crochet hook). The second image shows round 3 complete. Notice how it is worked behind the previous round, creating a framework for the next layer of petals.
Rnd 5: sl st to the 1st ch-3 space, (2 hdc in the same ch-3 space, bpdc (back post double crochet) around the THIRD hdc of the petal on the previous layer petal right on top of the current petal, 2 hdc in the same ch-3 space on round 5 again), sl st in nxt bpdc, *2 hdc in nxt ch-3 sp, bpdc around the 3rd hdc of the petal above as before, 2 hdc back in the same ch-3 sp, sl st in nxt bpdc, repeat from *, 6 times more, sl st to the 1st sl st made. (40 sts not including the slip stitches, 8 petals)
Rnd 6: ch 1, (does not count as st), bpdc around bpdc directly below from round 4 working behind petals, ch 4, *bpdc around nxt bpdc from round 4, ch 4, repeat from *, 6 times more, sl st to top of beg bpdc. (8 bpdc, 8 ch-4 sps)
TIP: When you are working the bpdc, the chain can tend to roll. I use my fingers and “pin” the chain to the rear of the work to anchor it to make the bpdc easier to complete
Rnd 7: sl st to the 1st ch-4 space, 4 hdc in same sp, bpdc under the TOP BARS ONLY of the 3rd st of the petal above (the bpdc of that petal as well), 4 hdc back in the same ch-4 space, sl st in next bpdc, *4 hdc in nxt ch-4 sp, bpdc under the TOP BARS ONLY in the 3rd st (the bpdc) of the petal above as before, 4 hdc in the same ch-4 space again, sl st in nxt bphdc, repeat from *, 6 times more, sl st to 1st sl st made. (72 sts not including the slip stitches, 8 petals)
This image shows how you are working under the TOP BARS only. This means you insert your hook from the back under the top bars just above the stitch you are working (the location you would normally insert your hook to work a stitch), then stick the hook from front to back under the top w bars just after the stitch to complete it. It is the same as a back post stitch except you are working “shallow” by inserting under the bars as opposed to working around the post of the stitch.
Rnd 8: ch 1, does not count as st, bpdc around bpdc directly below from ROUND 6 working behind petals, ch 5, *bpdc around nxt bpdc from ROUND 6, ch 5, repeat from *, 6 times more, sl st to top pf 1st bpdc made. (8 bpdc, 8 ch-5 sps)
Rnd 9: sl st to 1st ch-5 sp, 5 hdc in same sp, bpdc under the TOP BARS ONLY of the bpdc in the petal above (the 5th st of the petal), 5 hdc back in the same ch-5 space , sl st in next bpdc, *5 hdc in nxt ch-5 sp, bpdc under the TOP BARS ONLY of the bphdc (the 5th stitch) of the petal above as before, 5 hdc in the same ch-5 space, sl st in nxt bpdc, repeat from *, 6 times more sl st to 1st sl st made, tie off leaving a 24” tail for seaming later. (88 sts not including the slip stitches, 8 petals)
HOOKS DOWN EVERYONE! That is it for this week. Next week, we will create our second round of motifs, using the cute little balls of pretty gradient that remain in:
Week 6: Irish Crochet Motifs – Part 2
Until next time……
Much Love & Yarn,
Stephanie
The information and photos in this posting are the sole copyrighted property of Crochetverse©2016. Please do not copy and paste any of the information contained within either electronically, verbally, or written in part or in whole. Instead, please share the DIRECT LINK to this posting only, and if you do, I thank you for sharing. You of course may sell anything you make from this pattern that you have made with your own two hands, no contract labor or mass productions are permitted. If you credit Crochetverse as the designer that is greatly appreciated!
