


Hello! Welcome to our “HOME STRETCH!!” ……
Week 6: IRISH CROCHET MOTIFS – Part 2
If you missed the Info/Supply/Gauge post, you can find that here: https://crochetverse.com/lattice-rose-info-supply/
If you missed Week 1 & 2: Main Shawl – Start & Middle, you can find that here: https://crochetverse.com/lattice-rose-week-1-2/
If you missed Week 3: Main Shawl – Finish, you can find that here: https://crochetverse.com/lattice-rose-week-3/
If you missed Week 4: Edge & Block, you can find that here: https://crochetverse.com/lattice-rose-cal-week-4/
If you missed Week 5: Irish Crochet Motifs/Part 1, you can find that here: https://crochetverse.com/lattice-rose-cal-week-5/
Here are your translations! (Thank you Translation Team!)
LATTICE ROSE WEEK 6: AFRIKAANS
Moving right along, let’s begin!
Next up we will use a little Irish Crochet “flair” and techniques to assemble some larger motifs using what we have created so far. I just continued on with the gradient ball after I finished the flowers.
Gather your SIX flowers and 18 leaves and your yarn.
Don’t weave in your tails on them yet, they will be used strategically to further attach and secure these to the main shawl body.
For each assembly, we will need (3) of the leaves and (1) of the flowers.
Begin with your yarn ball, and make a magic ring:
Rnd 1: ch 1, 8 sc in the ring, sl st to the 1st sc made, pull gently on the tail to close the ring. (8)
Rnd 2: Broken into steps so it is easier to follow:
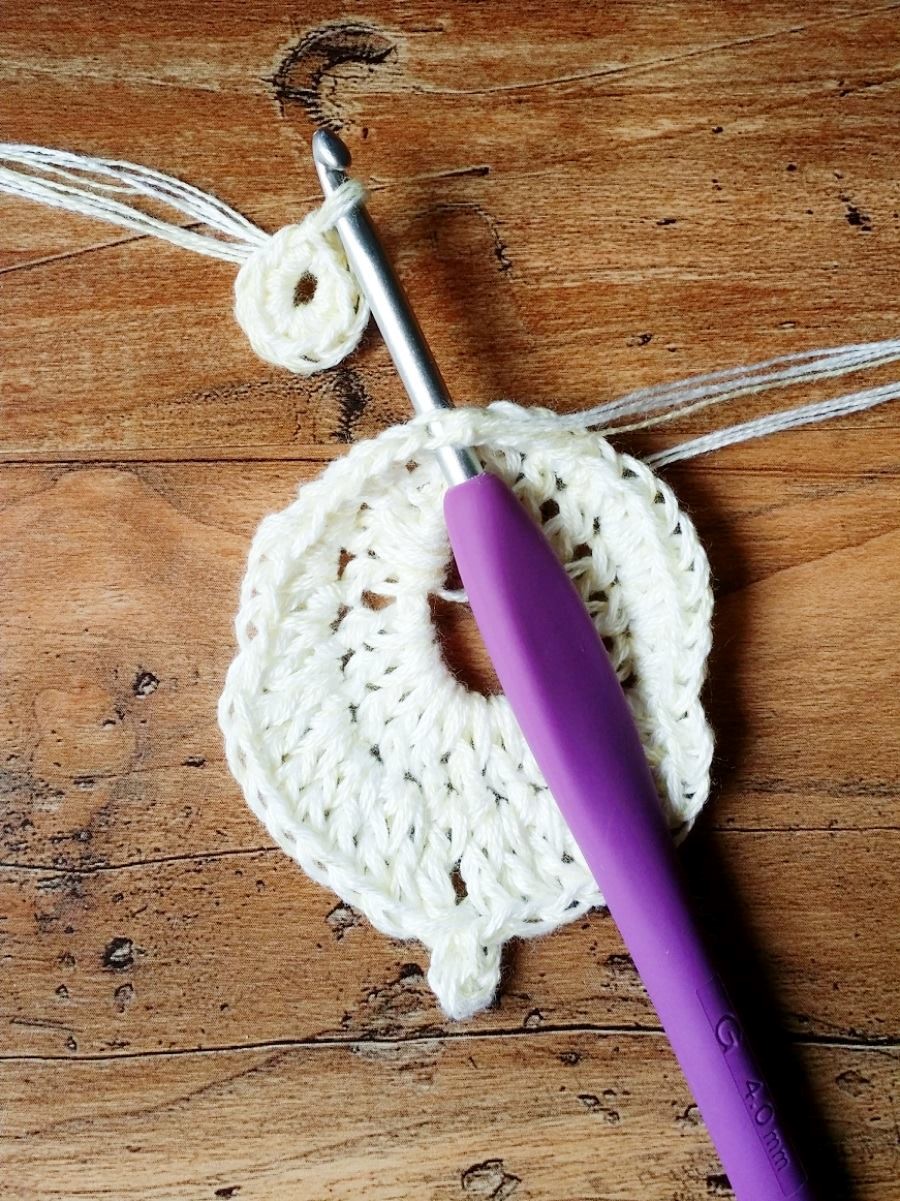
Ch 1, drop from hook, insert hook front to back between bottom (2) single crochets of one leaf (into the space between them), reinsert hook in loop and pull through the space in the leaf, ch 1, sc in same st on round one of the circle, sc in nxt st of the circle
The image below shows how to insert into the leaf and then back into the circle:
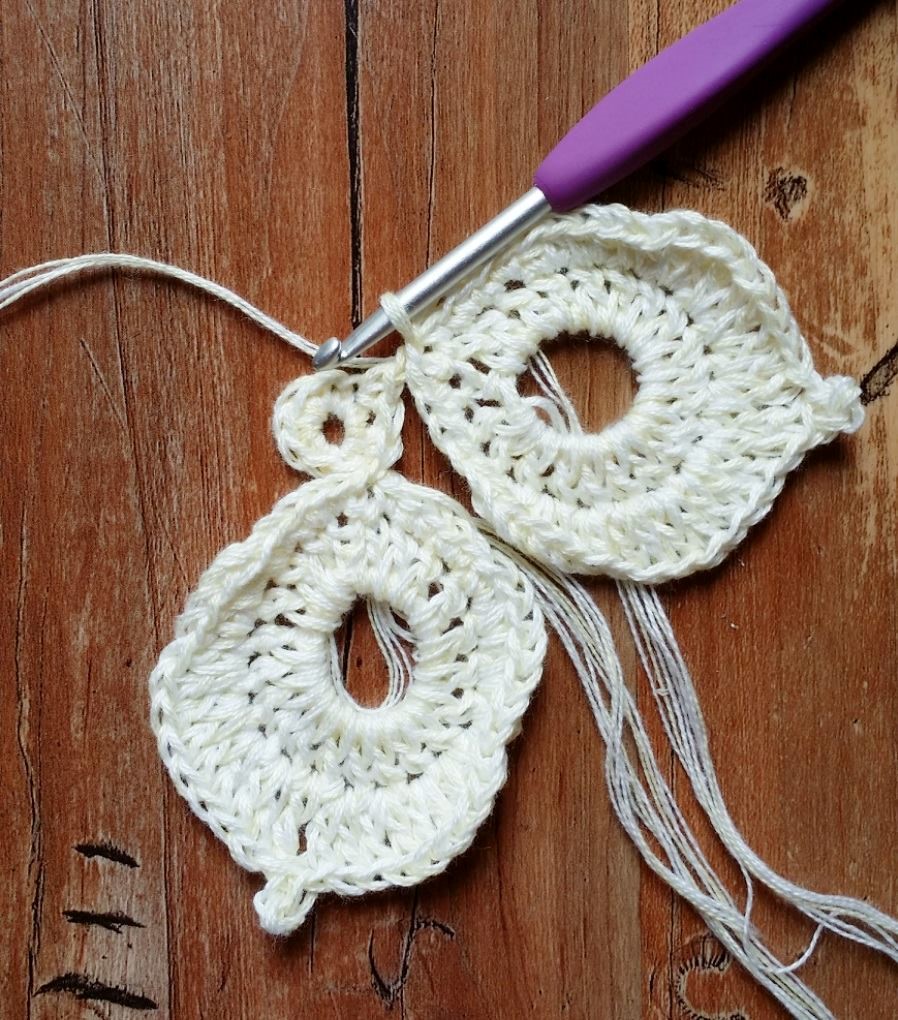
NOW: *sc in nxt st, ch 1, drop loop from hook, insert front to back between bottom 2 sc of the 2nd leaf, pick up loop and pull through, ch 1, sc in same sc on the circle, sc nxt sc
The image below shows just after pulling the dropped loop through the 2nd leaf:
Repeat from * above, one time more to attach the 3rd leaf, sc in nxt st on the circle, ch 1, drop loop, insert in the 6th st of any outer petal of the flower (this is the bpdc), reinsert into loop and pull through, ch 1, sc in same st at base and next st on ring, sl st to 1st sc made, tie off.
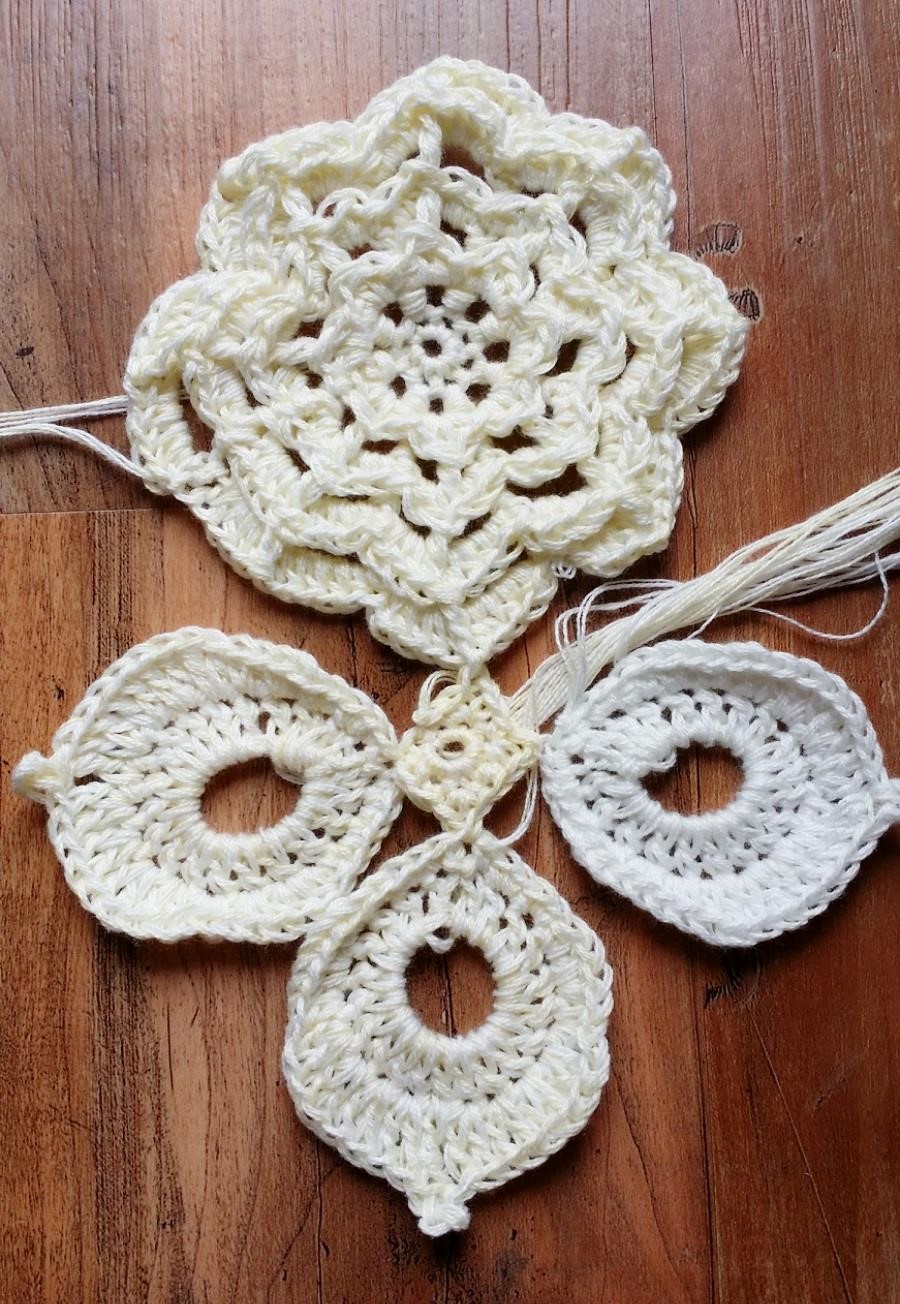
Repeat for the remaining leaves and flowers until you have (6) assemblies total.
This photo shows one assembly complete. Again, don’t weave in the tails just yet.
The rest of this week’s tasks will involve the needle, so put that hook away in a safe place! (Not the couch crevice or behind the microwave or in your purse somewhere, like I usually do!)
Begin by gathering your (6) flower/leaf assemblies and your main shawl body.
We have to weave in our tails no matter what, so WHY not use them to our advantage! We will use the tails strategically as we weave them to attach and secure those six motifs.
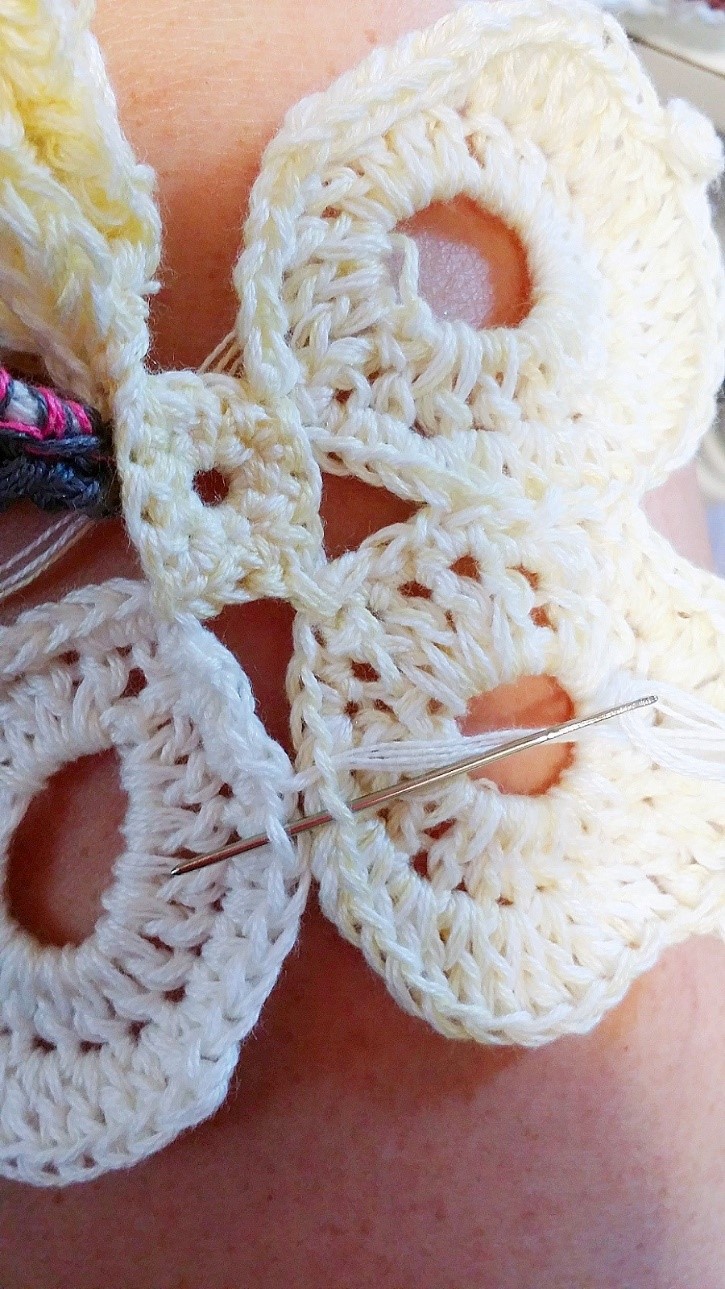
Referring to the image below, use the tails nearest the point you are asked to seam the stitches together. You will work by first weaving through the work to get the tail to the proper position, then when you are seaming the few stitches, insert your needle UNDER the BARS of the stitch closest to the front of the work as you weave side to side to secure them together.
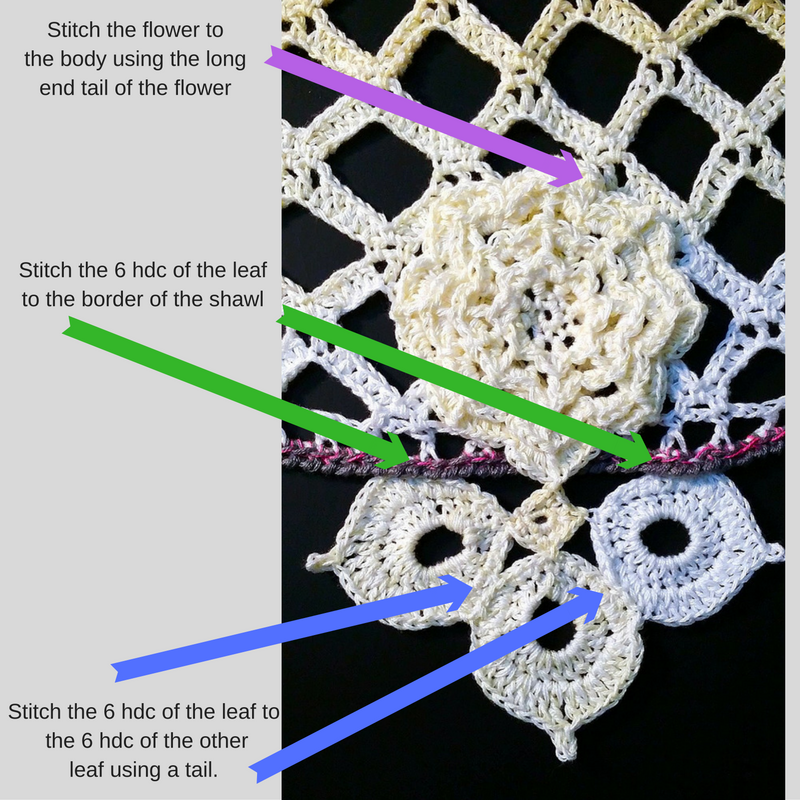
Here are the positions and stitch numbers to seam and secure each motif. Below that, the image shows how to work into the bars at the front of the work only.
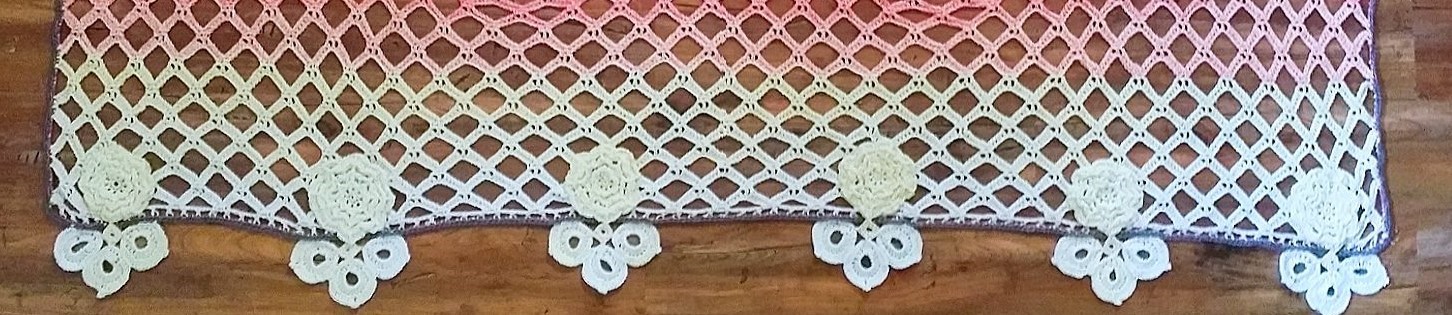
There are 6 in total. You will want to space them even across the bottom edge of the shawl (see image further down), spread the shawl body out and pin the flowers in place, then work on each one to finalize securing it.
- Stitch the flower to the body using the long end tail of the flower as shown by the PURPLE arrow.
- Stitch the 6hdc of the leaf to the border of the shawl as shown by the GREEN arrows.
- Stitch the 6 hdc of the leaf to the 6hdc of the other leaf again using the tails, as shown by the BLUE arrows.
*TIPS:
- Be careful to NOT pucker your work as you weave. As you work the tail across the piece to get to the right position needed to stitch the assemblies in place, gently flatten the piece to be sure you are not “binding” it as you work.
- Weave the tails INTO the stitches, separating the parts of the stich, work up and down, back and forth, and side to side randomly. This will help ensure the tail stays in place as best possible.
- Right before you do the final trim of the tail, gently tug it to purposefully pucker the piece just a tad. Then while holding tugged, trim the tail. Release the piece and flatten it back out. You will see that the little tail tip gets “sucked” into the stitch and is hidden very well!
Repeat stitching each assembly in place on the shawl body as described above and indicated on the above image in the position indicated across the bottom edge of the main shawl body.
- As you seam, look at your piece from the FRONT and BACK, your back should be as neat as your front. Careful finishing is what takes a project from good to GREAT. So take your time here, you got this!
- Do not accidentally twist your leaves when seaming. Be sure all of the are facing right side to the front.
It is just so pretty! Epitome of femininity!
That wraps up this week also! We are so close now, just a few more things to do and we can call it a “WRAP” …. LITERALLY! (bad pun fully intended!)
Join me next week for our FINAL week! Week 7: Additional Options, Closure, & Block
Until next time……
Much Love & Yarn,
Stephanie
The information and photos in this posting are the sole copyrighted property of Crochetverse©2016. Please do not copy and paste any of the information contained within either electronically, verbally, or written in part or in whole. Instead, please share the DIRECT LINK to this posting only, and if you do, I thank you for sharing. You of course may sell anything you make from this pattern that you have made with your own two hands, no contract labor or mass productions are permitted. If you credit Crochetverse as the designer that is greatly appreciated!
