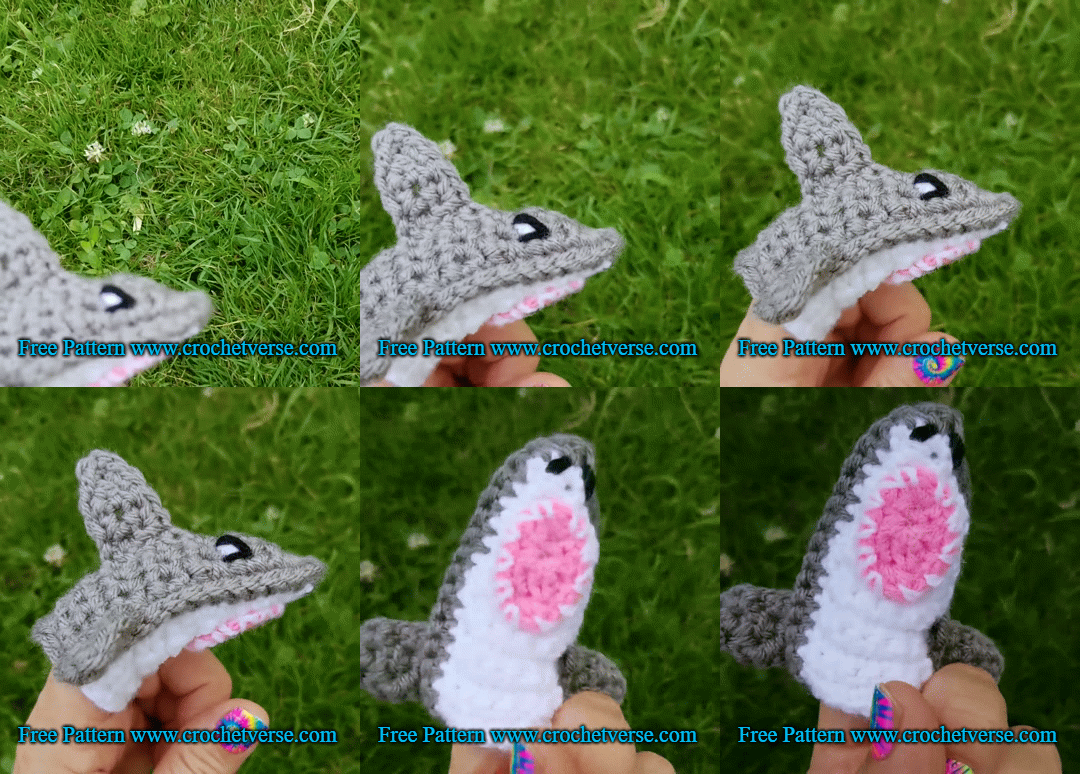
If your family is obsessed with Shark Week (It begins July 22nd this year!) Or have littles where you hear “Baby Shark, doo doo doo doo doo” at least…I don’t know…. 6000 times per day? Then, you gotta whip up this cute little finger puppet! Super fast, make a whole family!
I ask that always share the link to the freebies I offer. I ask that you never copy and paste the content and post elsewhere, alter it a little or a lot and claim as own either free or paid. BUT, please sell the finished puppet to your heart’s content! Thank you so much, this allows me to keep offering cool free patterns to you <3
Materials:
– small amounts of white, gray, pink, and black worsted weight yarn
– size F (3.75mm) crochet hook (I crochet TIGHTLY, you want little to no holes in your shark, go down a hook size or two if needed to achieve this)
– tapestry needle, scissors
Finished Size:
About 3 ¼” tall
Intructions: (US Terms)
White Body Half:
With white, chain 7:
Row 1: sc in 2nd ch from hook and each remaining ch across. (6)
Row 2-7: ch 1, turn, sc in each sc across. (6)
Row 8: ch 1, turn, sc dec over 1st 2 sts, sc in nxt 2 sts, sc dec over last 2 sts. (4)
Row 9-10: ch 1, turn, sc in each st across. (4)
Row 11: ch 1, turn, sc dec over 1st 2 sc, sc dec over last 2 sc. (2)
Row 12: ch 1, turn, sc dec over 2 sts. (1)
Edge: ch 1, do not turn, sc in the end of each row down the side (catch only a strand or two of the st from the side to avoid large gaps in the work), work 3 sc in the 1st st on the bottom, sc in nxt 4 sts, 3 sc in last st on the bottom, sc in the end of each row up the second side, 3 sc in the st at the tip, sl st to 1st sc made, cut yarn.
Gray Body Half:
With gray, repeat as for white body half.
Crochet Body Halves together:
Stack the gray half on top of the white half, matching them row for row.
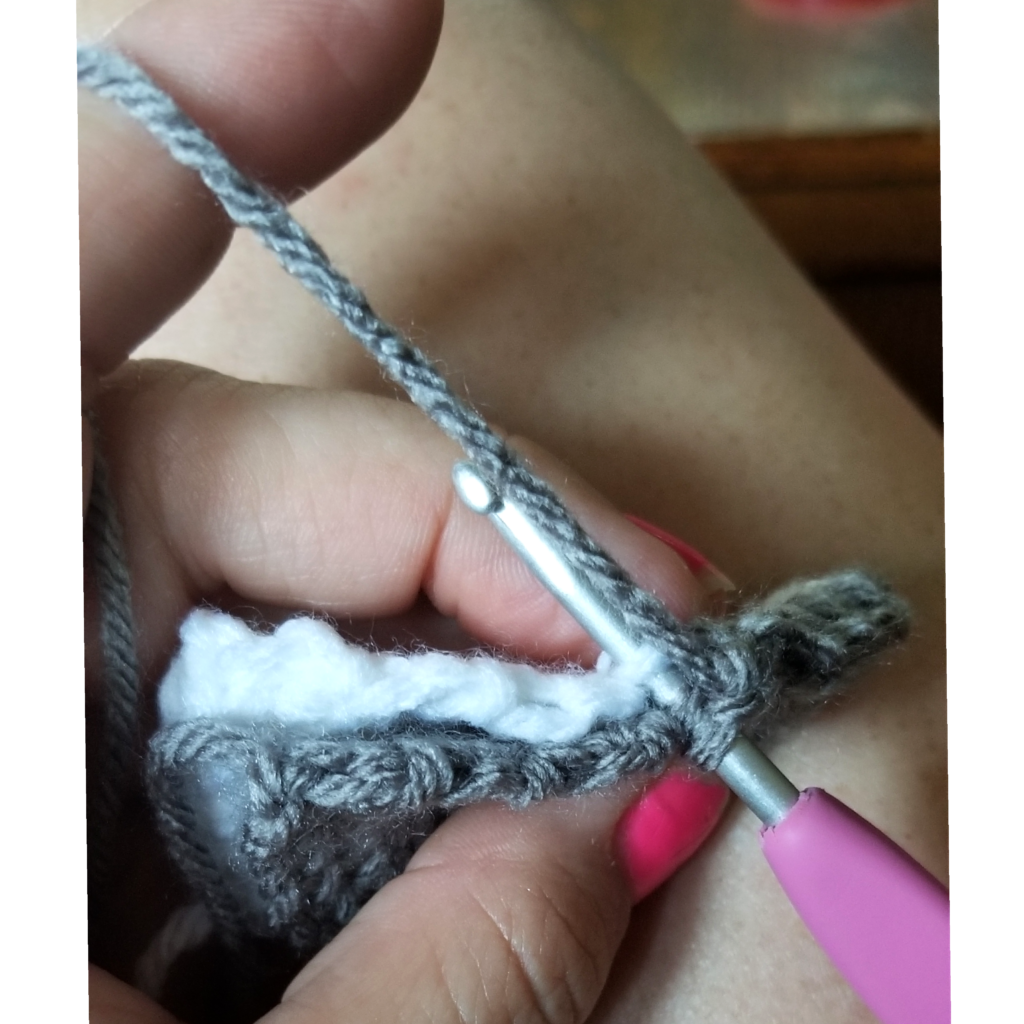
Work through BOTH layers of the halves in the edge rounds of each. Join the gray yarn with a sl st in the 1 sc tip of them, ch 1:
Rnd 1: remembering to work through both layers at once to join, sc in each sc around down the 1st side, NOW ONLY WORK ACROSS THE GRAY LAYER so it remains open to insert the finger, make 2 sc in the 1st st of the gray only, sc in each st across until you have 1 st remaining, make 2 sc in last st, NOW AGAIN WORKING THROUGH BOTH LAYERS, sc in each sc up the second side, make 3 sc in the 1sc tip, sl st to 1st sc made, cut yarn.
Top Fin:
With gray, ch 3:
Row 1: sc in 2nd ch from hook and last chs. (2)
Row 2: ch 1, turn, sc in each sc. (2)
Row 3: ch 1, turn, sc dec over the 2 sts. (1)
Egde: ch 1, do not turn, sc in end of each of the 2 rows down the side, 3 sc in 1st st along bottom of row 1, 2 sc in last st on bottom of row 1, sc in end of each of the 2 rows up the second side, (sc, ch 1, sc) in the sc at the tip, sl st to 1st sc made and cut yarn leaving tail to seam to body.
Weave in ends to this point. Using tail from fin, sew it to the middle of the gray half of the body, so the pointed tip is pointing up.
Side Fins (Make 2):
With gray, ch 3:
Row 1: sc in 2nd ch from hook and nxt ch. (2)
Row 2: ch 1, turn, sc in each sc. (2)
Row 3: sc dec over the 2 sc. (1)
Edge: ch 1, do not turn, sc in end of each of the 3 rows, 3 sc in each of the 2 sts along the bottom of row 1, sc in end of each of the 3 rows up the opposite side, (sc, ch 1, sc) in the single sc of row 3, sl st to 1st sc made, cut yarn leaving tail to sew to body.
Using the end tail, sew one fin to either side of the body just inside the gray round the body halves were joined with near the open end of the shark.
Mouth:
With pink, ch 2:
Row 1: sc in 2nd ch from hook. (1)
Row 2: ch 1, turn, 3 sc in the same sc. (3)
Row 3: ch 1, turn, sc dec over all 3 sc (same as normal sc dec but pull up loop from all 3 sc before final yarn over/pull through). (1)
Edge: ch 1, sc in side of each of the 3 rows, 3 sc in the bottom of the single sc of row 1, sc in each of the 3 row ends up the second side, 3 sc in the single sc of row 3, sl st to 1st sc made, cut yarn.
Take a 24” length of white yarn and split the yarn so you are only working with two of the 4 plies, whip stitch around the entire perimeter of the mouth to mimic teeth. Knot the white beginning and end tails on the reverse of the pink mouth and trim short.
Using the end tail of the pink mouth, stitch it to the white body half a little above the vertical midway point (closer to the nose tip).
Eyes:
With a strand of black yarn and a tapestry needle, sew a “V” shape onto the gray body half near the nose tip and positioned on either side. (see photo for placement)
With a white strand, make two stitches inside the “v” shape to fill it in.
Nostrils:
With a strand of black yarn and tapestry needle, stitch a two nostrils at the tip of the body on the white half.
Weave in all ends. Repeat as many times as desired lol!
Please hop over to my Facebook page at http://www.facebook.com/crochetverse
and share your tops! You can also join my group for VIP discounts and sharing! That can be found at https://www.facebook.com/groups/251695645349035/
Follow me on any of my social media to stay in touch, I would love to have you! Much love and yarn, Stephanie Pokorny (Crochetverse)
The information and photos in this posting are the sole copyrighted property of Crochetverse©2018. Please do not copy and paste any of the information contained within either electronically, verbally, or written in part or in whole. Instead, please share the DIRECT LINK to this posting only, and if you do, I thank you for sharing. You of course may sell anything you make from this pattern that you have made with your own two hands, no contract labor or mass productions are permitted. I need your visits to keep me around creating! Please never screenshot or copy and paste the info within, instead share the link so I may entertain your friends as well! If you credit Crochetverse as the designer that is greatly appreciated!


Thank you for sharing this pattern. My great grand loves the shark song.
You are so welcome, thank you for visiting me here!
Comments are closed.