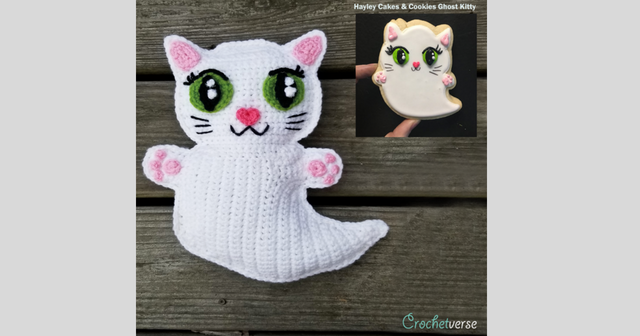
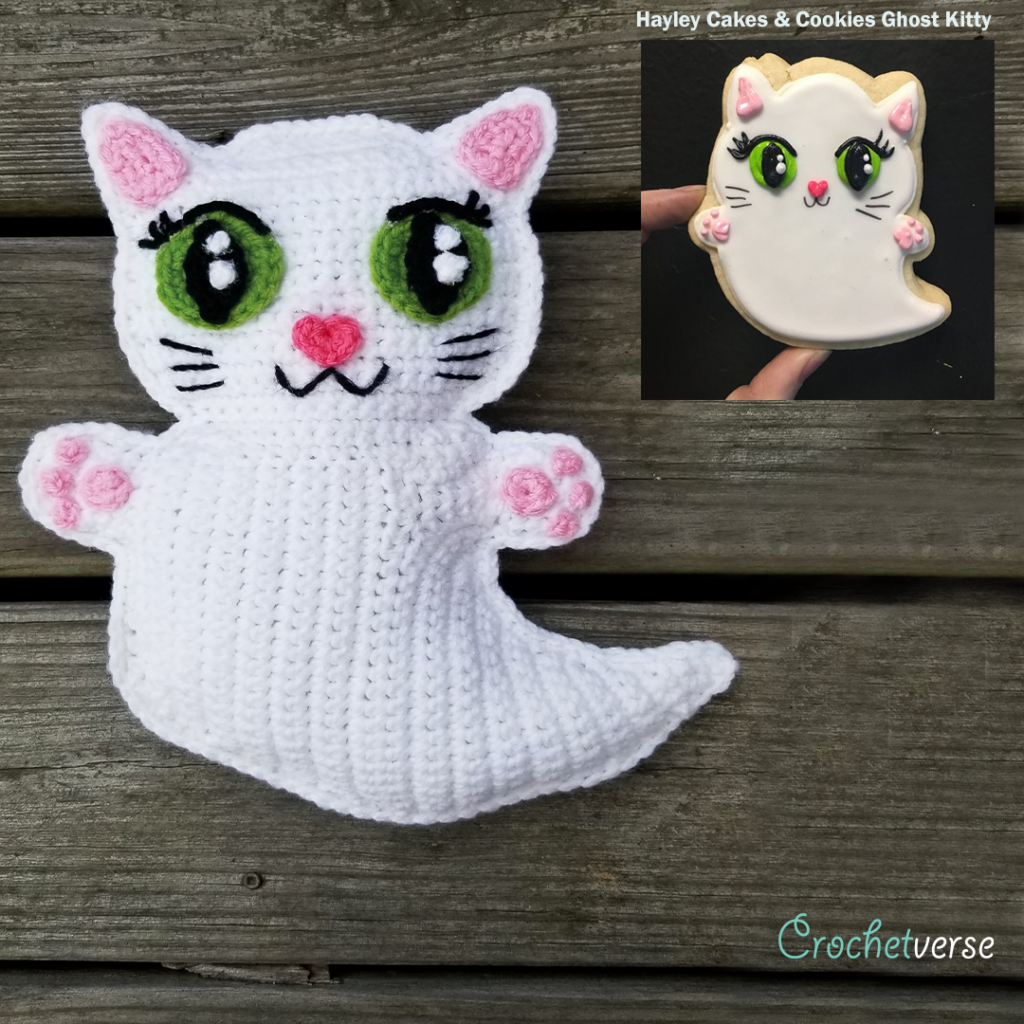
FREE Ghost Kitty Ragdoll Pattern!
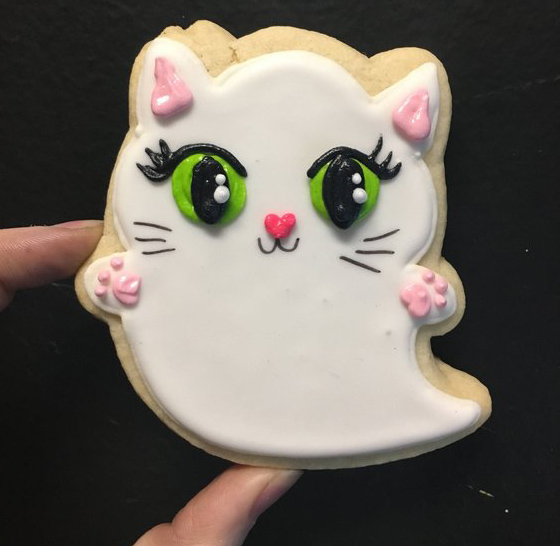
If you are into following bakers and cake makers online, there is a good chance you know Hayley Cakes & Cookies, an amazingly talented maker based in Austin.
I follow them and came across their amazing GHOST KITTY COOKIE! I mean come on, how cute is this?! You can find all their amazingness here on Etsy: https://www.etsy.com/shop/TheHayleyCakes?ref=l2-shopheader-name
I REALLY loved it, and when I really love something, I want to crochet it!! So, I emailed them on Etsy and asked for permission to create their design in crochet as it is very important to me to take care to do that! I didn’t think they would have the time to even reply honestly. Imagine my happy level, when the reply came through, “Crochet away!” And… so I did. I am so so pleased with how it turned out and hope you enjoy!
A few things… I ask that you only share the link to this pattern page when sharing. Please do not ever copy and paste the info and share anywhere. Please do not alter the pattern a little or a lot and claim as your own for paid or for free. These few things allow me to keep creating for you!
Let’s begin:
Materials:
- small amounts of worsted weight yarn in light and dark pink, lime green, and black
- about 150 yards white worsted weight yarn
- size G crochet hook or size needed to obtain gauge as show after row 14 in pattern
- tapestry needle, scissors, tape measure
- small amount of stuffing
- glue gun and glue sticks if you choose the glue assembly method
Finished Size:
About 11″ tall x 8″ wide
Instructions:
Body Panels (Make 2):
Main Body:
All parts of the body panel use white yarn and G hook.
With G Hook and white, ch 2:
Row 1: sc in 2nd ch from hook. (1)
Row 2: ch 1, turn, 3 sc in the sc. (3)
Row 3: ch 1, turn, sc in each sc across. (3)
Row 4: ch 1, turn, sc in 1st sc, 2 sc in nxt sc, sc in last sc. (4)
Row 5: ch 1, turn, 2 sc in 1st sc, sc in nxt 2 sc, 2 sc in last sc. (6)
Row 6: ch 1, turn, sc in each sc across. (6)
Row 7: ch 1, turn, 2 sc in 1st sc, sc in nxt 4 sc, 2 sc in last sc. (8)
Row 8: ch 1, turn, 3 sc in 1st sc, sc in nxt 5 sc, sc dec over last 2 sc. (9)
Row 9-10: ch 1, turn, sc in each sc across. (9)
Row 11: ch 1, turn, 2 sc in 1st st, sc in nxt 7 sts, 3 sc in last st. (12)
Row 12: ch 1, turn, sc in each st across. (12)
Row 13: ch 1, turn, sc in 1st 11 sts, 3 sc in last st. (14)
Row 14: ch 1, turn, sc in each st across. (14)
Pause and make sure you are on track with gauge:
After Row 14 is completed, your piece should measure 3” across at Row 14 end and 3 ¼” tall.
If you are larger, drop a hook size and try again.
If you are smaller, drop a hook size and try again.
Row 15: ch 1, turn, 2 sc in 1st st, sc in 1st 12 sts, 3 sc in last st. (17)
Row 16: ch 1, turn, 5 sc in 1st sc, sc in each of last 16 sts. (21)
Row 17: ch 1, turn, sc in each st across. (21)
Row 18: ch 1, turn, 2 sc in each of 1st 2 sts, sc in nxt 19 sts. (23)
Row 19: ch 1, turn, sc in 1st 18 sts, hdc in nxt st, dc in nxt 2 sts, 2 dc in nxt st, dc in last st. (24)
Row 20 (partial row): ch 1, turn, 2 hdc in 1st st, hdc in nxt 4 sts. (6)
Row 21: ch 1, turn, hdc in 1st 3 sts, sc in last 3 sts, cut yarn. (6)
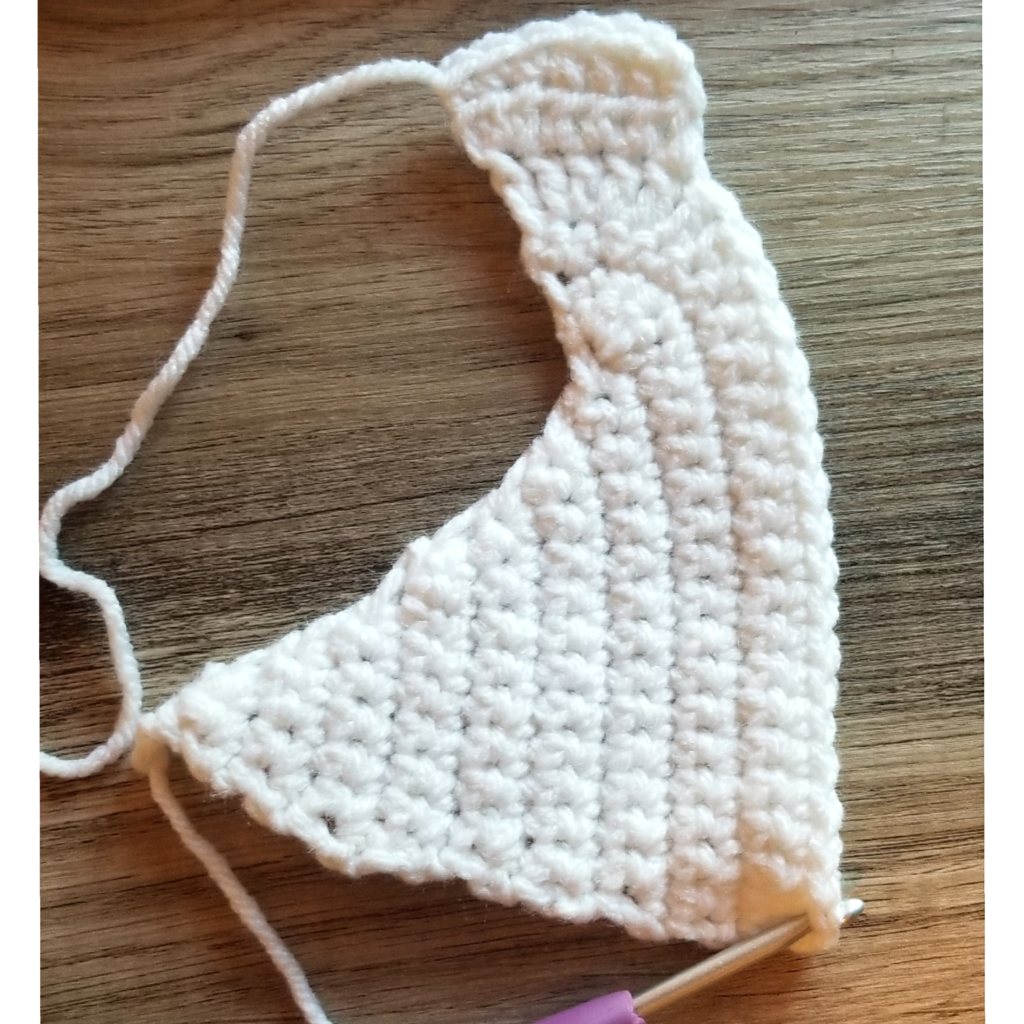
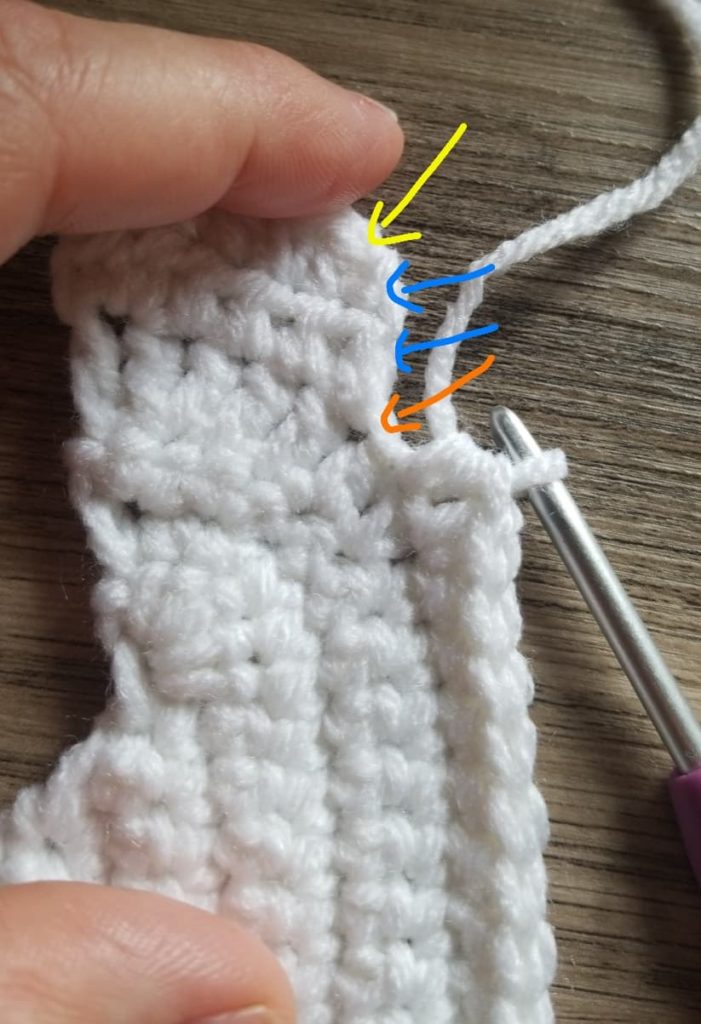
Position as show in image and join white yarn with a sl st in the bottom right most st as shown with the crochet hook.
Row 22: (The image below shows placement for the last stitches of the row) ch 1, sc in same st and nxt 17 sts, hdc in nxt st, hdc in nxt st (ORANGE arrow; this st already has a st in it, but work into it again), hdc in the st at the end of the nxt 2 rows (BLUE arrows; working into the side of the st), hdc in nxt st (YELLOW arrow). (23)
Row 23: ch 1, turn, sc in 1st 21 sts, sc dec over last 2 sts. (22)
Row 24: ch 1, turn, sc in each sc across. (22)
Row 25: ch 1, turn, sc in 1st 20 sts, sc dec over last 2 sts. (21)
Row 26: ch 1, turn, sc in each st across. (21)
Row 27: ch 1, turn, sc in 1st 19 sts, sc dec over last 2 sts. (20)
Row 28: ch 1, turn, sc in each st across. (20)
Row 29: ch 1, turn, sc in 1st 18 sts, sc dec over last 2 sts. (19)
Row 30: ch 1, turn, sc in each st across. (19)
Row 31: ch 1, turn, sc in 1st 17 sts, sc dec over last 2 sts. (18)
Row 32-33: ch 1, turn, sc in each st across. (18)
Row 34: ch 1, turn, sc dec over 1st 3 sts (3 sc become 1 sc), sc in last 15 sts. (16)
Row 35: ch 1, turn, sc in 1st 14 sts, sc dec over last 2 sts. (15)
Row 36: ch 1, turn, sc in 1st st, (sc dec over nxt 2 sts) twice, sc in last 10 sts, cut yarn. (13)
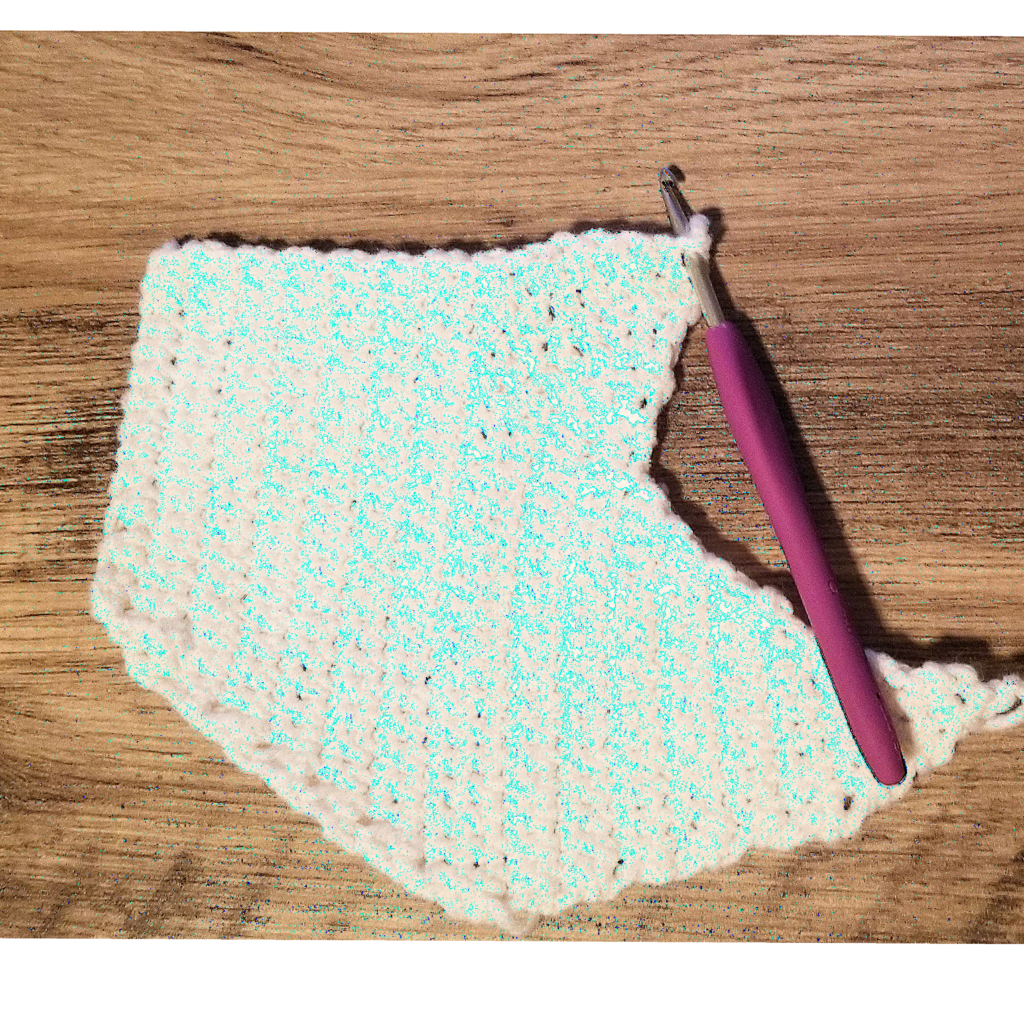
Position as shown in the image and join white yarn with a sl st in the right most st in the position shown by the hook in the photo, ch 1:
Row 37: sc in same st and nxt 5 sts, now we work in the ends of the rows, sc in the end of each of the 15 rows across to the end. (21)
Row 38: ch 1, turn, sc dec over 1st and nxt sc, (sc dec over nxt 2 sts) twice, sc in nxt 4 sts, 2 sc in nxt st, sc in nxt 4 sts, (sc dec over nxt 2 stitches) three times. (16)
Row 39: ch 1, turn, sc dec over 1st and nxt sc, sc in nxt 12 sts, sc dec over last 2 sts. (14)
Row 40: ch 1, turn, sc in each st across. (14)
Row 41: ch 1, turn, 3 sc in 1st st, sc in nxt 12 sts, 3 sc in last st. (18)
Row 42: ch 1, turn, 3 sc in 1st st, sc in nxt 16 sts, 3 sc in last st. (22)
Row 43-50: ch 1, turn, sc in each st across. (22)
Row 51: ch 1, turn, sc dec over 1st 2 sts, sc in nxt 18 sts, sc dec over last 2 sts. (20)
Row 52: Mark last stitch in this row for right ear placement later, ch 1, turn, sc dec over 1st 2 sts, sc in nxt 16 sts, sc dec over last 2 sts. (18)
Row 53: ch 1, turn, sc dec over 1st 2 sts, sc in nxt 14 sts, sc dec over last 2 sts. (16)
Row 54: ch 1, turn, sc in each st across. (16)
Row 55: ch 1, turn, sc dec over 1st 2 sts, sc in nxt 12 sts, sc dec over last 2 sts. (14)
Row 56: Mark first stitch in this row for left ear placement later, ch 1, turn, sc dec over 1st 2 sts, sc in nxt 10 sts, sc dec over last 2 sts. (12)
Row 57: ch 1, turn, sc dec over 1st 2 sts, sc in nxt 8 sts, sc dec over last 2 sts. (10)
Row 58: ch 1, turn, sc dec over 1st 2 sts, sc in nxt 6 sts, sc dec over last 2 sts. (8)
Row 59: ch 1, turn, sc dec over 1st 2 sts, sc in nxt 4 sts, sc dec over last 2 sts. (6)
Ears:
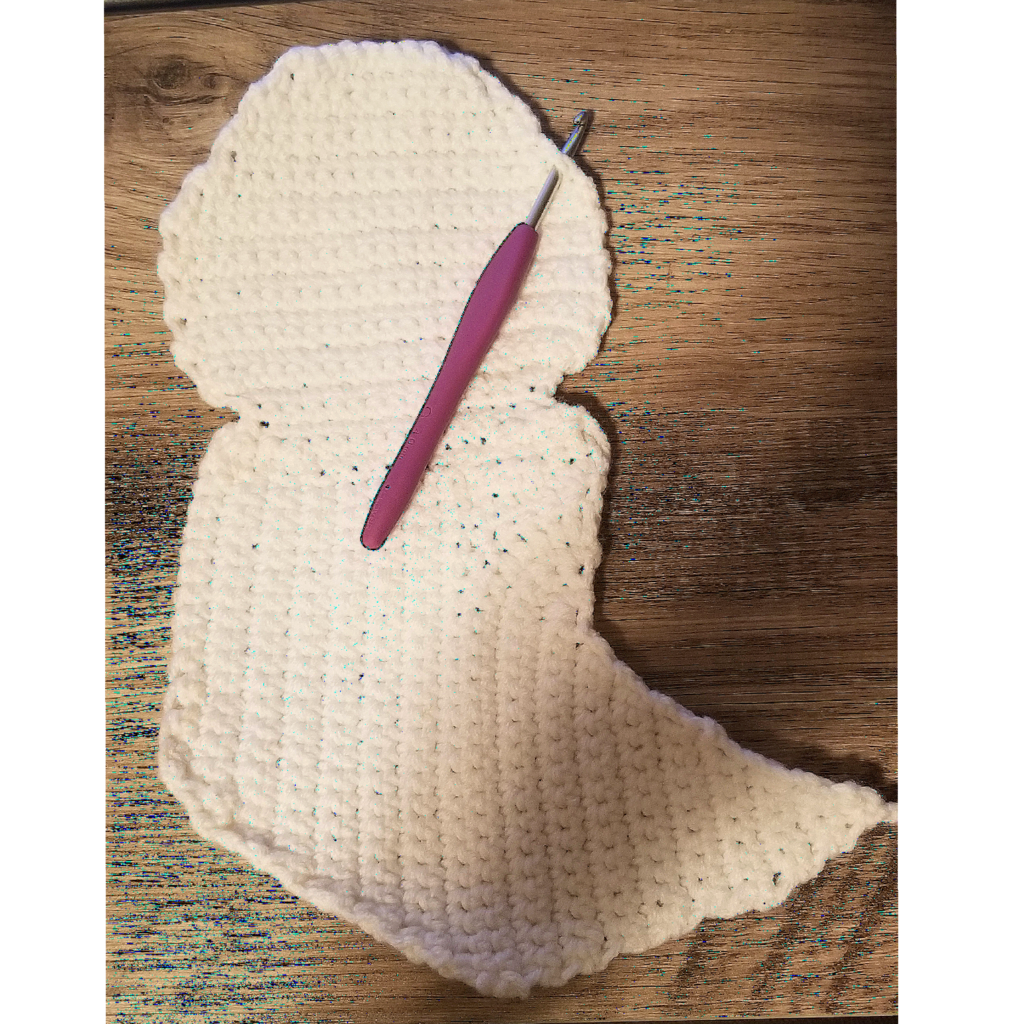
Position as shown and join white yarn with a sl st from the side in end of marked Row 52 as shown by the hook in the photo, ch 1:
Row 1: sc in end of same row and nxt 4 rows. (5)
Row 2: ch 1, turn, sc in each st across. (5)
Row 3: ch 1, turn, sc dec over 1st 2 sts, sc in nxt st, sc dec over last 2 sts. (3)
Row 4: ch 1, turn, sc in each st across. (3)
Row 5: ch 1, turn, sc dec over 1st 2 sts, sc in last st. (2)
Row 6: ch 1, turn, sc dec over the 2 sts, ch 1 more to finish off nicely and cut yarn. (1)
Position the piece the same as you did for the 1st each, but join now in the end of the 56th row that you marked, ch 1:
Rows 1-4: Repeat rows 1-4 as for other ear.
Row 5: ch 1, turn, sc in 1st st, sc dec over last 2 sts. (2)
Row 6: Repeat as for row 6 of other ear.
Arms (Make 2):
With white yarn and G hook, leave long beginning tail to sew to body later and chain 7:
Row 1: sc in 2nd ch from hook and each rem ch. (6)
Row 2-3: ch 1, turn, sc in each st across. (6)
Row 4: ch 1, turn, sc dec over 1st 2 sts, sc in nxt 2 sts, sc dec over last 2 sts. (4)
Row 5: ch 1, turn, sc in 1st st, sc dec over nxt 2 sts, sc in last st. (3)
Using the long beginning tail and the photo as a guide, sew row 1 of arm to either side of body. They should sit just below where the neck tapers in.
Join with sc edge round:
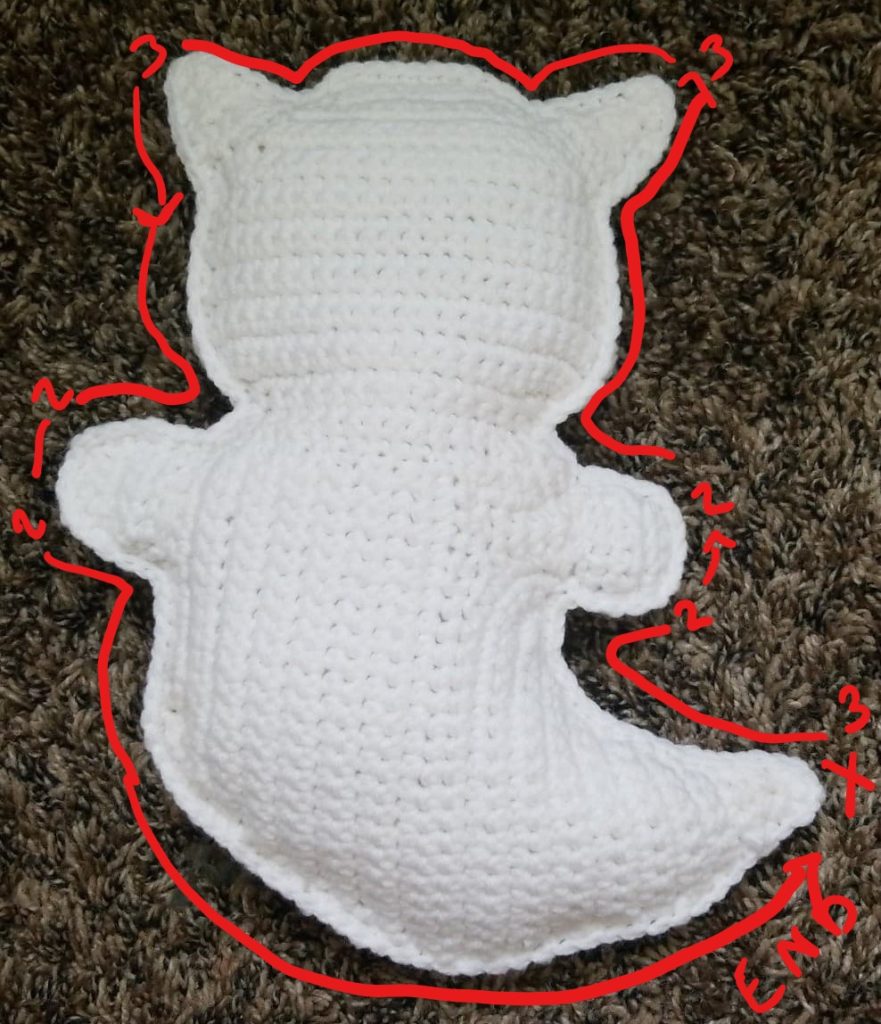
Weave in all ends to this point. Stack the two body panels on top of each other. WORKING THROUGH BOTH LAYERS AT ONCE TO JOIN, join the white yarn with a sl st in the tip of the tail, shown at the “x”.
STUFF BODY NOTE: You will stuff the piece GENTLY (remember it is a ragdoll so you want some body to it, but it should remain fairly flat.) I stuffed each ear and the head when I was around the head, then the body and tail about 10 sts before closing the round completely.
Rnd 1: ch 1, remembering to work through both layers, make 3 sc in the tip of the tail, make one sc in each st and end of row around, at the top either side of each hand make 2 sc to round the corner, at the tip of each ear also work 3 sc in the same st, once around, sl st to 1st sc made and cut yarn.
Nose:
With the bright pink yarn, and E hook (or two sizes smaller than what you used to achieve gauge for body panels), make a magic ring, ch 1:
Rnd 1: (ch 1, 2 hdc, sc, ch 2, sc, 2 hdc, sl st) all in the magic ring, pull tail tightly to close.
Using the end tail, sew the nose to the face. If you have chosen the glue, knot end tails tightly together, trim, then glue the nose in position using the photo as a guide. You can also use the end tails to sew shut any hole that remains in the center from the magic ring.
Inner Ears (Make 2):
With the light pink yarn and E hook (or two sizes smaller than body), ch 3:
Row 1: sc in 2nd ch from hook and nxt ch. (2)
Row 2: ch 1, turn, sc dec over the 2 sts. (1)
Edge: ch 1, do not turn, sc in the end of each of the 2 rows down the side, make 3 sc in each sc along the bottom of row 1, sc in the end of each of the 2 rows up the 2nd side, (sc, ch 2, sl st in 2nd ch from hook, sc) all in the single sc at the tip, sl st to 1st st made, cut yarn.
Using the end tail, sew one inner ear to each ear on the main body. If you have chosen the glue, knot end tails tightly together in the rear, trim, then glue on inner ear to each ear.
Paws:
Repeat through twice, once for each hand.
Larger Dot
With the lighter pink and E (or two sizes smaller than body), make a magic ring:
Rnd 1: ch 1, 6 sc in ring, sl st to 1st sc made, cut yarn. (6)
Smaller Dot
Note: Doing the smaller dots like this almost requires the use of the glue because they are so small. If you opt for sewing only, you may replace the smaller dots with simple French knots sewn directly onto the paws instead.
Row 1: ch 2, sc in 2nd ch from hook, ch 1, cut yarn.
- Using the photo as a guide, sew the larger dot to the hand (or glue into position). Knot the beginning and end tails together and trim short. When attaching with glue I rub the ends into the glue with the tip of the glue gun to secure them, then press the dot into place on the hand.
Eyes:
Main Eye:
With green and G hook, make magic ring, ch 1:
Rnd 1: 6 sc in ring, do not join round. (6)
Rnd 2: Do not turn, 2 sc in each st around, do not join. (12)
Rnd 3: Do not turn, (sc in nxt sc, 2 sc in nxt sc) six times total, sl st to 1st sc made, cut yarn. (18)
Pupil:
With black and E hook, ch 4:
Rnd 1: sc in 2nd ch from hook, hdc in nxt ch, (sc, ch 2, sl st in 2nd ch from hook, sc) all in the last ch, working up the opposite side of the beginning ch in the remaining free loop, hdc in nxt ch, (sc, ch 2, sl st in 2nd ch from hook) in last ch, sl st to 1st sc made, cut yarn.
Eyelid:
With black and E hook, tighly chain 6. Sew this onto the top edge of the eye already on the face, positioned starting at the 10 o’clock position and ending at the 2 o’clock position. Use a strand of black yarn and needle and sew the three eyelashes on the outer edge of the eye using the photo as a guide.
Sew the black pupil centered on the green eye. With a strand of white yarn, sew a large eye sparkled and small eye sparkle. Both the sparkled on both eyes are on the right side of the eye, larger on bottom smaller on top. Go around 2-3 times for the large dot and 1-2 times for the smaller. Knot the tail for the sparkles behind the eye and trim. Sew the green eye onto the face. If you are gluing, glue all into position.
Repeat all of the above for the second eye.
Mouth and Whiskers:
Split a black length of yarn in half and use only 2 of the 4 plies. Stitch a “W” shape centered under the bottom of the heart nose. Stitch three whiskers to either side of the face. Use the photo as a guide throughout.
And you are done!
Weave in all ends. Repeat as many times as desired lol!
Please hop over to my Facebook page at http://www.facebook.com/crochetverse
and share your tops! You can also join my group for VIP discounts and sharing! That can be found at https://www.facebook.com/groups/251695645349035/
Follow me on any of my social media to stay in touch, I would love to have you! Much love and yarn, Stephanie Pokorny (Crochetverse)
The information and photos in this posting are the sole copyrighted property of Crochetverse©2018. Please do not copy and paste any of the information contained within either electronically, verbally, or written in part or in whole. Instead, please share the DIRECT LINK to this posting only, and if you do, I thank you for sharing. You of course may sell anything you make from this pattern that you have made with your own two hands, no contract labor or mass productions are permitted. I need your visits to keep me around creating! Please never screenshot or copy and paste the info within, instead share the link so I may entertain your friends as well! If you credit Crochetverse as the designer that is greatly appreciated!



This is just the cutest ever!!! I’m having trouble with row 38. I have the correct 20 on the row before, but I keep ending row 38 with 15? Am I not understanding it correctly? It’s 3 dec at the beginning and 3 at the end? But I end with only 2 dec available. Thank you for this pattern!
Hello! Thank you for letting me know I have edited Row 38 just now and it should work out at this point. Thank you!
Thank you for the pattern, I’m having trouble after row 22. I worked it as written, but when I got to the next part, the bump from row 22 was still there. Are we supposed to work only on that side of the body, or the rows that go across? from there?
TIA,
Melissa
Can you shoot me a message on my Facebook Page with photo of what you are talking about? I would love to help, I am sorry about the late reply!
Comments are closed.