My love of rainbows has always had me a huge lover of tie dye as well, so when I saw this cool tie dye kit, I knew I had to try it with crochet. I was REALLY happy with the results, so I am going to share with you!
I absolutely love rainbow-themed clothing and accessories. My best friend has recently purchased a fake LV rainbow handbag and I am so jealous!
I had no idea it was a replica piece until she told me. The LV logo looks so good in all of the different colors of the rainbow. Who knows I might have to treat myself to a similar bag too!
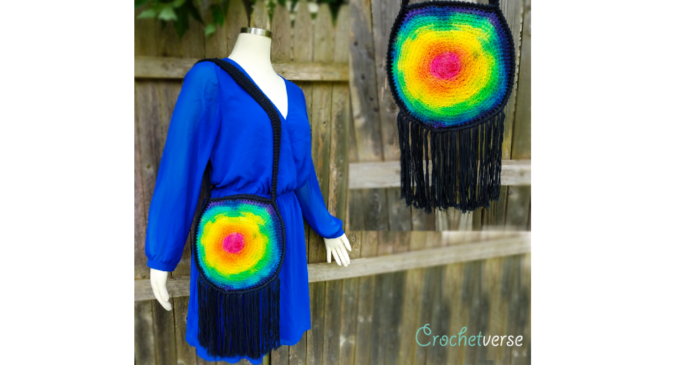
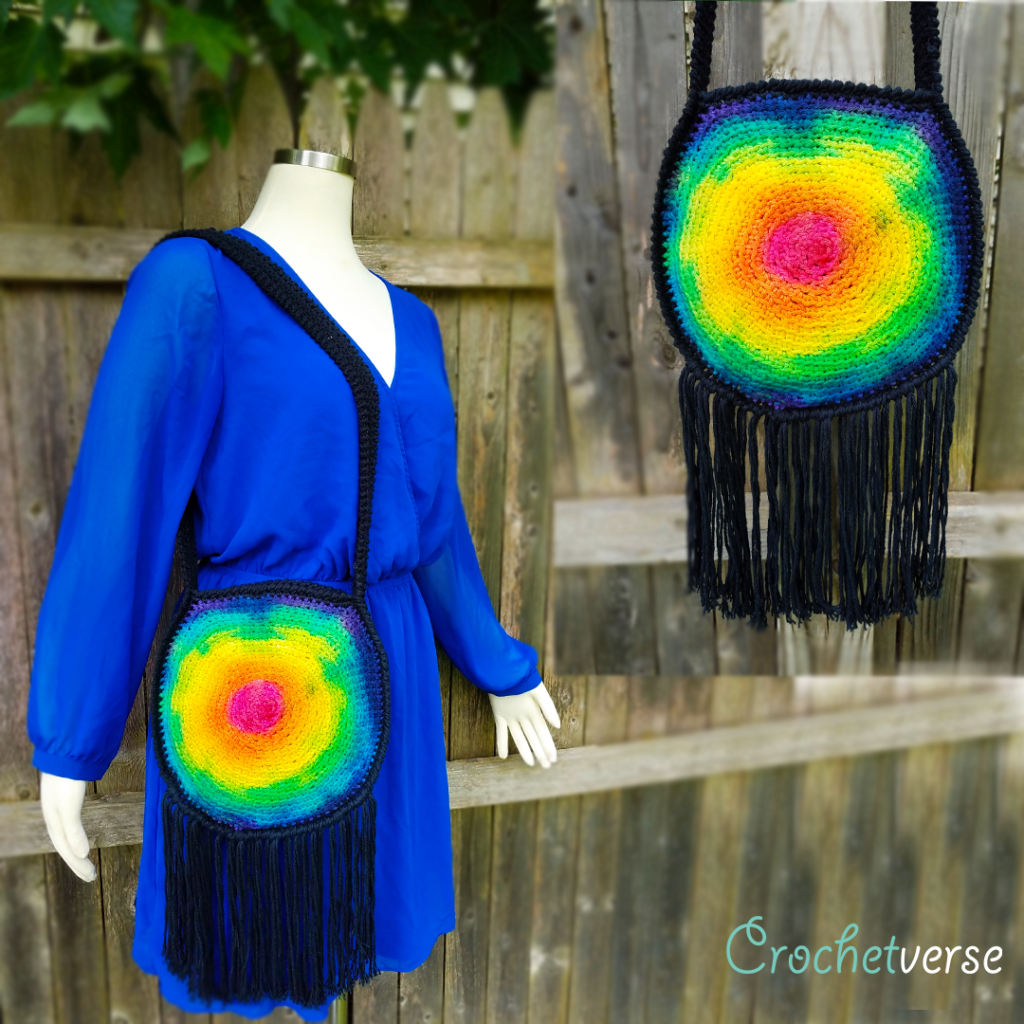
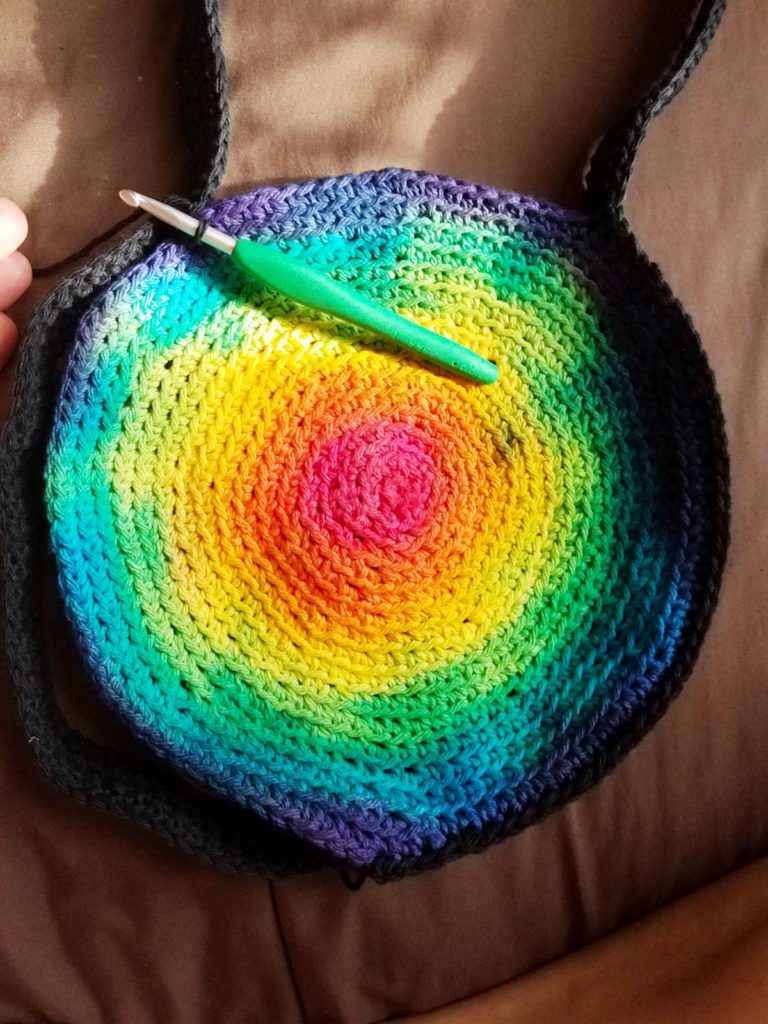
For now though, how amazing is this tie dye handbag design?
Of course this purse can be made in a solid color or yarn that is already dyed! Just scroll on down to the purse pattern if you would like to skip to that!
BUT, if you are down to try some tie dye, read on!
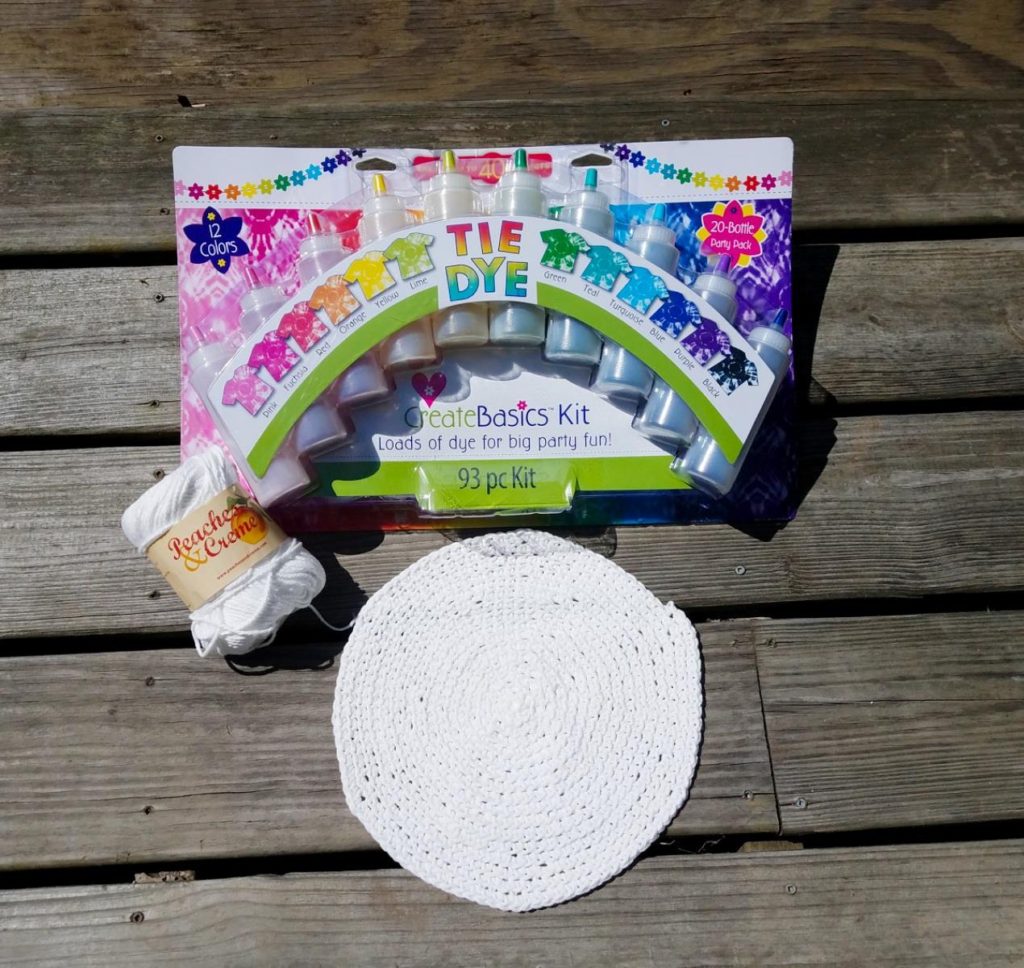
The kit was 10 bucks, and there was MORE than enough to do multiple projects. My children and I did 3 shirts, the purse panel, and some yarn as well. I still have bottles left over! Speaking of bottles, they make the process SO MUCH easier than when I tie dyed as a child. YES, it is still a little messy, but it is WAY better now!
HOW TO TIE DYE YOUR CROCHET PANEL:
Step 1: Gather your materials:
- One skein of peaches and cream or sugar and cream cotton in the pure white. It HAS to be 100% cotton, it CANNOT be a mix with any other fiber or acrylic. The dyes will NOT work on any other fiber. You will need 2 additional balls of yarn, to complete the purse.
- The dye kit (found at my local WalMart for $10), which included the prefilled dyed bottles, to which you add water, gloves, rubberbands.
- Plastic surface to tie dye on, I used garbage bags.
- regular table salt and plain white vinegar to set the dyes after.
Step 2: Create the Panel and Tie It:
- Scroll down to the pattern and using the white yarn, crochet ONE purse panel.
- I had a GREAT photo of the panel all tied and dyed, but it dissappeared into space! SO, I am going to improvise. I think the point will still be clear.
Why is it done is scblo? So it is kind of loosey goosey. It couldn’t be too tight or it just wouldn’t tie nicely. Begin by pinching up the CENTER of the purse panel, and about 1/2″ down, tightly wrap a rubberband around as many times as you can without it breaking. I double wrapped with 2 rubber bands for each tie.
Now, gather the panel more down from the center and evenly space rubberbands in the same tight manner so you end up with 6 sections, which is the most I could fit comfortably.
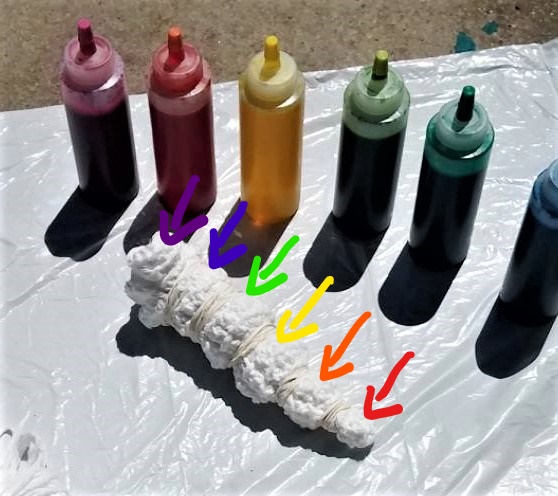
This image shows the rubber banded panel and the colors I dyed each section:
Step 3: Begin to Dye:
I added water to each of the bottles in my chosen colors, put on the gloves, and laid the tied purse panel on a spread out garbage bag. Beginning at the 1st section (which is the middle of the panel you pinched up 1st) I squirted the red dye on. I went slowly so the material absorbed the dye and it didn’t squirt or splash around. My goal was to keep each color in each section to the best of my ability, so do not rush. A little will likely cross over, which is good, the colors will blend really nicely. But you want to avoid splatter as best you can.
Continue dying each section, gently inserting the tip of the bottle into the fabric folds as you can and squeezing softly. You want to fully saturate each section, but not so much so all the colors just bleed into the next and create a “muddy” piece.
Step 4: Wrap it, Heat it, Leave it:
I saw this trick on a video I saw of a hand dyer of yarn, so I employed it here for good measure. First, I placed the tied and dyed panel on a piece of plastic wrap and rolled it up and closed it into a nice little tie dyed crochet sausage. THEN, I went to my microwave…I put the wrapped panel in and went full power for one minute. I would not do more, it will splatter which we do not want. If you are not comfortable with this method, you could take a hair dryer and heat up the wrapped piece. Think of it like when you get your hair dyed and they put you under a heat lamp to process, same thought. USE YOUR OWN DISCRETION as to what you feel comfortable with. I had no dye in my microwave at all after the heat, but be warned it COULD happen. Next, I placed it wrapped up and heated out on my front walk in the sun and left it alone for 8 hours at least, I rotated it a few times during the eight hours.
Step 5: Cut ties, Rinse, Set:
After the 8 hours were up, I brought it in to my sink (again beware of dye) and cut the ties. I then rinsed it thoroughly until the water ran clear. Now, off to set the dye to keep the colors vibrant and to keep the colors from fading and bleeding as best we can. I have seen TONS of methods, but this works for me, so we shall run with it. Get ONE gallon of water, 1/4 cup of table salt, and one cup of plain white vinegar and mix them in a container. Now, place the dyed panel in that solution and leave it. Overnight if you can. 12 hours minimum. When the time is done, take it out and rinse thoroughly, shape it into a circle on a flat surface and leave it to dry. Once dry, you are ready to create your purse!
HOW TO CROCHET YOUR PURSE, THE PATTERN:
Materials:
- 360 yards worsted weight cotton in your choice of color, I used (1) white and (2) black balls and the balls are 120 yards each
- Size I (5.5mm) crochet hook -OR- size needed to obtain gauge ( I am a fairly tight crocheter so an average user of my patterns may need to drop down a hook size
- scissors, tapestry needle for ends, measuring tape
Gauge:
Begin making one circle panel, when round 8 is completed you should be about 4″ in diameter.
Finished Size:
Bag is 9″ in diameter
With strap the total length is 24″, the drop of the strap is 15″ (can be added or reduced)
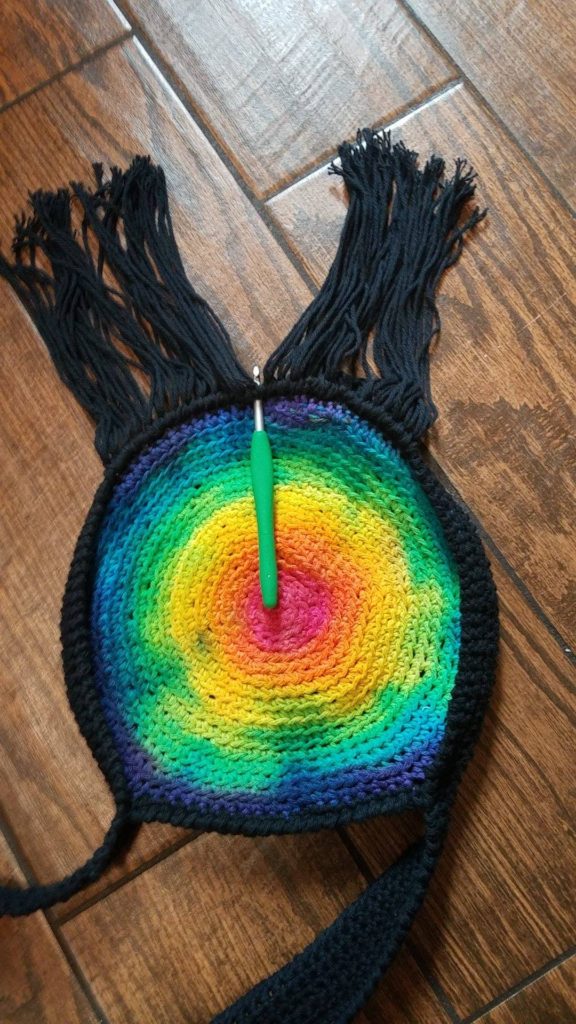
Fringe adds another approximate 7″ to total length.
Stitch Key:
sl st slip stitch sc single crochet
scblo single crochet BACK LOOP only rev sc reverse single crochet
nxt next ch chain
st(s) stitch(es)
Circle Panel (Make 2):
NOTES ABOUT THE PANEL: The increases are worked spaced differently than you might be used to. When you space increases the same each round, you generally end up with a circle that is noticeably octagonal or has “sides”. To avoid this, the panel has increased as you normally would adding 6 each round, but they are spaced differently. Result? A true circle panel.
ALSO TO NOTE: The scblo (single crochet back loop only) tends to be tighter in the beginning and loosen up as you work the rounds. You may notice your piece “domes” as you begin. Trust the piece is increased properly. You may need to tug, dampen, and lay a heavy object on top of them to block. I found a quick dampen with cool water, shape to flat and let dry was sufficient.
Make magic ring, ch 1:
Do not join or turn rounds, worked in a spiral.
Rnd 1: work 6 sc in the ring, pull tail to close tightly. (6)
Rnd 2: scblo in each sc around. (12)
Rnd 3: (scblo in the nxt st, 2 scblo in the nxt st) six times total. (18)
Rnd 4: (scblo in the nxt 2 sts, 2 scblo in the nxt st) six times total. (24)
Rnd 5: (2 scblo in the nxt st, scblo in the nxt 3 sts) six times total. (30)
Rnd 6: (2 scblo in the nxt st, scblo in the nxt 4 sts) six times total. (36)
Rnd 7: (scblo in the nxt 2 sts, 2 scblo in the nxt st, scblo in the nxt 3 sts) six times total. (42)
Rnd 8: (2 scblo in the nxt st, scblo in the nxt 6 st) six times total. (48)
Rnd 9: (scblo in the nxt 3 st, 2 scblo in the nxt st, scblo in the nxt 4 sts) six times total. (54)
Rnd 10: (2 scblo in the nxt st, scblo in the nxt 8 st) six times total. (60)
Rnd 11: (scblo in nxt 3 st, 2 scblo in nxt st, scblo in nxt 6 st) six times total. (66)
Rnd 12: (2 scblo in nxt st, scblo in nxt 10 sts) six times total. (72)
Rnd 13: (scblo in the nxt st, 2 scblo in the nxt st, scblo in the nxt 10 sts) six times total. (78)
Rnd 14: (scblo in the nxt 5 sts, 2 scblo in the nxt st, scblo in the nxt 7 sts) six times total. (84)
Rnd 15: (scblo in nxt 5 sts, 2 scblo in nxt st, scblo in nxt 8 sts) six times total. (90)
Rnd 16: (2 scblo in nxt st, scblo in nxt 14 sts) six times total. (96)
Rnd 17: (2 scblo in nxt st, scblo in nxt 15 sts) six times total,sl st to the nxt st and tie off. (102)
Strap (Make 1)
Made longways because crochet stretches less longways ?
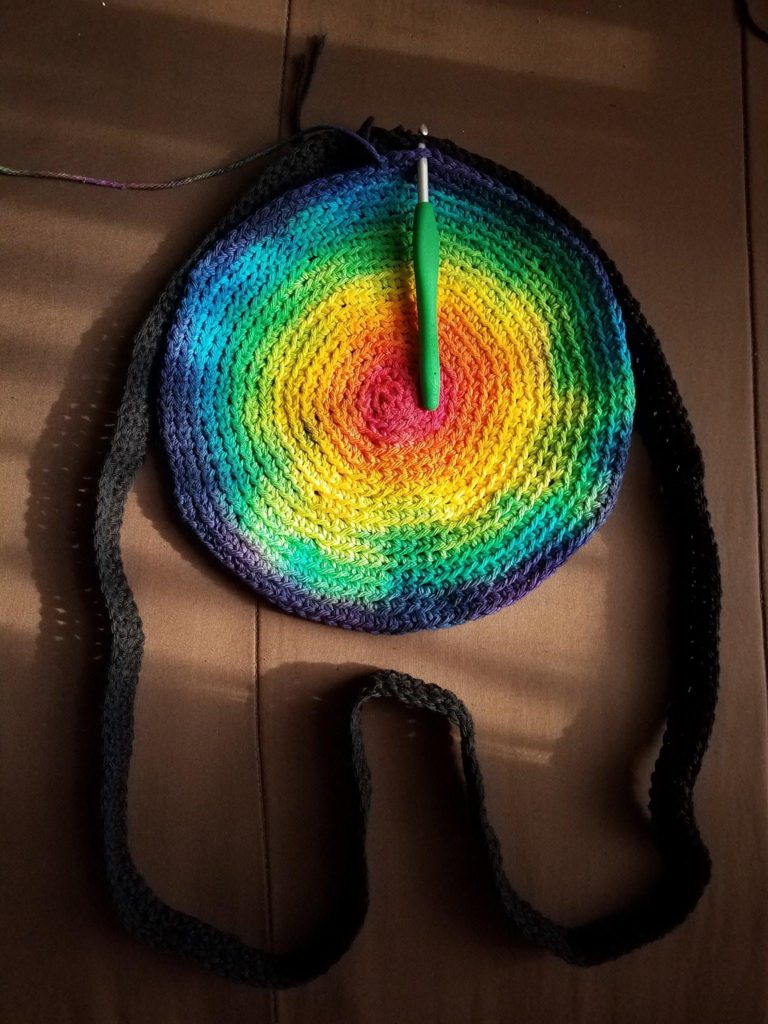
As written, this allows about a 15″ strap drop. Note where that hits on someone of average height looking at the image at the beginning of the post. Keep in mind also that the strap will likely stretch some. BUT, if you would like it shorter or longer, simply chain more/less than the 201 stated. You will need to adjust your join round later which will be noted.
Chain 201:
Row 1: sc in 2nd ch from hook and in each rem ch. (200)
*This can be replaced with a chainless foundation row of 200 sc*
Row 2-3: ch 1, turn, sc in each sc across.
Before tying off, match the short ends together and sl st through both sides across the 3 rows to close the strap into a ring. Do not twist the strap.
Assembly:
Step 1: Position and sl st join.
Place the strap with the sl st closed end further from you, and place the 1st purse panel on top and in the center, right side facing out. Insert the hook in the center most st through both the strap and the outer round of the purse panel.
Step 2: Join one circle panel to the strap.
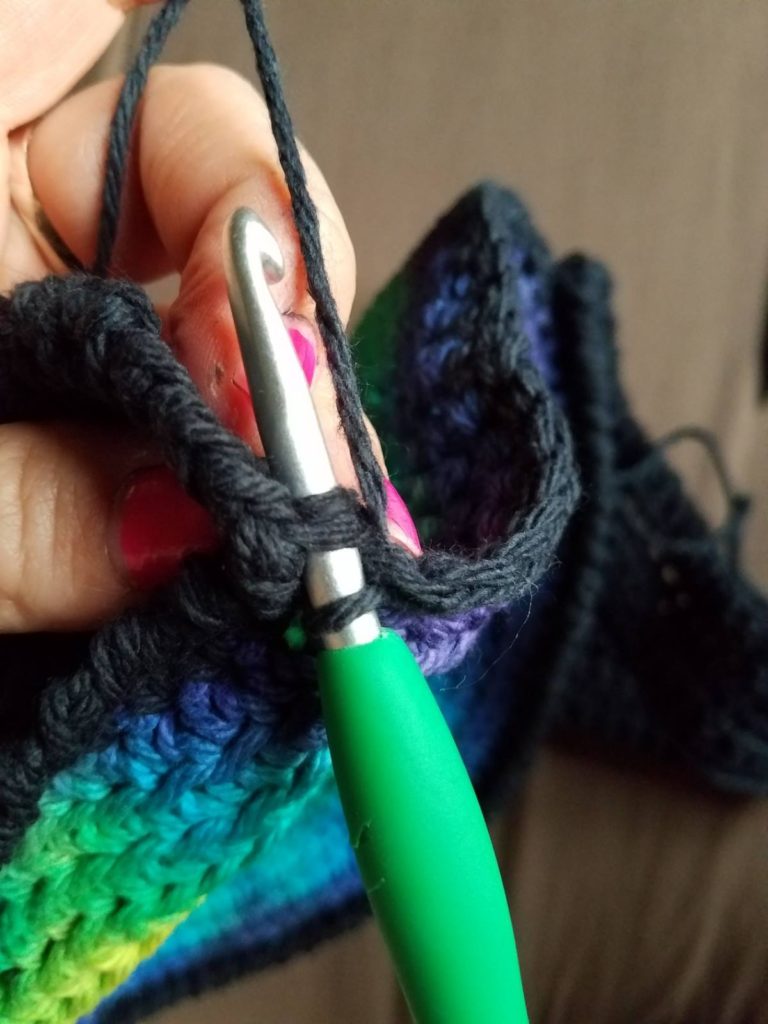
Rnd 1: ch 1, working through both panels at once matching stitches, sc in the same st and the next 41 sts, then work ONLY on the strap and sc in the nxt 114 sts on the strap only, then skip 18 sts from the last st worked on the purse panel and begin working again through both the panel and the strap at once to join the 2nd have of the circle, you will sc in 42 sts, then sl st to the 1st sc made at the bottom middle of the bag. If you made your strap longer or shorter than stated in the pattern, when you work only the strap in the join round, add or subtract the same number of stitches from the 114 that you added or subtracted on your strap.
When you get begin to join the second side of the circle, you will drop the current loop of the hook, pull it through the st of the circle panel, then ch 1, and sc in the same st and the next 41 sts.
The first few sts of the join round:
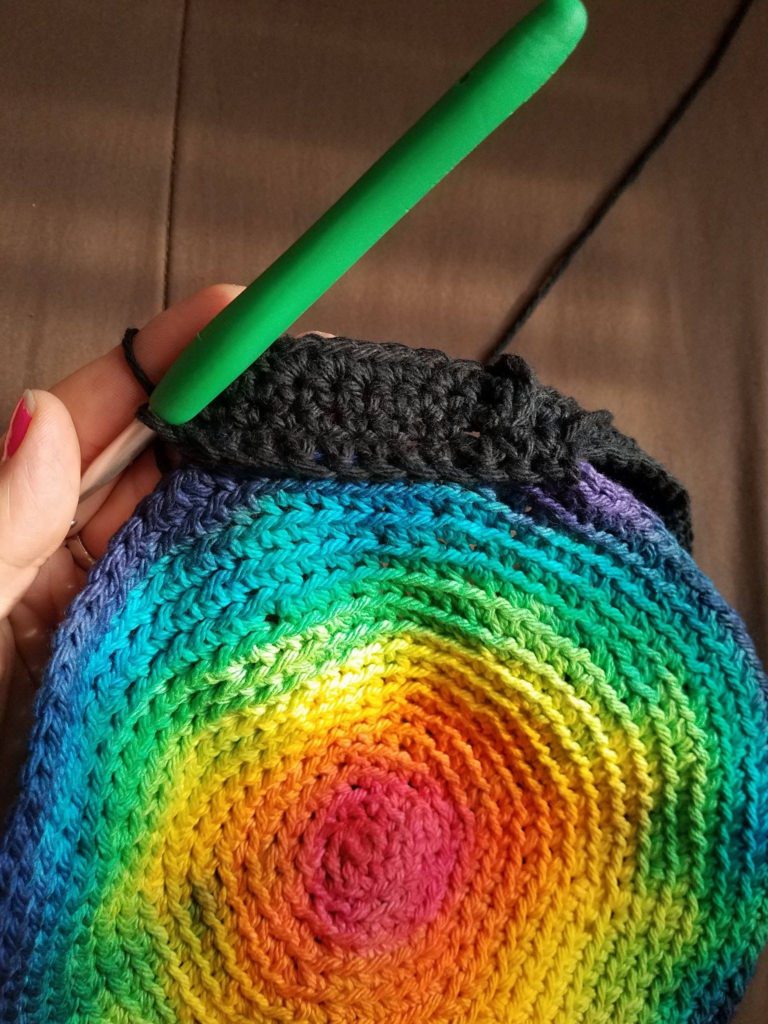
The first few sts working up the strap only after the 1st half of the bag is joined.
When you begin to work the 2nd half of the circle through both panels, drop the loop on the hook and pull it through the 1st st on the bag before you ch 1 and finish the join.
Rnd 2: ch 1, and REVERSE SC (or crab stitch) in each sc around, sl st to the 1st rev sc made and tie off.
Edge the unworked sts of the circle panel:
Join the yarn with a sl st in the rightmost st of the unworked sts of the circle, ch 1:
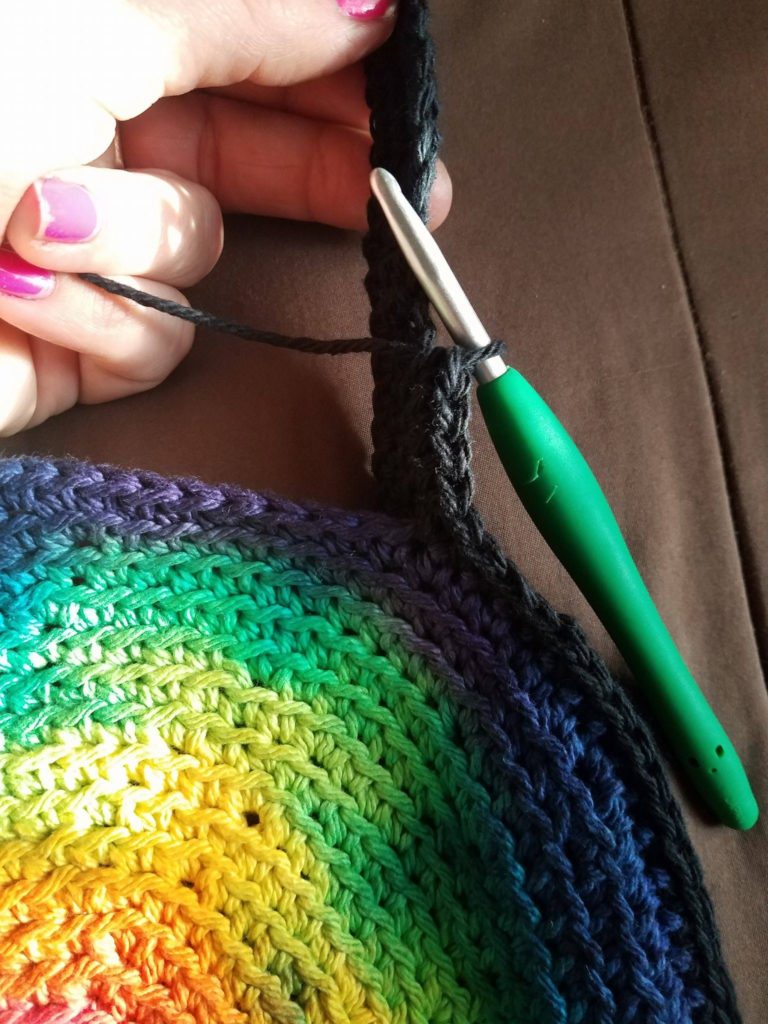
Row 1: ch 1, sc in the same st and in each st across, then sl st into the strap from the side so the top edge meets nice and tight to the center.
This shows sl st to the strap at the last st of the row. Just grab a few strands of the st that is at the join of the strap and circle.
Row 2: ch 1, then REVERSE SC back across the row, sl st into the strap on the right in the same manner as you did the left, and tie off.
Step 3: Repeat step 2 for the other circle panel.
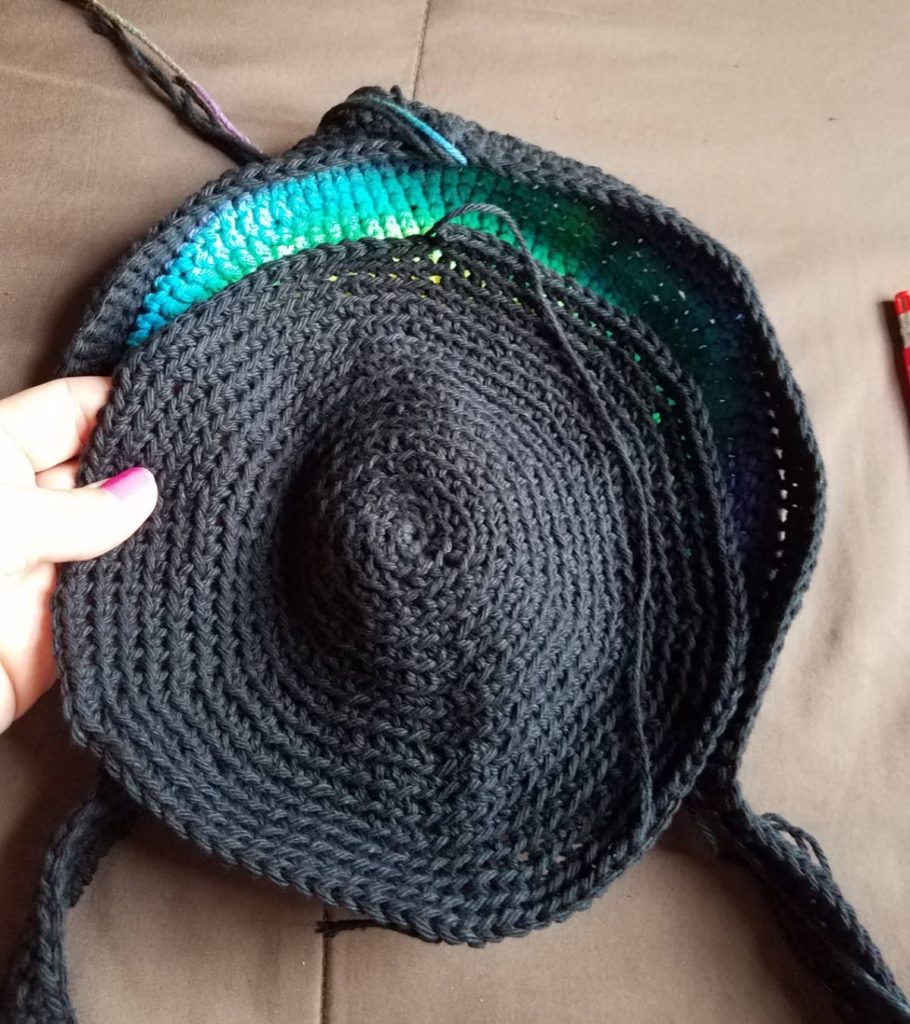
Flip the assembly over and attach the 2nd side in the exact same way as the first.
Step 4: Weave in all ends.
Step 5: Add fringe.
Cut 54 strands of yarn that are about 24″ long.
You will add two strands of fringe to each of the sts indicated. You will insert the hook from above to below through the crab stitch round of the join round.
Lay 2 strand next to each other, and fold them in half evenly. Insert the hook as shown nd lay the looped end of the folded strands over the end of the hook and pull them through the purse round. Grab all 4 of the loose ends of the strands with your hook and pull them through the looped end. Tighten firmly by pulling the loose ends.
Work your first fringe in the center bottom stitch of the bag. Then fringe 13 sts to the right and 13 sts to the left, for a total of 27 fringed stitches.
Hang the bag from door knob or hanger and smooth the fringe and trim. I cut the few on the outer edges just a tad shorter than the rest so it angled up slightly.
Thank you! Please show me your work on the Facebook Page “Crochetverse!”
If you are viewing this pattern anywhere but crochetverse.com or downloaded from the Official Crochetverse Ravelry or Etsy store, it is an illegal reproduction copy. Please help me stay on top of this by emailing me, so I may stay afloat and continue to share patterns and ideas with you all! <3 Much Love and Yarn, Stephanie Follow on Facebook Here!
The information and photos in this posting are the sole copyrighted property of Crochetverse©2017. Please do not copy and paste any of the information contained within either electronically, verbally, or written in part or in whole. Instead, please share the DIRECT LINK to this posting only, and if you do, I thank you for sharing. You of course may sell anything you make from this pattern that you have made with your own two hands, no contract labor or mass productions are permitted. If you credit Crochetverse as the designer, that is greatly appreciated!



Amazing! Thank you. Question – doesn’t the plastic wrapping melt? Can you set the dye without the plastic by just using the hair dryer?
It did not in the slightest for me! While I won’t vouch for every single plastic wrap out there, when I make ribs, I first wrap them in plastic wrap, then in foil. Alton Brown does it that way, so I fugure it has to be good! I really think you will be just fine with a hair dryer! Don’t touch it or get to close and move it around as you heat! Thank you!
Comments are closed.