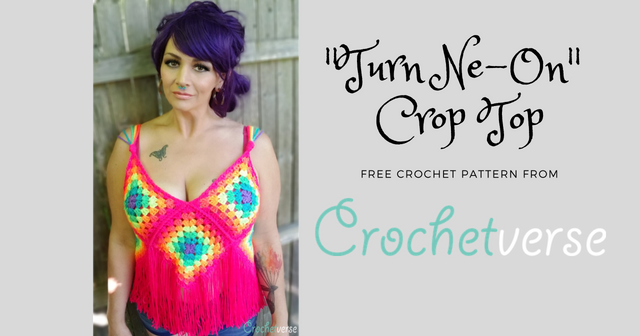
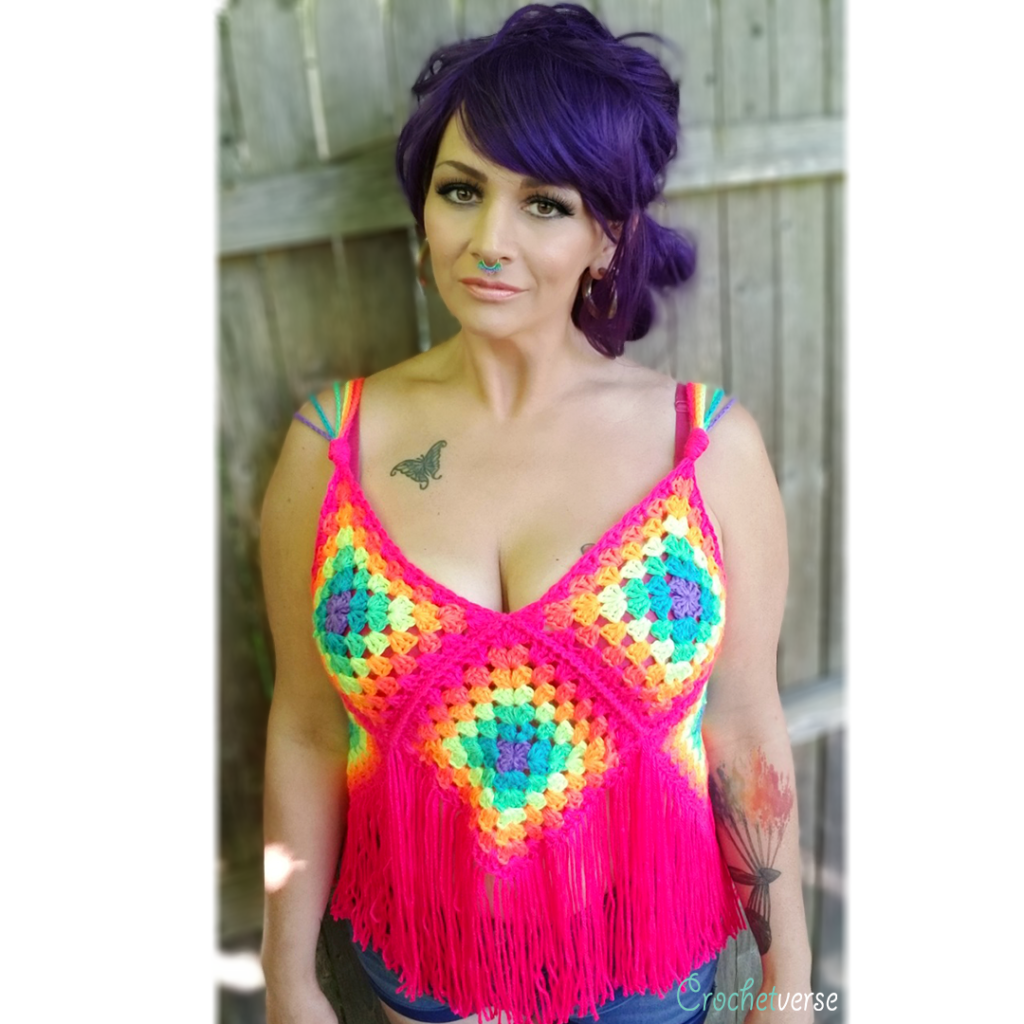
Free “Turn Ne-On” Granny Square Tank Crop Top Pattern
Tops similar to this float around every Summer. It is perfect for a beginner crocheter who really wants to make a wearable! There are many tops like this, but I wanted to share exactly how I did mine with sizing included. There is no guess work or freehanding needed!! I know when I was earlier in my crochet career, I needed line by line instruction, especially for sizing. I hope you enjoy!
I ask you to share the LINK to this page only. Please never copy and paste my instructions to share. I need your visits to keep my blog up and running so I can continue to share freebies with you! Sell any finished garment you want that you complete using this pattern, but never the pattern itself. Please don’t alter it a bit and claim it either for free or pay. In short, just please be kind to me <3 Thank you and so much love!
Materials:
- Size I (5.5mm) crochet hook -OR- size needed to obtain gauge.I crochet TIGHTLY, you may need to drop a hook size to meet my gauge.
- worsted weight yarn (Shown is Caron Simply in Grape, Blue Mint, Neon Green, Neon Yellow, Neon Orange, Neon Coral, and Neon Pink)
About 475 yards for a top using 7 rounds per granny square. Larger sizes will need more, smaller sizes will need less.
- scissors, tapestry needle, tape measure
Gauge:
Check this after round 3 of your 1st granny square, I like to make it part of the pattern so it is easier to complete.
Sizing:
Crochet stretches. Quite a bit actually, especially granny squares which are fairly open work. I like to make my clothing of this nature with what is called “negative ease”. This means the finished dimension of the garment will be LESS than the actual body measurement of the person who will wear the item. Then, it will not be overlay baggy and stretched out of shape with one wearing.
I am working with approximately 4″ of negative ease. This means:
My fullest bust measurement around on my actual body wearing the bra I like best is 40″
The armpit to armpit measurement of my garment is 36″ across, hence 4″ NEGATIVE ease.
After round 3 on the granny square below, it will denote the number of times to repeat it for the bust measurement the intended wearer has provided.
Granny Square (Make 8): US Terms
Rnd 1: Make magic ring, ch 3, 2 dc, *ch 1, 3 dc in ring, repeat from * two times more, ch 1, sl st to the top of beginning ch-3, cut yarn.
Rnd 2: with right side of round 1 facing up, join nxt color in any ch-1 sp around, ch 3, 2 dc in same sp, ch 1, 3 dc in same sp, *sk nxt 3 dc, in nxt ch-1 sp make (3 dc, ch 1, 3 dc), repeat from * two times more, sl st to top of beg ch-3, cut yarn.
Rnd 3: with right side of previous round facing up, join next color in any ch-1 space at a corner, ch 3, (2 dc, ch 1, 3 dc) in same space, *(sk next 3 dc, make 3 dc in the space after the 3rd skipped dc), repeat parentheses until next ch-1 sp at a corner is reached (this parentheses repeat will NOT be used in round 3, but will be used in the rest of the rounds), in the nxt ch-1 sp make (3 dc, ch 1, 3 dc), repeat from * three times more eliminating final (3 dc, ch 1, 3 dc) in the corner and instead sl st to top of beg ch-3, cut yarn.
GAUGE: After round 3, your square should measure about 2.75″ across.
If you are LARGER, your tension is looser: Drop a hook size and try again.
If you are SMALLER, your tension is tighter: Go up a hook size and try again.
Once you have gauge matched, proceed to complete the number of rounds needed for the size you are making. Have the intended wearer measure around the FULLEST part of the bust while wearing whatever bra (or lack of whatever bra) they usually wear.
I have used a different color for each round on my top. You can most certainly use the same color or any number of colors throughout. To do so, instead of cutting the yarn at the end of each round, simply sl st across the dc into the ch-1 space at the corner, then perform round 3 repeat as written. I did not turn any of my rounds, the right side of each round is facing the same way. There is a back and front to my squares so take care when joining them, that they are all facing the same way.
For a bust measurement of 30-33″: Work to 5 total rounds on each granny square.
For a bust measurement of 34-37″: Work to 6 total rounds on each granny square.
For a bust measurement of 38-40″: Work to 7 total rounds on each granny square.
For a bust measurement of 41-44″: Work to 8 total rounds on each granny square.
For a bust measurement of 45-48″ Work to 9 total rounds on each granny square.
For a bust measurement of 49-51″: Work to 10 total rounds on each granny square.
To go larger, simple add more rounds.
Assembly:
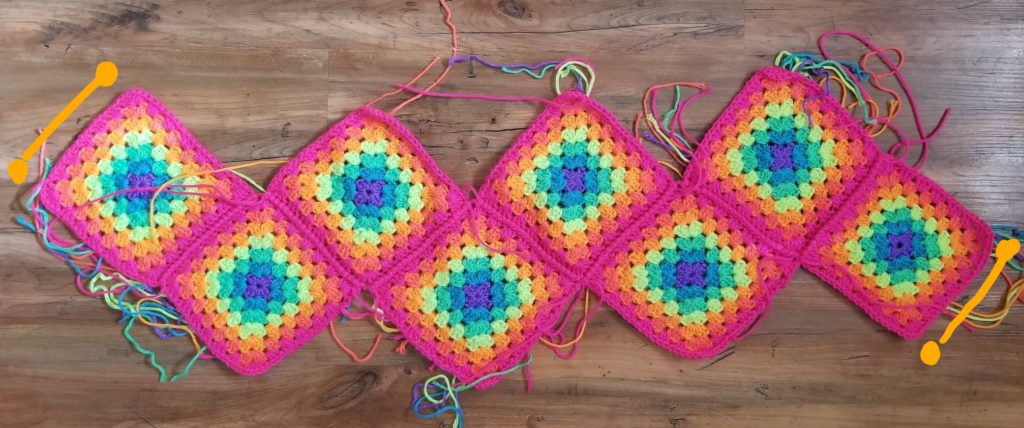
- Sew: Using a tapestry needle and a separate strand of yarn, sew the squares into the shape shown in the diagram below. Then, sew the edges marked with the yellow lines to each other to complete the main top body.
2. Weave: Weave in all ends to this point.
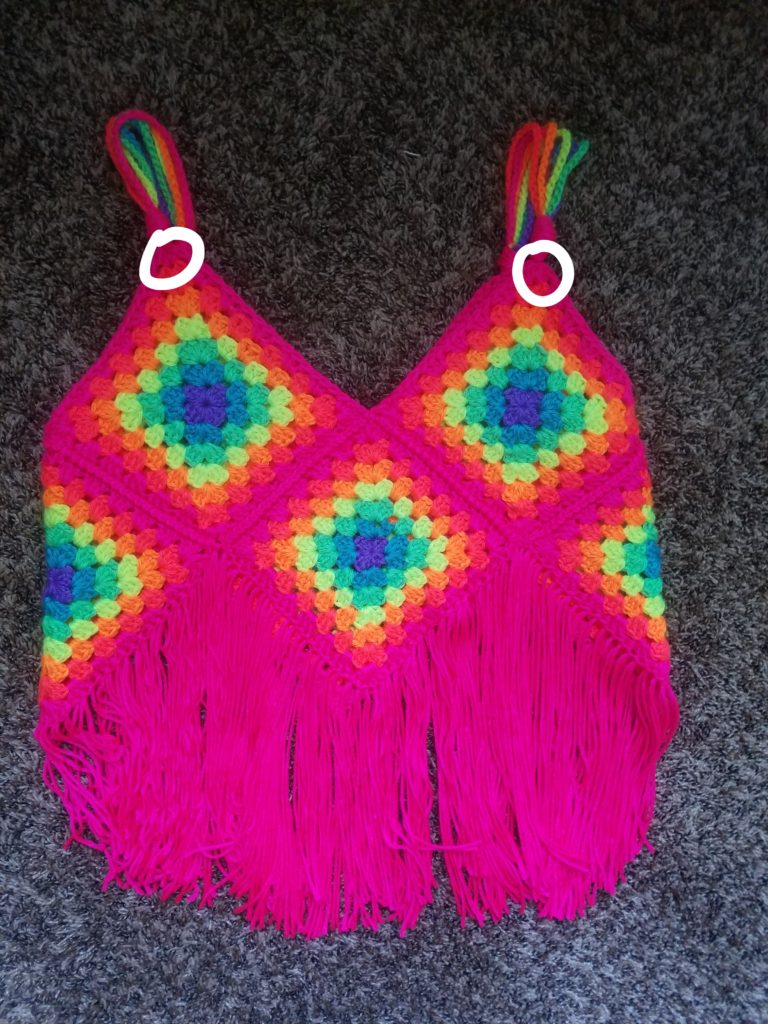
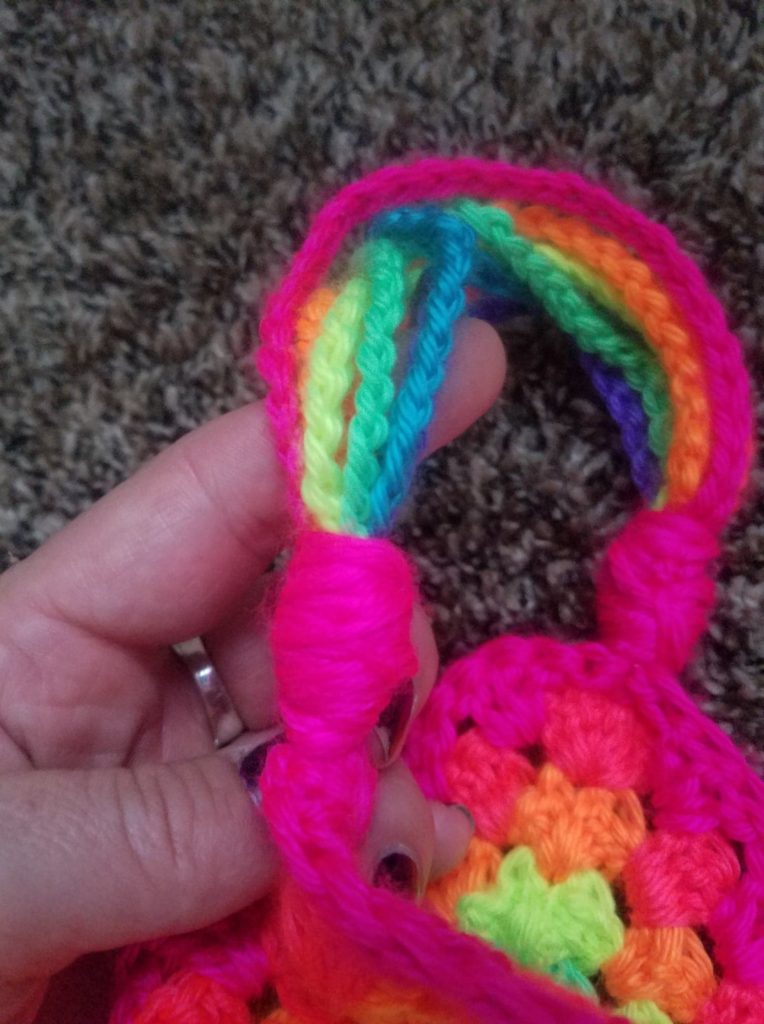
3. Create Straps: Position the garment as shown. Join the yarn in the tip chain 1 space of the square in the front (shown with the white circles) with a sl st, chain 30, then sl st the yarn to the tip ch-1 space of the square directly behind it. A very tall person could add 5-10 more chains, a very short person could reduce 5-10 chains. I used each of the 7 colors repeating the process above for each side.
4. Trim and Wrap the Strap Ends: At each ch-1 tip, I took all 7 end tails and overhand knotted them very tightly as close to the tip of the square as I could. I then trimmed them to about 1/2″. Cut a strand of yarn about 36″ long, leave 6″ of yarn trailing at the beginning and wrap the yarn tightly around the knot you just made with the strap tails. Continue to wrap to cover it completely, then knot the beginning and end tails of the wrapping yarn together and weave it into the wrap and trim flush. Repeat this for all 4 strap attachment point. Here is an image of how that looks up close.
5. Fringe: Cut 1 strand of fringe for each stitch and ch-1 space around the bottom edge of your top. Cut them about 25″ in length each. This number will vary for each size obviously. I used about 150 pieces. To fringe: From the right side of the garment, insert the crochet hook into a stitch as you normally would. Fold a strand of fringe in half and drape the looped end around the hook. Pull the looped on the hook through the stitch on the garment. Grab the two loose ends of the fringe strand and pull them through the loop on the hook. Pull VERY tightly to secure. Repeat around the entire bottom opening
6. Trim: Lay the top flat and thoroughly smooth and flatten the fringe strands. Using a sharp pair of scissors, trim them even across the bottom. Weave in any remaining ends.
Please hop over to my Facebook page at http://www.facebook.com/crochetverse
and share your tops! You can also join my group for VIP discounts and sharing! That can be found at https://www.facebook.com/groups/251695645349035/
Follow me on any of my social media to stay in touch, I would love to have you! Much love and yarn, Stephanie Pokorny (Crochetverse)
The information and photos in this posting are the sole copyrighted property of Crochetverse©2018. Please do not copy and paste any of the information contained within either electronically, verbally, or written in part or in whole. Instead, please share the DIRECT LINK to this posting only, and if you do, I thank you for sharing. You of course may sell anything you make from this pattern that you have made with your own two hands, no contract labor or mass productions are permitted. I need your visits to keep me around creating! Please never screenshot or copy and paste the info within, instead share the link so I may entertain your friends as well! If you credit Crochetverse as the designer that is greatly appreciated!


