So…….I’m DEFINITELY that chick who makes her husband pull a speed demon U-Turn in a busy intersection so I can go pick up that amazing what-not some obviously clueless person set on the curb as trash.
Holy SMOKES HONEY! Did you see that TV stand?! By spending only 212.75 on supplies, I can turn that 10.00 TV stand into a 40.00 TV stand. It’s a gift really. 😉
This led me to do a “versatility test” of sorts on my Cheshire Cat Scoodie pattern that I released a while back and can be found HERE! Now, *I* would most certainly wear it all day every day, but I realize that’s not practical for everyone, so I decided to give it a redo, so it will be wearable for EVERYONE FOREVER! In addition, I am going to include a little how-to on tassle making!
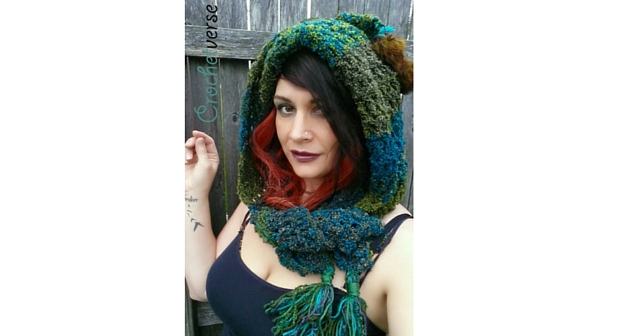
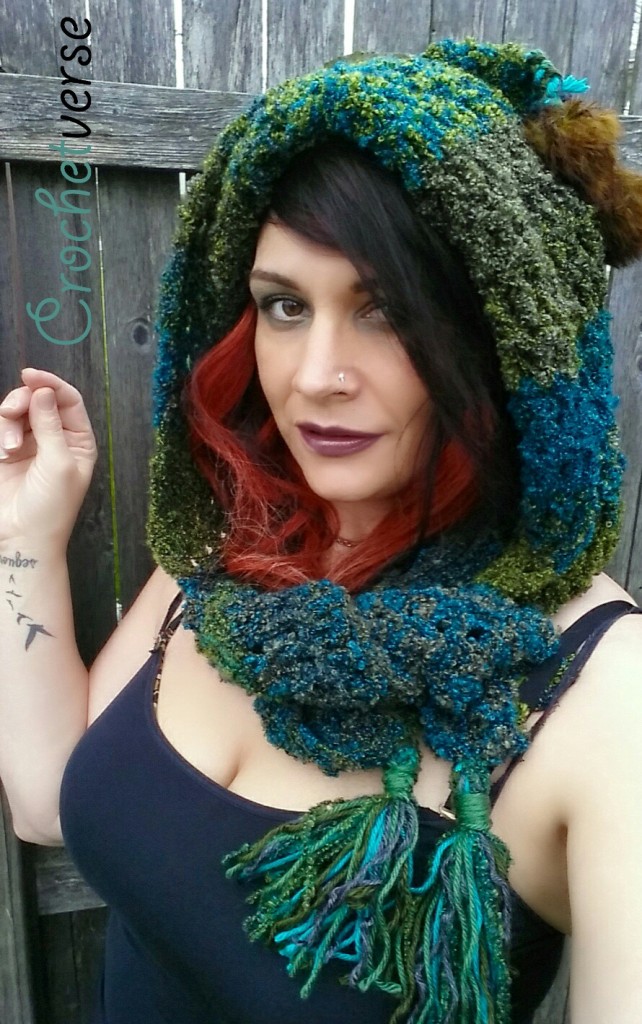
Allow me to show you my Pixie Scoodie. Tank top and hood? Because Ohio Winter 2015, yo. 😉
Believe it or not, (believe it, I’d never lie about crochet!) this is the SAME pattern as the Cheshire Cat Scoodie. VERSATILITY CHECK: PASSED.
Now onto the good part, let me give you the “recipe” to bake this baby right up in your own home. In no time at all, the sweet smell of yarn will be wafting through the kitchen.
THE RECIPE:
Ingredients:
-450 yards of worsted weight yarn. This is actually a great project to use those yarns that shine on their own. It’s created in a simple dc stitch, so grab up those fun textures that are hard to find a project for, in the words of Martha, “It’s a good thing” here.
Yarn sub?: Sure go right ahead, you will get similar result with most worsted weight yarn held double strand or any chunky yarn held single strand. Obviously, should you use chunky, the yardage required will be about 225 yards or half.
*I’ve use Joann Fabrics new line of yarn called Buttercream. Specifically:
(1) ball Rainbow Boucle in Green/Turquoise/Brown
-Size N/P (10.0mm) crochet hook, or size needed to obtain gauge. I am generally a tighter crocheter so take just a moment to measure.
– tapestry needle to weave in ends and any bobbles or do-dads you’d like to dangle from it
Gauge/Finished Dimensions:
4 rows and 6 sts = 4″ x 4″ in dc. The scoodie measures 50″ wide along the scarf portion and is in total 15″ tall. This will fit the average adult.
Baking Instructions:
*You will hold the boucle yarn DOUBLE stranded the entire project for worsted weight* There are two ways to do this: 1. Roll your ball into two smaller balls before you begin. 2. Sometimes this can get tangley, but I work using the inner strand and outer strand at the same time from the same ball. Entirely up to you.
This kind of yarn likes to tangle due to it’s texture. I had to pause and untangle a few times, if you think this will make you hurl your hood across the room, just buy 2 balls 🙂
Chain 82:
Row 1: dc in 3rd chain from hook and each remaining chain. (80 dc)
Row 2: ch 2, turn (I prefer a chain 2 for my dc turning chain, you may do ch-3 if you like, this also counts as the 1st dc here and throughout so you will skip the first st), skip 1st st and dc in each dc across. (80 dc)
Row 3: ch 2, turn, sk 1st dc, dc in each dc across.
Row 4: repeat row 3, tie off. You are now left with a long somewhat narrow scarf.
Now, we will work to create the hood portion.
Row 5: REATTACH the yarn in the 21st stitch from the right end with a sl st, ch 2, dc in next 39 sts, leave remaining 20 stitches unworked. (40 dc)
Row 6: ch 2, turn, dc in the nxt 39 sts. (40 dc)
Rows 7-15: repeat row 6, tie off after row 15.
You are now left with a smaller rectangle built upon and centered on the long narrow scarf.
Now, FOLD row 15 in half, then seam those two edges of Row 15 together, closing the top. The hood is created.
I’ve attached some pom-poms to the point of the top of the hat. Follow suit or say no thanks!
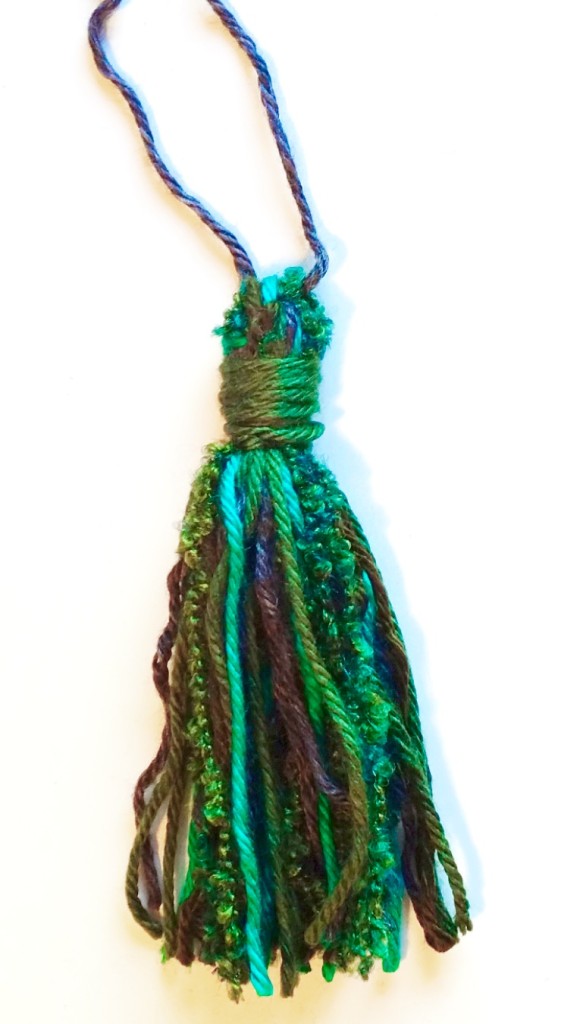
Now, for the tassels: I like them big and full! I used only Buttercream for the hood. For the tassels only, I added some worsted regular yarn in a gray, teal, and olive.
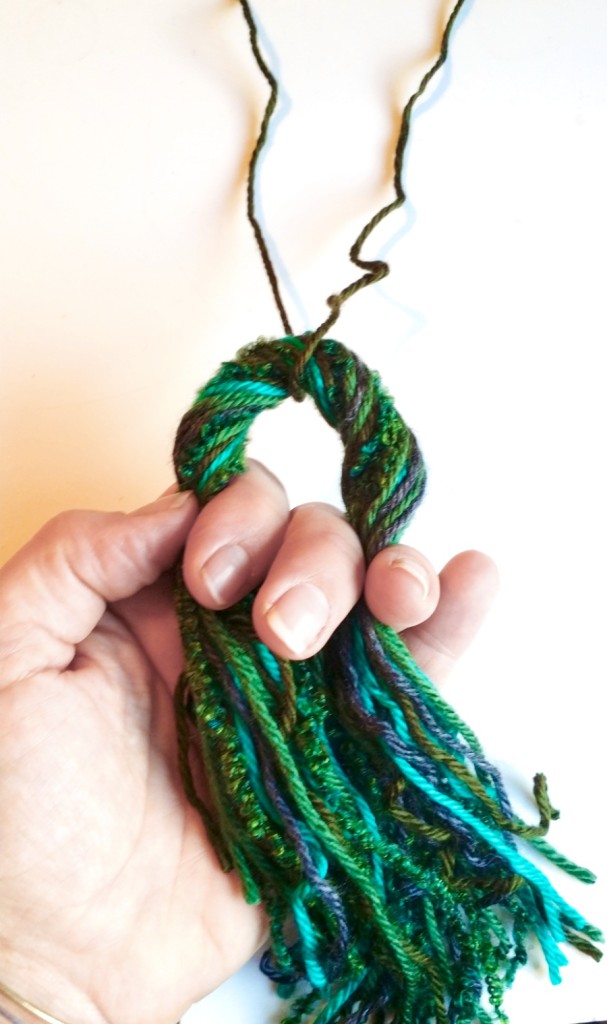
Cut 25 strands of yarn about 14″ long. Now twist the center and hold it in your hand, and using a 14″ piece of regular worsted weight yarn loop it throught the twisted portion as such:
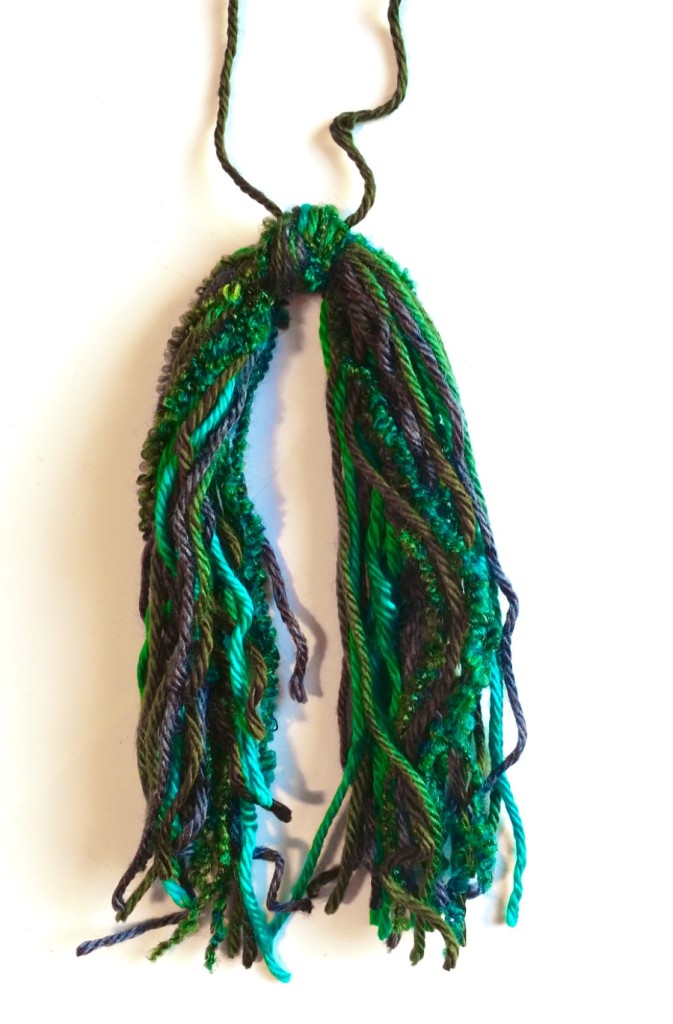
Next, take the loose ends of either side and holding them as one, knot them firmly together at the top encapsualting that strand you placed in the middle.
Finally, take another strand of yarn about 28″ long and fold it in half. Wrap it around the entire bundle of strands for about 3/4″ as shown in the photo, knot the two ends together and weave them into the bundle again. OH YEAH BUDDY, look at that!
Now, they are ready to stitch to the hat. Locate row 1 of the hat, the first one you made. Stitch one tassle to the 1st stitch at the corner and the last stitch at the corner of this row.
Place the hood on your head or the head of the recipient, fold the edge around the face back so that those pretty baby blues (or greens, or browns) can be seen. I folded mine about 3.5″ back. Using a strand of the yarn, tack this into place with a few stitches.
Weave in all the ends, and TA DAH! You’re done!
So, now that you’re sitting there with this gorgeous new hood in your lap, COME on over to the FACEBOOK PAGE HERE! and show me your goodies!
Prefer Instagram? Find us HERE! Tag us! We love to see your projects!
Please feel free to share the LINK ONLY or the WATERMARKED PHOTO only for this pattern. Do not copy/paste, or reshare this information otherwise. You can sell all of these that you create with your two beautiful hands, but no farming out or mass productions permitted. Thank you so much and enjoy!



[…] pattern can be found here and it’s very […]
[…] 3. Woodland Pixie Hood Scoodie by Stephanie Pokorny […]
This worked up fast and was easy to follow. I can’t figure out how to put the pompom on though. I could use a few tips or a photo to look at.
Thanks so much, Carol
Hi! I think got your question answered on my FB group, if not please feel free to let me know so I can help!
I love this pattern.
However, made it with the correct gauge and two strands and it is child size. I will have to go back and do some math to make it adult sized. Not sure what went wrong. I did use a
Different yarn because I couldn’t find the same Boucle Maybe it was really a lot of thinner
Hi! I am not quite sure what happened if you did in fact make gauge when starting. It could be that either you tightened up as you created or your yarn had less stretch that mine or was bulkier a bit. It should however be pretty easy to go larger, I would suggest trying it on as you go and stop when you feel it is the size you desire. Thanks for visiting me here!
Comments are closed.