


My kiddos have been OBSESSED with this app called Among Us. Have you heard of it?
Just make sure you figure out who the IMPOSTER is and you’re all good.
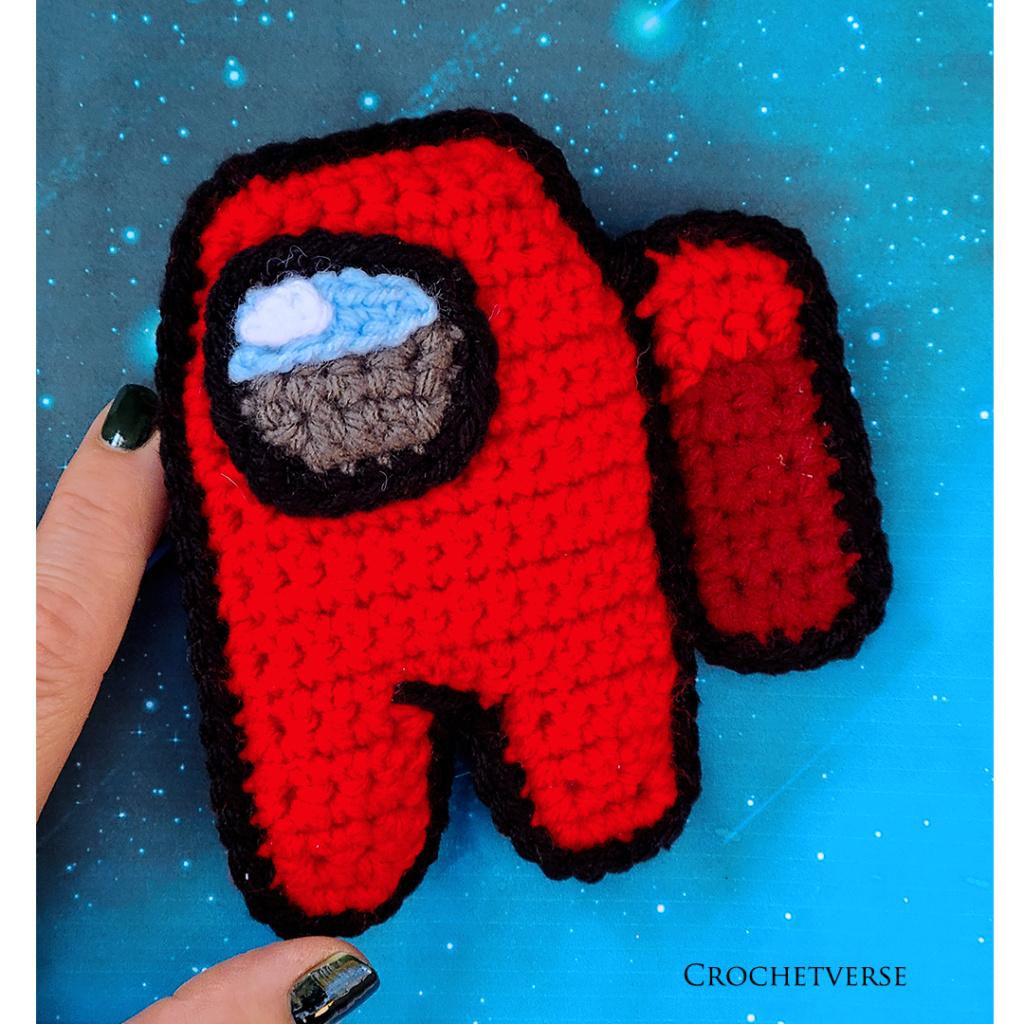
Your character is a super cute little astronaut! AND SO…
OF COURSE…
IN CROCHETVERSE MOMMY STYLE…
I HAD TO MAKE ONE!
You can make a whole bunch. You can make imposters. You can launch your own mission with your own little crochet babes in your house.
SUPER fast too!
I ask that you ALWAYS share the link to this pattern so that everyone can come visit me on my blog. I NEED your visits to keep the blog “lights on” and keep bringing you free patterns! Please NEVER share the pattern itself through copy paste or screenshots. I thank you for respecting the work that goes into providing free content. Much LOVE and Yarn, Stephanie Pokorny
Visit me on my Facebook page at Crochetverse and show me your makes!
Want to see my patterns, both paid and free? Go to https://www.ravlery.com/designers/stephanie-pokorny
I KNOW you will find some more amazing things to make!
Now, for the pattern:
Materials:
– small amounts of worsted weight yarn in red, dark red, black, white, light blue, dark gray
– G (4.25mm) crochet hook
– small amount stuffing
– tapestry needle, scissors
Finished Size:
About 5.5” tall by 5” wide
Want a bigger toy? Double the yarn and use an I(5.5mm) hook
Gauge:
While not critical, you need to make sure you have tight tiny stitches so the stuffing doesn’t show through.
Abbreviations:
Sl st slip stitch
Ch chain
Bb back bump
Sc single crochet
Nxt next
St(s) stitch(es)
Scdec single crochet decrease
skip
Instructions (US Terms):
Main Body Panel (Make 2):
With red and G hook, chain 9:
Row 1: sc in 2nd bb from hook and nxt 7 bb. (8)
Row 2: ch 1, turn, sc in each st. (8)
Row 3: ch 1, turn, 2sc in 1st st, sc in nxt 6 sts, 2 sc in last st. (10)
Row 4: ch 1, turn, sc in each st across. (10)
Row 5: ch 1, turn, 2sc in 1st st, sc in nxt 8 sts, 2sc in last st. (12)
Row 6-15: ch 1, turn, sc in each st. (12)
Row 16: (partial row make 1st leg): ch 1, turn, sc in 1st 4 sts.
Row 17-18: ch 1, turn, sc in each st across. (4)
Row 19: ch 1, turn,sc in 1st st, scdec over nxt 2 sts, sc in last st. (3)
Row 20: ch 1, turn, sc in each st across, cut yarn. (3)
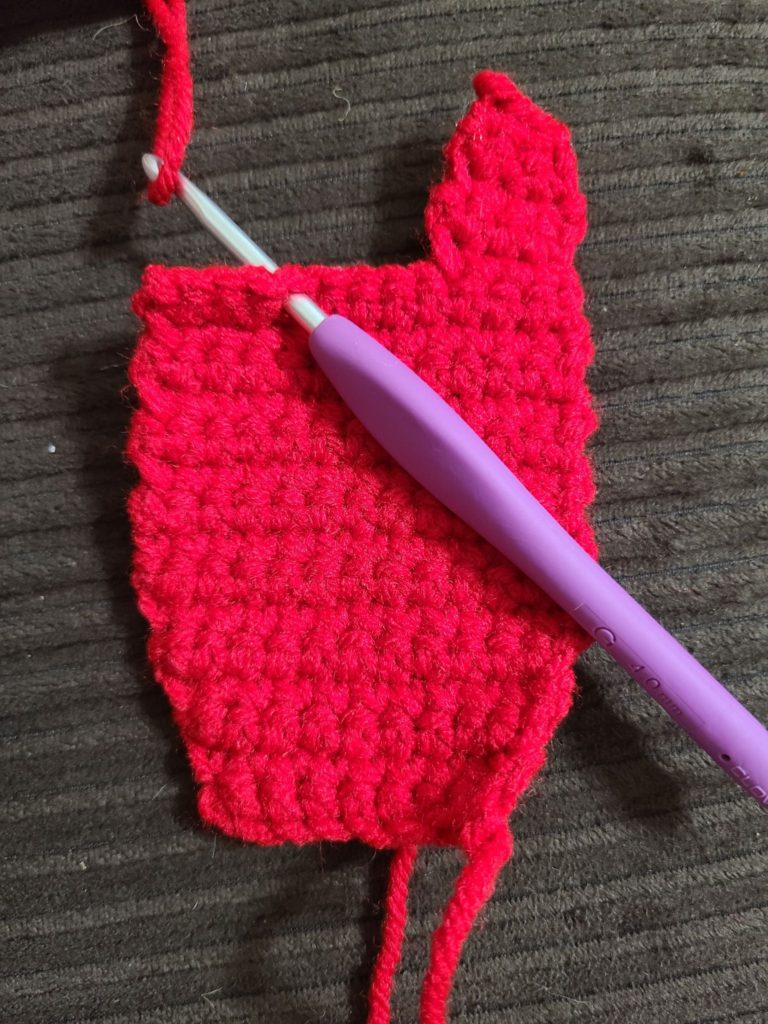
Position the panel so the leg just made is to the right and furthest away from you. Counting from the inside of the leg, skip 4 sts and rejoin red yarn with a sl st in 5th st to the left. (see photo here)
Row 1: ch 1, sc in same st as ch 1 and each st to end. (4)
Row 2-5: Repeat rows 17-20 of main body panel, DO NOT cut yarn continue to edge round.
Edge Panel:
This image shows the direction the round is worked.
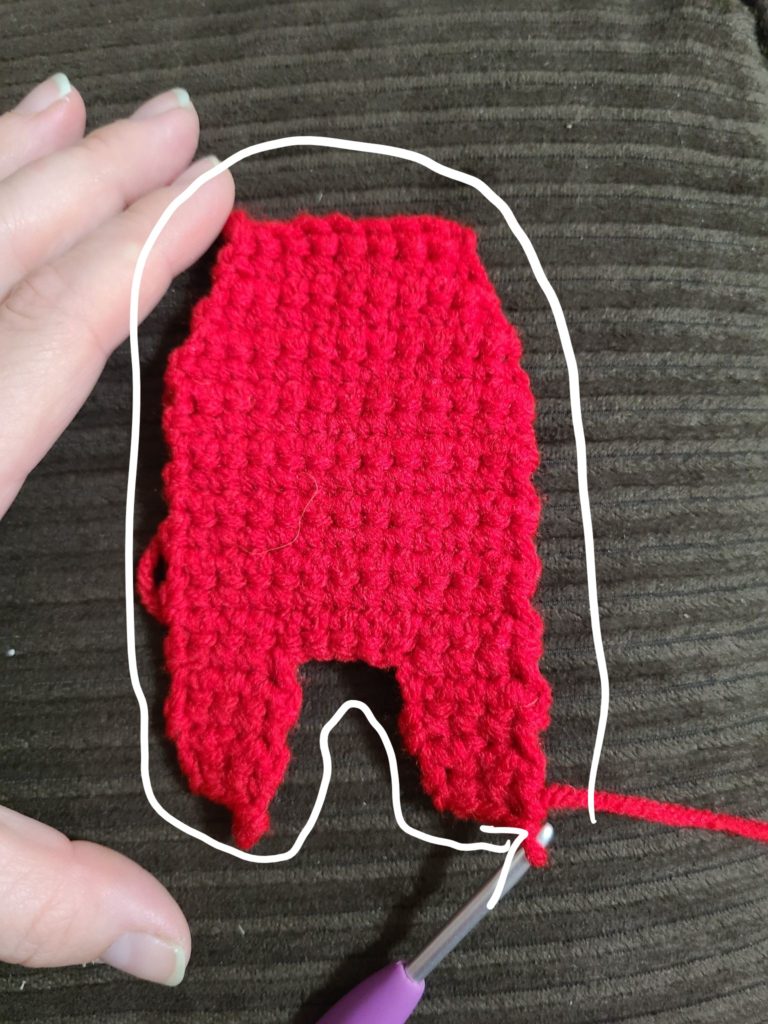
Rnd 1: ch 1, do not turn, sk 1st row end, sc in end of nxt 18 rows, sk the last row end, 3sc in 1st st across bottom of row 1, sc in nxt 6 sts, 3sc in last st, sk 1st row end down 2nd side and sc in end of nxt 18 row ends, sk the last row end down the 2nd side, 3sc in 1st st of bottom of leg, sc in nxt st, 3sc in last st on bottom of leg, sc in each of the 4row ends up the leg to the crotch, sk the 1st st between the legs, sc in nxt 2 sts, sk the last st between the legs, sc in nxt 4 row ends down 2nd inside leg, 3sc in 1st st on last row of leg, sc in nxt st, 2sc in last st on bottom of leg, sl st to 1st st made, cut yarn.
Joining the two main body panels:
Lay the panels on top of each other making sure that the right side of the edge round is facing out on both sides. *I tucked the ends from the main body panels inside the body as I joined and did not bother to weave them in.*
Rnd 1: Insert hook through any st working through both panels to join, then join black yarn, ch 1, sc in same sts, stuffing lightly with stuffing as you work the round and working through both sts matching st for st all the way around, sc in each around to join the panels together. Once around, sl st to 1st st made, cut yarn. Weave in any ends.
Backpack Panel (Make 2):
With dark red, chain 4:
Row 1: sc in 2nd bb from hook and nxt 2 bb. (3)
Row 2-6: ch 1, turn, sc in each sc. (3)
Row 7: ch 1, turn, sc in each sc across, at final yarn over/pull through of final sc, drop dark red leaving 18” end and change to red. (3)
Row 8-9: ch 1, turn, sc in each st. (3)
Edge Round: ch 1, working down the side in the ends of the rows, sc in the end of the 1st red row, sc in end of nxt red row changing to dark red at final yo/pull through, sc in end of each dark red row to end, 3sc in 1st st along short bottom, sc in nxt st, 3sc in last st, sc in each end of row until one before the red, sc in end of last dark red row changing to red at final yo/pull through by laying the yarn across the back of the panel so it will be hidden inside but you don’t have to cut and rejoin, sc in end of each of the two red rows, 3sc in 1st st along short top, sc in nxt st, 2sc in last st, sl st to 1st st made, cut yarn.
Join the backpack panels:
Lay the backpack panels on top of each other, matching colors making sure the right side of the edge round is facing out on both panels, in the same manner as you joined the main body panels together, join the black yarn in st working through both panels at the same time to join and sc in each st around, tuck the tails inside and there is no need to stuff. Once around, sl st to 1st st made and leave long tail to sew to body.
Using the long end tail from the backpack and making sure the right side of both black edge rounds are facing up, sew the backpack to the right side of the body so the bottom row of the dark red sits at the same row as the top of the leg on the right side of the body. I sewed the black edge round of the backpack behind the black edge round of the body. Weave in ends.
Face Shield:
With gray, chain 5:
Row 1: sc in 2nd bb from hook and nxt 3 bb. (4)
Row 2: ch 1, turn, sc in each sc. (4)
Row 3: ch 1, turn, sc in each sc, continue to edge round. (4)
Edge Round:
Do not turn, sc in each end of row and st around making 3sc in each corner, sl st to 1st st made, cut yarn.
With right side of gray end round facing up, join black with a sl st in any sc around, ch 1, sc in same st and each st around, sl st to 1st st made, cut yarn leaving a long tail to sew to face. Weave in all ends except the long last black end.
With light blue, chain 6:
Row 1: sc in 2nd bb from hook and each bb across, cut yarn leaving tail for sewing. (5)
Using the light blue tail and using the photo as a guide, sew the blue at the top just inside the black edge so it meets up.
With white, chain 3:
Row 1: sl st in 2nd ch from hook and nxt ch, cut yarn leaving tail for sewing.
Using the white tail and using photo as a guide, sew the white to the top left side of the blue.
Weave in all ends except the long black end from row 3. Using the long black tail sew the face shield to the left side of the body opposite the backpack. Weave in any remaining ends.
Using a strand of black yarn and tapestry needle, sew a crease line from the crotch to the left leg as seen in the main pattern photo.
I hope you enjoy! I would LOVE to see your creations. I am CROCHETVERSE on allll the social medias. Tag me!
MUCH LOVE AND YARN,
Stephanie Pokorny, Crochetverse
Follow me on any of my social media to stay in touch, I would love to have you! Much love and yarn, Stephanie Pokorny (Crochetverse)
The information and photos in this posting are the sole copyrighted property of Crochetverse©2020. Please do not copy and paste any of the information contained within either electronically, verbally, or written in part or in whole. Instead, please share the DIRECT LINK to this posting only, and if you do, I thank you for sharing. You of course may sell anything you make from this pattern that you have made with your own two hands, no contract labor or mass productions are permitted. I need your visits to keep me around creating! Please never screenshot or copy and paste the info within, instead share the link so I may entertain your friends as well! If you credit Crochetverse as the designer that is greatly appreciated!

This is so cute 🙂
Thank you!
There’s a typo on your ravelry link above I think? I haven’t played this game yet but my friend is dying to make us play haha so I’m bookmarking this pattern for later! Thanks!
Ok I will check that thank you! It is http://www.ravelry.com/designers/stephanie-pokorny
Comments are closed.