


RAINBOWS. SUGAR. GEMS. UNICORNS. THIS POST HAS IT ALL!
YOU HAVE FOUND HEAVEN ON EARTH! Welcome!
I follow the most fun weird group on Facebook called “Show me your Aspics”. In short, it is all things jello-y related. You will see some things that look damn delightful and things that look crazy, but you cannot help but be impressed! Think an entire breakfast meal encased in clear gelatin. Like… the weirdest coolest thing ever, right?!
I saw a post about a Japanese Candy called Kohakutou. It looks like RAINBOW GEMS. So, this obviously required me to RUN FULL SPEED to Amazon Prime and order Agar Agar so I could make it STAT. This is the Agar Agar I ordered for when you have to do the same!
(No affiliation with any of the links posted within, just sharing what I used and liked!)
AGAR AGAR LINK: https://amzn.to/2ziuzJL
THIS IS THE RECIPE I USED: https://somssikorea.wordpress.com/2018/01/30/kohakutou-japanese-crystal-jelly-candy/
I messed up and added too much food gel and poured too thin on the 1st batch. So add your coloring sparingly. You want it to be clear still with a hint of color. I actually doubled the recipe and used a 9×13 pan and it was about 1/2″ thick which ended up perfect. There. Now you can avoid my mistakes. Also, WEIGH YOUR AGAR AGAR. It says 1 tsp is 10g on the package and it really is not. It was a heck ton more to reach 10g on my kitchen scale.
And end up with THIS:
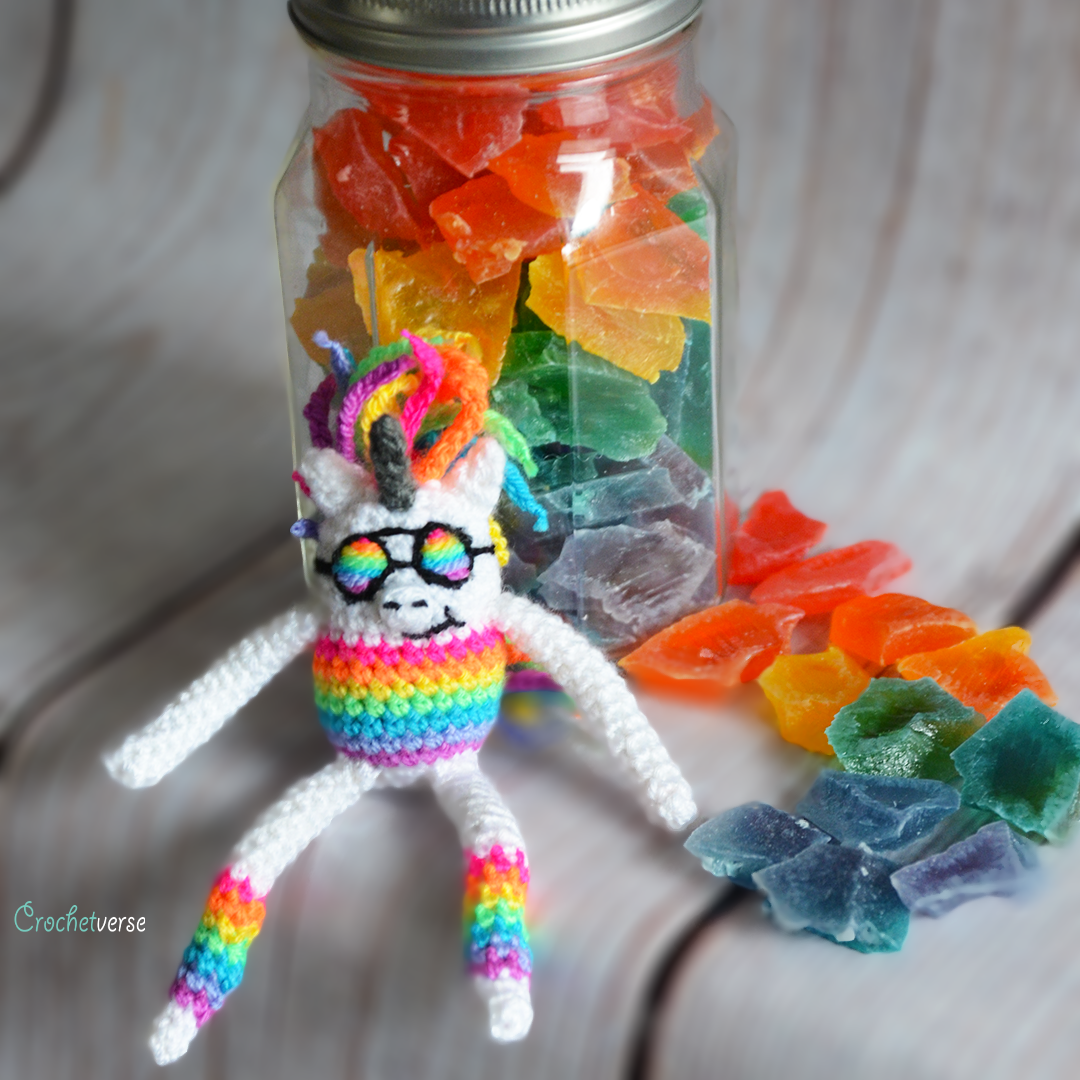
LIKE. OH. MY. GOSH. You can add flavor extracts to it as well. I plan to try a citrus with my next batch! You have to let it air dry for SIX days. The wait was not easy. I’ll admit. I sent my sister videos of it drying on the daily. Haha!
It is crunchy on the outside and jelly like kind of like the inside of a gumdrop on the inside. It is the coolest thing ever if you are a texture person! And I SO AM!
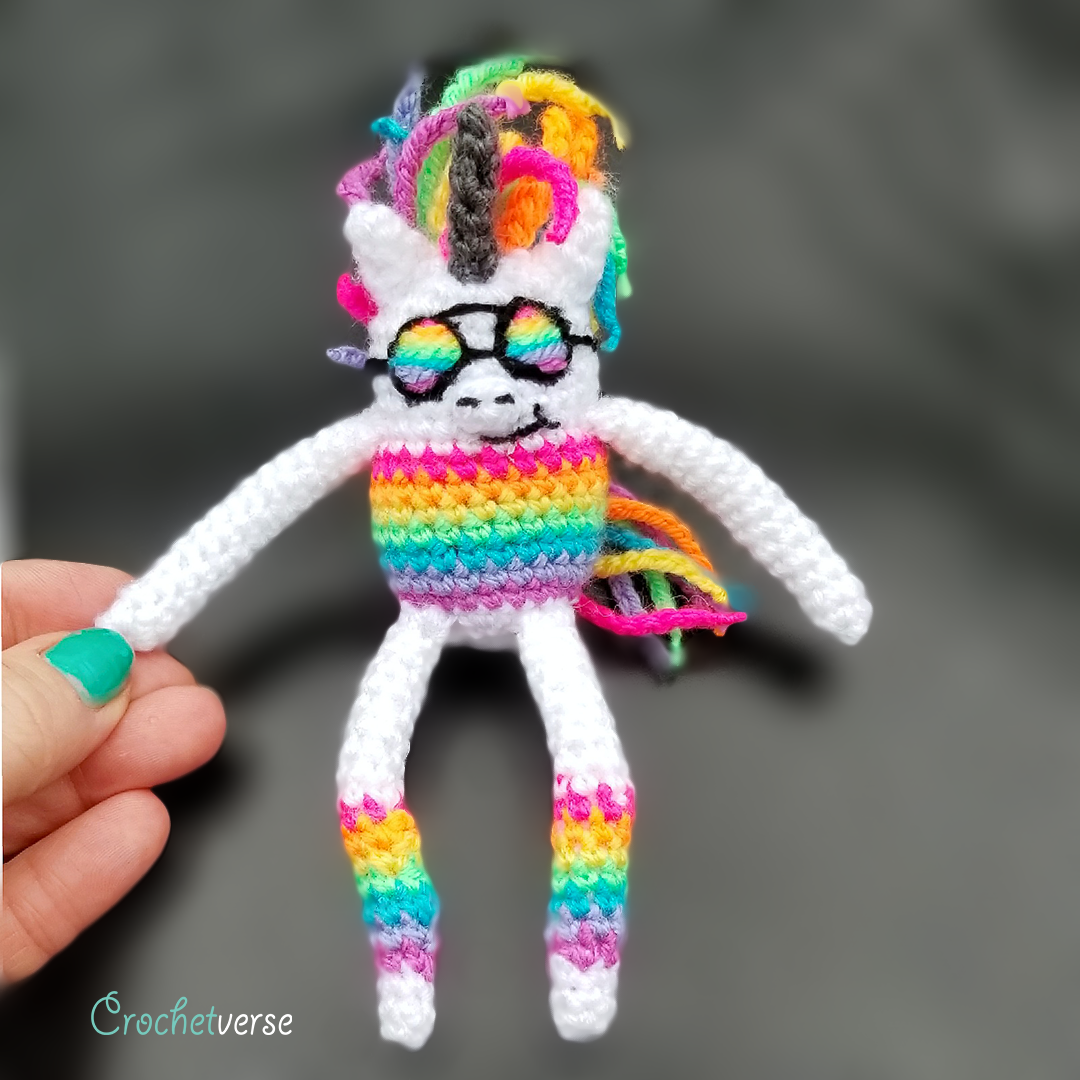
Of course, I had to incorporate crochet into this. And what better than a uber cool spindly leg unicorn with rainbow glasses. BTW LOOK AT THAT JAR SHAPE! It is their new “Sharing Jars” and I am obsessed with them for real! I got mine from Walmart here: https://bit.ly/2A2DP4t
Now for the free crochet pattern. I welcome you to make, sell, share them! I ask that you ONLY link back to my blog to share the pattern. Never copy and paste or offer elsewhere. Your visits here are critical to me being able to keep bringing you free patterns! So please, enjoy, and invite your friends to the blog! <3
Unicorn Pattern: (US Terms)
Materials:
– I used Stylecraft Special DK yarn for the project. You can sub in any yarn, but be sure you are working with a hook that feels too small for the yarn thickness. Amigurumi stitches should be TIGHT with no holes. (Colors shown are white, black, Fiesta (pink), Jaffa (orange), Citron (yellow), Bright Green (Green), Turquoise (blue), Lavender (light purple), Magenta (violet).
This is where I order my Stylecraft yarn from LOVEKNITTING.COM
https://www.loveknitting.com/us/stylecraft-special-dk
– D Hook & B Hook (I crochet TIGHTLY! You may have to drop hook sizes to achieve nice tight amigurumi style stitches)
– small amount polyfil stuffing
– tapestry needle and scissors
Finished Size:
About 6” tall
Gauge:
Start with the body: After you are done with the pink round, the piece should measure about 1.5” tail and 1.75” wide. If you are LARGER, your gauge is looser than mine, drop a hook size and try again. If you are SMALLER, your gauge is tighter than mine, go up a hook size and try again.
Instructions:
Body:
With D hook and white, make magic ring, ch 1:
Do not turn rounds. Do not join rounds unless specifically instructed.
Rnd 1: 8 sc in ring. (8)
Rnd 2: 2 sc in each sc around. (16)
Rnd 3: (sc in nxt sc, 2 sc in nxt sc) eight times total, sl st to nxt st, cut white. (24)
Rnd 4: join violet yarn with a sl st in the same st as the sl st join of the previous round, ch 1, sc in same st and in each rem st around, sl st to 1st sc made, cut yarn. (24)
Rnd 5: rep rnd 4 with purple yarn.
Rnd 6: rep rnd 4 with blue yarn.
Rnd 7: rep rnd 4 with green yarn.
Rnd 8: rep rnd 4 with yellow yarn.
Rnd 9: rep rnd 4 with orange yarn.
Rnd 10: rep rnd 4 with bright pink yarn.
Rnd 11: join white yarn with a sl st in the same st as the sl st join of the previous round, ch 1, sc in same st and in each st around. (24)
Rnd 12-17: sc in each sc around. (24)
I did not weave in any ends, I knotted together the tails inside and tucked them within. Then, I added a bit of polyfil stuffing to fill up the body the rest of the way.
Rnd 18: (sc in nxt st, scdec over nxt 2 sts) eight times total. (16)
Rnd 19: (scdec over nxt 2 sts) eight times total, sl st to 1st sc made, cut yarn, use tail to weave in and out of these 8 stitches with a tapestry needle and pull tightly to close hole. (8)
Legs (Make 2):
With D hook and white, make magic ring, ch 1:
Do not turn. Do not join unless specifically instructed.
Rnd 1: 6 sc in ring. (6)
Rnd 2-3: sc in each sc around, after rnd 3, sl st to 1st sc made, cut white. Tuck the tail inside the tip of the leg.
Rnd 4: join violet yarn with sl st in the same st as the sl st join of the previous rnd, ch 1, sc in same sc and each sc around, sl st to 1st sc made, cut yarn. Tie tails and tuck inside. (6)
Rnd 5: rep rnd 4 with purple.
Rnd 6: rep rnd 4 with blue.
Rnd 7: rep rnd 4 with green.
Rnd 8: rep rnd 4 with yellow.
Rnd 9: rep rnd 4 with orange.
Rnd 10: rep rnd 4 with bright pink.
Rnd 11: join white with sl st in the same st as the sl st join of the previous round, ch 1, sc in same sc and in each sc around. (6)
Rnd 12-20: sc in each sc around, after rnd 20, sl st to nxt sc and cut yarn leaving 14 inch tail to sew to body.
First, fold the last round of the leg opening in half making sure any seam from color joins will be in the back of the leg. Second, make sure the body is turned so any seam from the color changes is in back and sew the folded last round of the leg to rnd 3 of the body (the white round just under the violet. Repeat for the second leg. You can gently mold the legs to bend as you like.
Arms (Make 2):
With D hook and white, make magic circle, ch 1:
Do not turn or join rounds.
Rnd 1: 6 sc in ring. (6)
Rnd 2-16: sc in each sc around, after rnd 16, sl st to 1st sc made made and cut yarn leaving 14″ tail to sew to body.
First, fold the last round of the arm opening in half, then sew one arm to either side of the body, just above the pink round of the body.
Ears (Make 2):
With D hook and white, make magic ring, ch 1:
Rnd 1: 4 sc in ring. (4)
Rnd 2: sc in each sc around. (4)
Rnd 3: (sc in nxt sc, 2 sc in nxt sc) twice, sl st to 1st sc made, cut yarn leaving tail to sew to head. (6)
Sew round 3 of either ear to each side of the head.
Horn:
With B hook and dark gray yarn, make magic ring, ch 1:
Rnd 1: 4 sc in ring.
Rnd 2-5: sc in each sc around, after rnd 5 sl st to 1st sc made and cut yarn.
Sew round 5 of horn to head.
Snout:
With B hook and white, make magic ring, ch 1:
Rnd 1: 5 sc in ring, sl st to 1st sc made, cut yarn.
Sew to center of face about one round above the pink round on the body.
Nostril and Mouth:
These are stitched on with a needle and black yarn. I separated the 4 plies in half and just used two of the plies to stitch. You can enter and exit within the mane so any little nips of black that show through are hidden within the hair.
Tail:
With D hook, take an 18″ length of each of the rainbow colors. Leave a 6″ beginning tail, chain 15, pull the end through tightly to secure (knot close to last chain if desired) and trim to 1/4″. After you have done this with each color, overhand knot all the beginning tails together and attach to the booty of the unicorn. I used a drop of hot glue and secured to the green round on the body.
Mane:
Insert the hook around a stitch near the horn at the top of the head. Fold a 24″ length of yarn in half. Lay the looped end over the hook and pull through the head. This is how it looks.
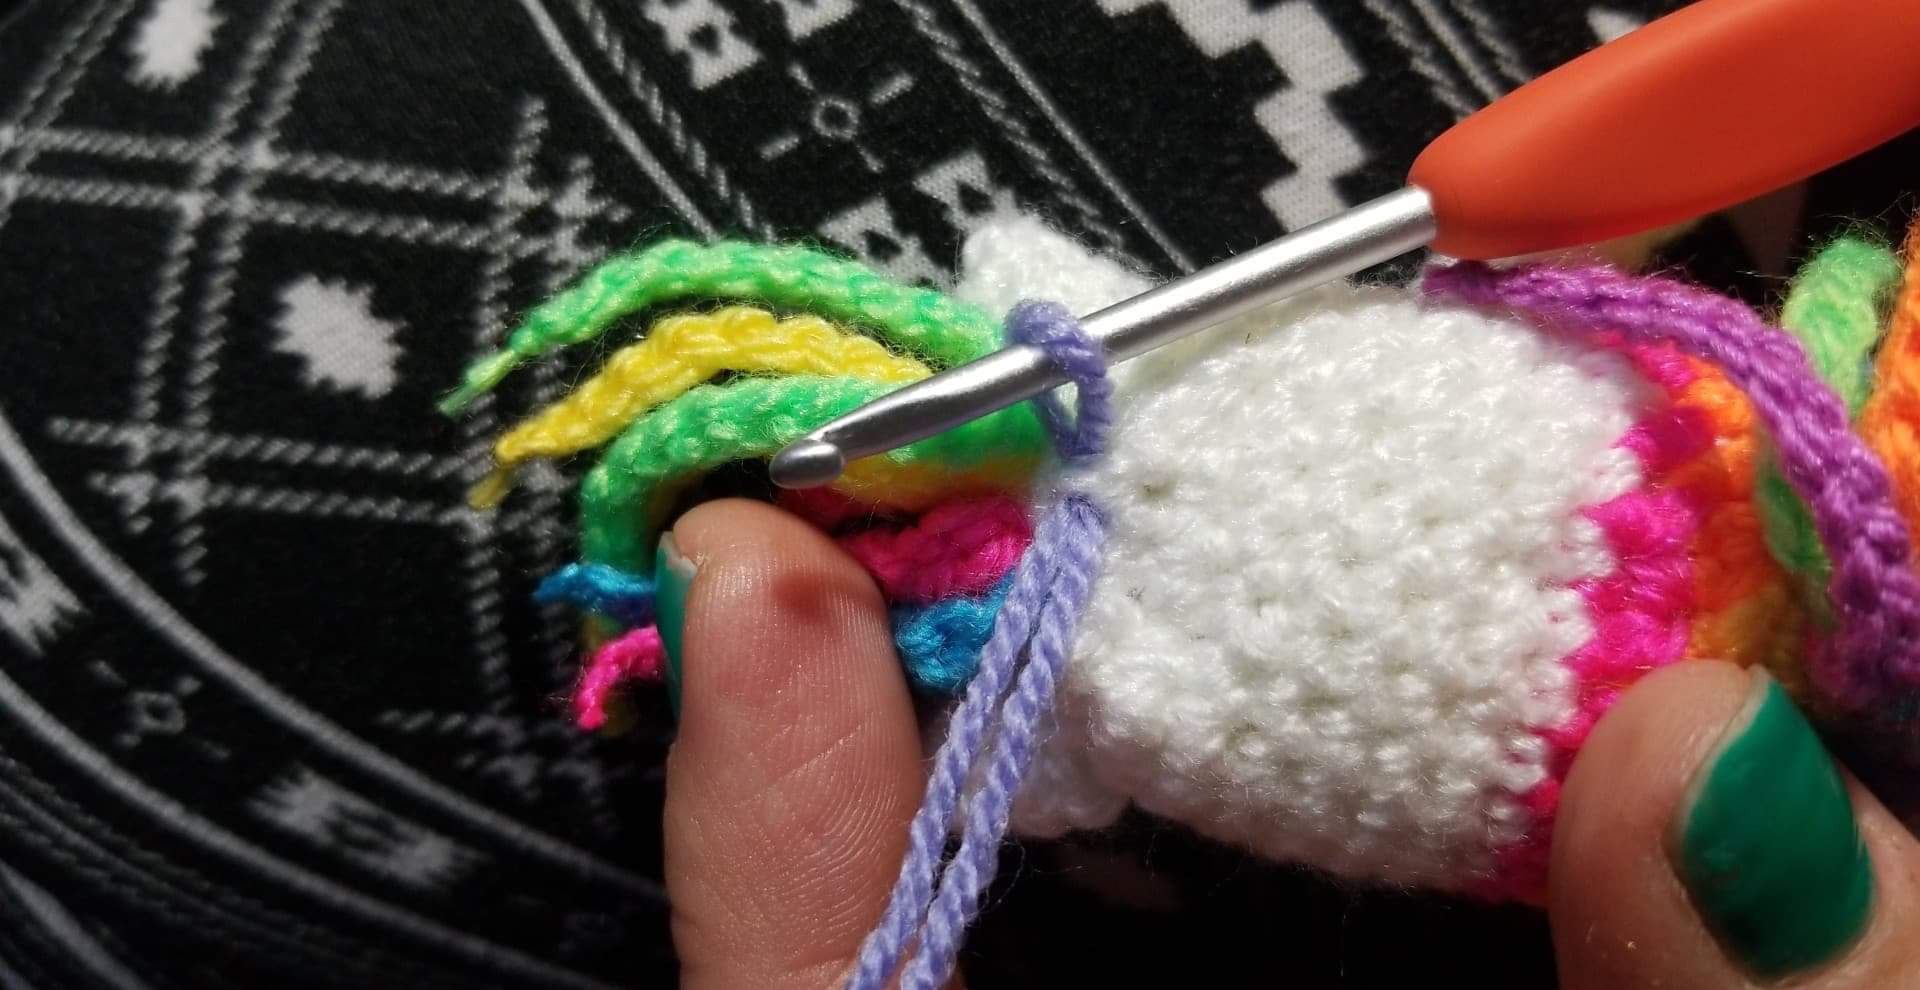
Now, using one tail of the yarn, chain 15. Pull the end tightly to secure and trim to 1/4″. Insert the hook into the 1st chain you made on the first and pull the second tail through, chain 15. Again tightly pull, cut, trim. Repeat using each color of the rainbow in the same manner
Glasses:
These are embroidered on. The black outline is done 1st. Then, within each lens a stripe of the rainbow in each color is done; pink on top down to violet on the bottom. This honestly took some time and finesse. If embroidery is not your thing, please feel free to place with stitched eyes of any type or small black buttons.
Follow me on any of my social media to stay in touch, I would love to have you! Much love and yarn, Stephanie Pokorny (Crochetverse)
The information and photos in this posting are the sole copyrighted property of Crochetverse©2018. Please do not copy and paste any of the information contained within either electronically, verbally, or written in part or in whole. Instead, please share the DIRECT LINK to this posting only, and if you do, I thank you for sharing. You of course may sell anything you make from this pattern that you have made with your own two hands, no contract labor or mass productions are permitted. I need your visits to keep me around creating! Please never screenshot or copy and paste the info within, instead share the link so I may entertain your friends as well! If you credit Crochetverse as the designer that is greatly appreciated!
