

")
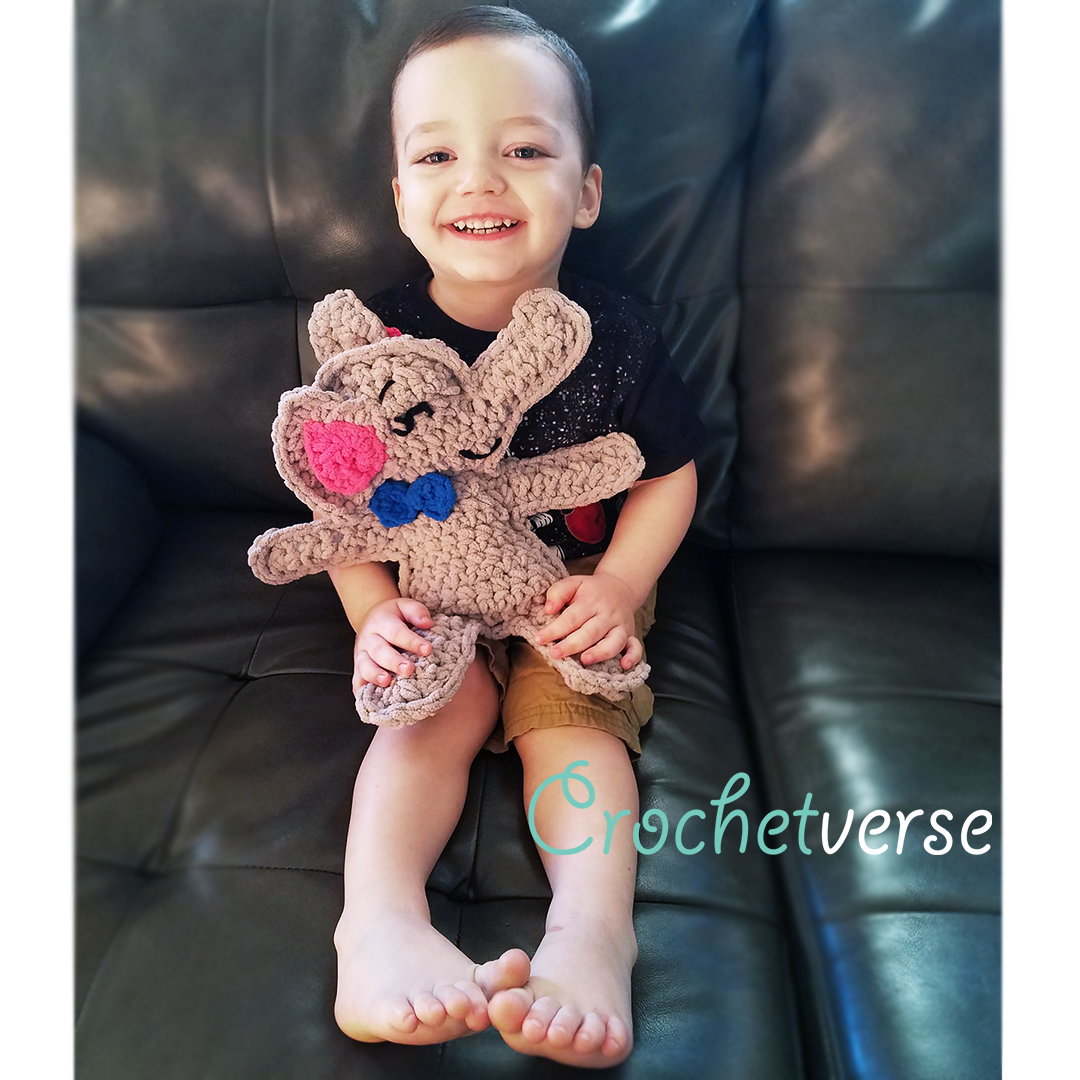
So, I am LOVING Ragdolls lately. They are just the perfect touch of simplistic cuteness and whismy!
And my son is in LOVE with Bernat Blanket, I mean… IN LOVE.
His Snuggly Blanket is the 1st thing he grabs in the morning! So, naturally, I wanted to make a ragdoll, but use the Blanket Yarn and I think he turned out just adorable!
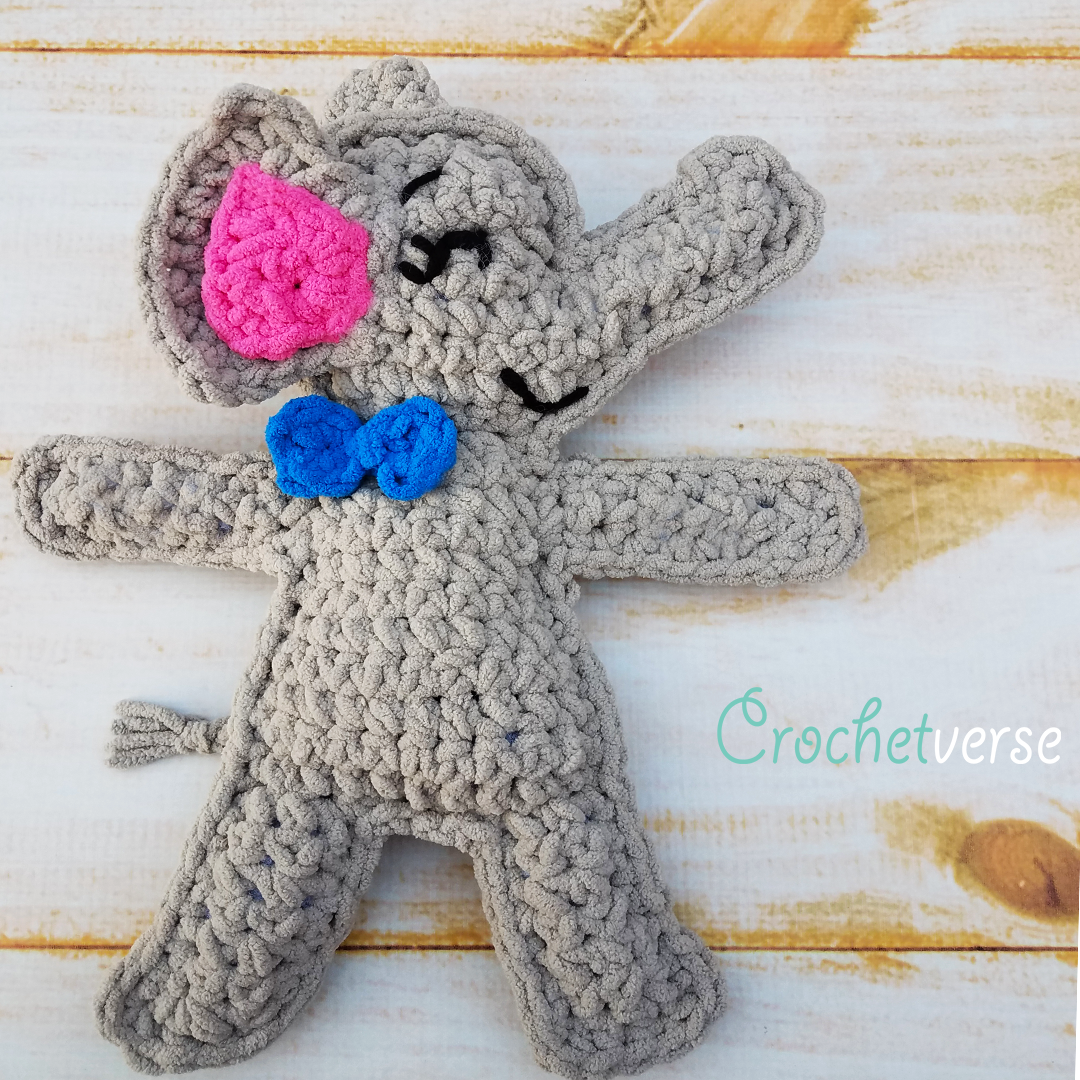
Put the bow on the ear for a dainty girl or on the neck for a dapper boy <3
This happy little elephant takes just 1-2 hours and is really easy! I have included TONS of pics to make it as clear a possible! I would love to see your babies when you are done! Head over to the Facebook page here http://www.facebook.com/Crochetverse and show me your makes!!
He is just loving him..he said, “Momma, he is sooooo cute!”
Without further chatter…
THE PATTERN:
Materials:
– Super bulky (size 6) yarn in gray, pink, and blue
About 100 yards of the gray and less than 10 yards each of the blue and pink
Shown: Bernat Blanket in Pale Gray and Bernat Blanket Brights in Royal Blue and Pixie Pink
– Just few yards of regular worsted weight yarn in black for the features
– Small amount of Fiberfil stuffing
– Size N (9.0mm) crochet hook
– Basic tool kit (scissors, tape measure, tapestry needle)
Finished Size:
About 14” tall x 12” wide when laid flat
Gauge:
While it is not super important, you want your stitches to be tight and firm so the stuffing doesn’t show through and he has some “structure” to him. I am an average to tight crocheter, so feel free to drop a hook size if you are very loose.
Instructions:
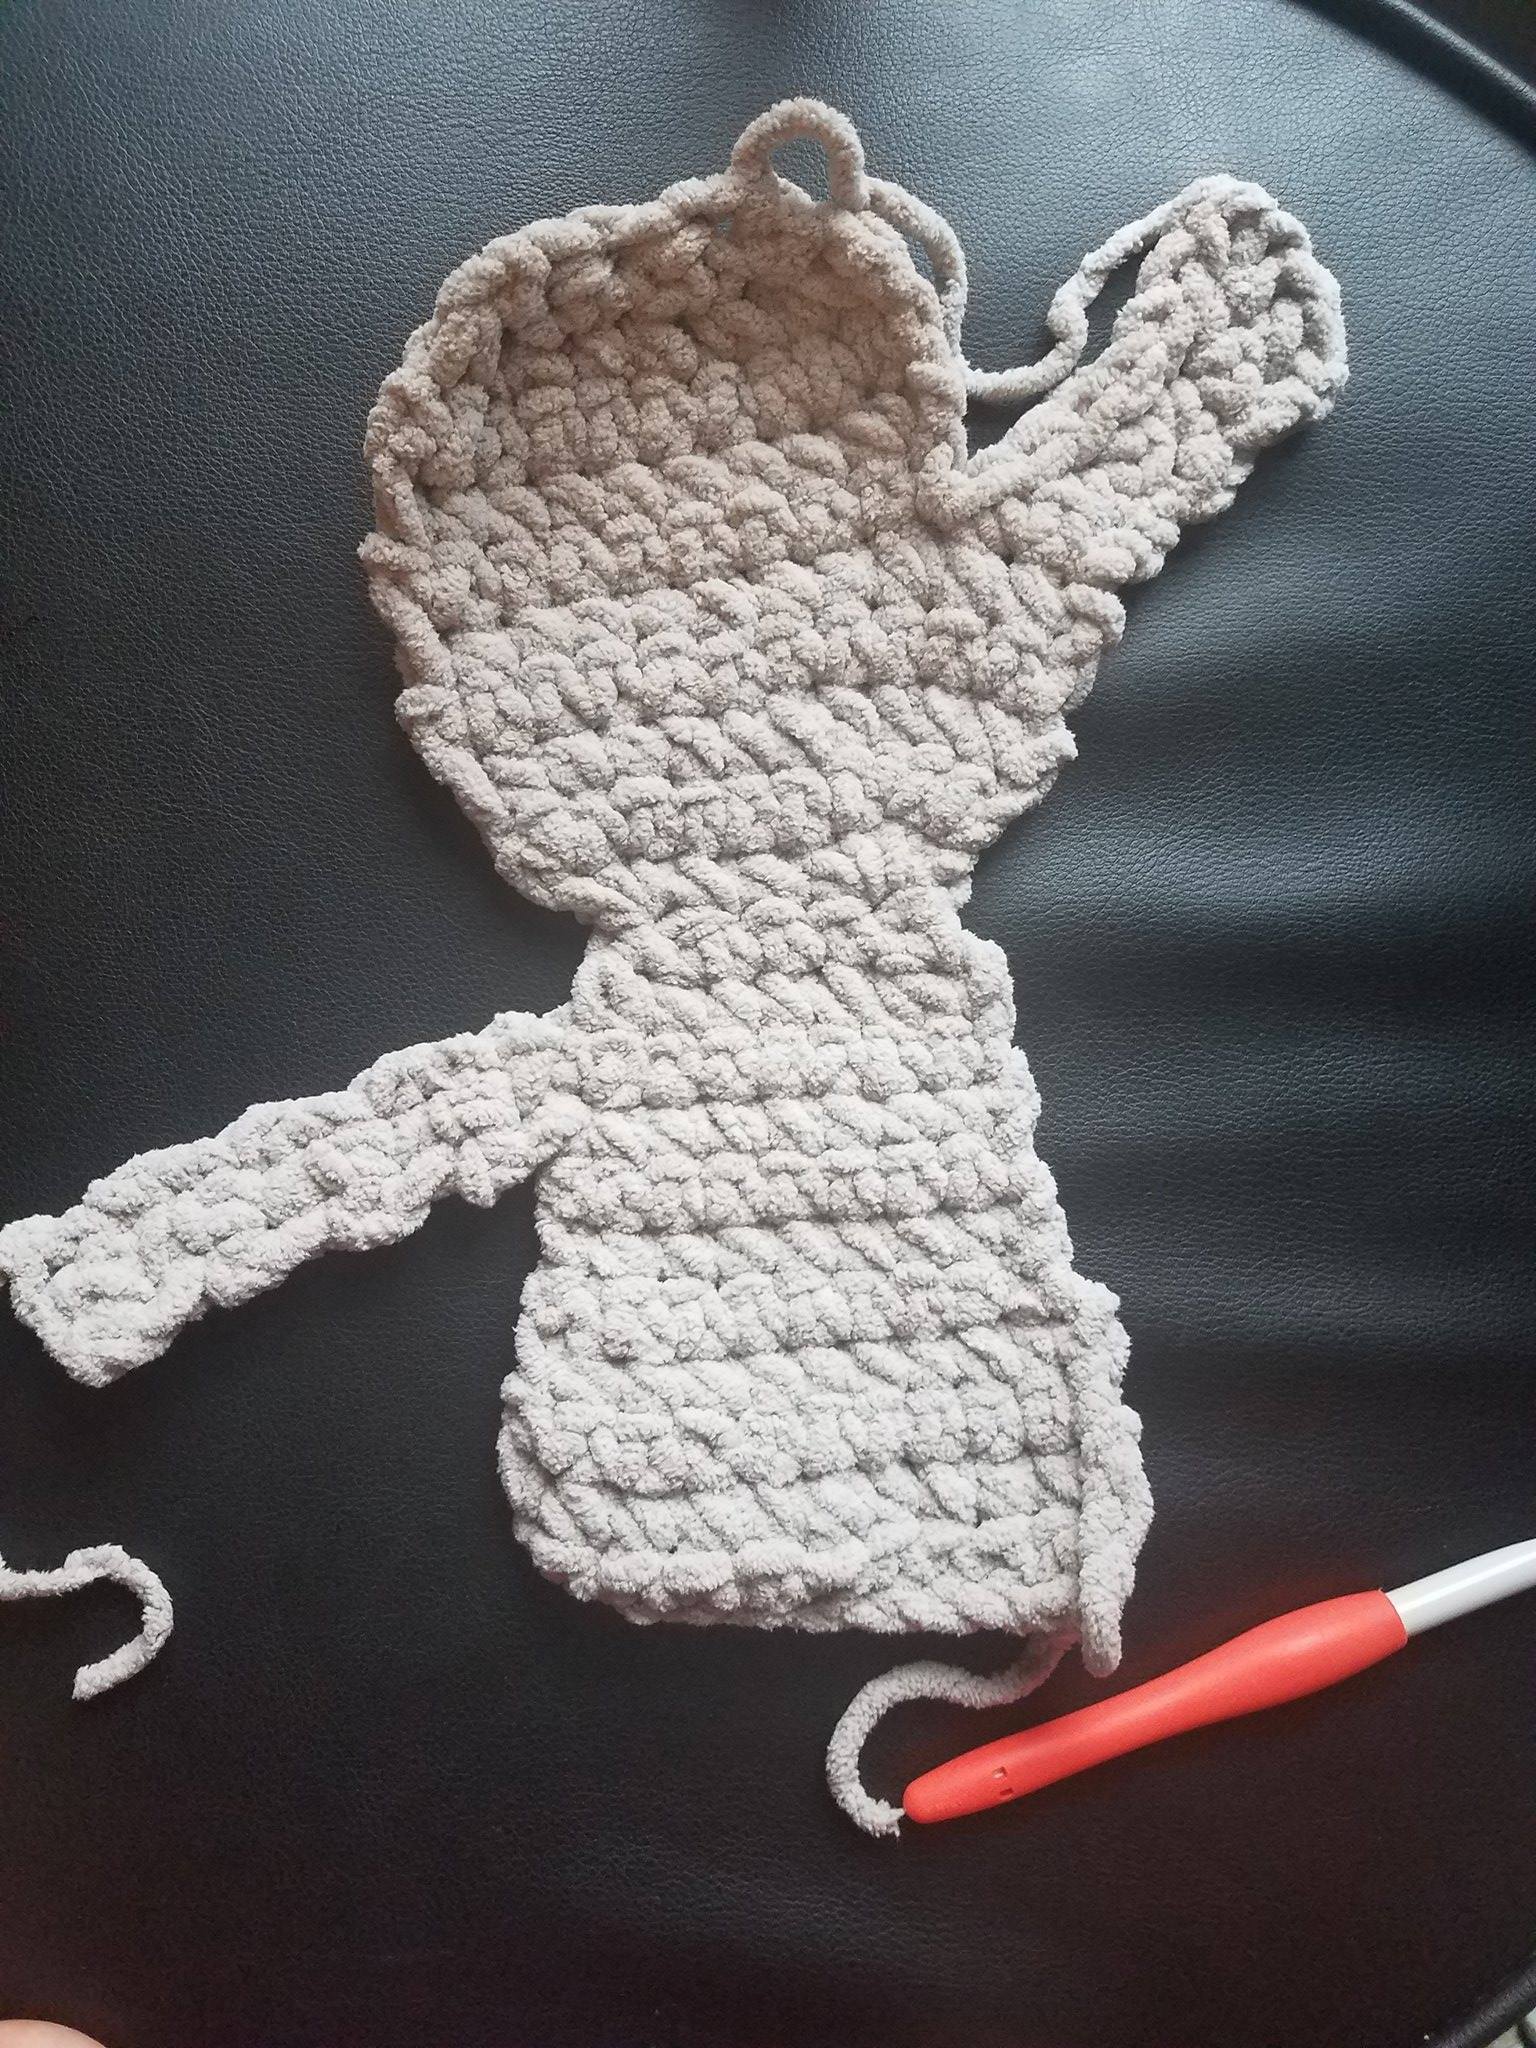
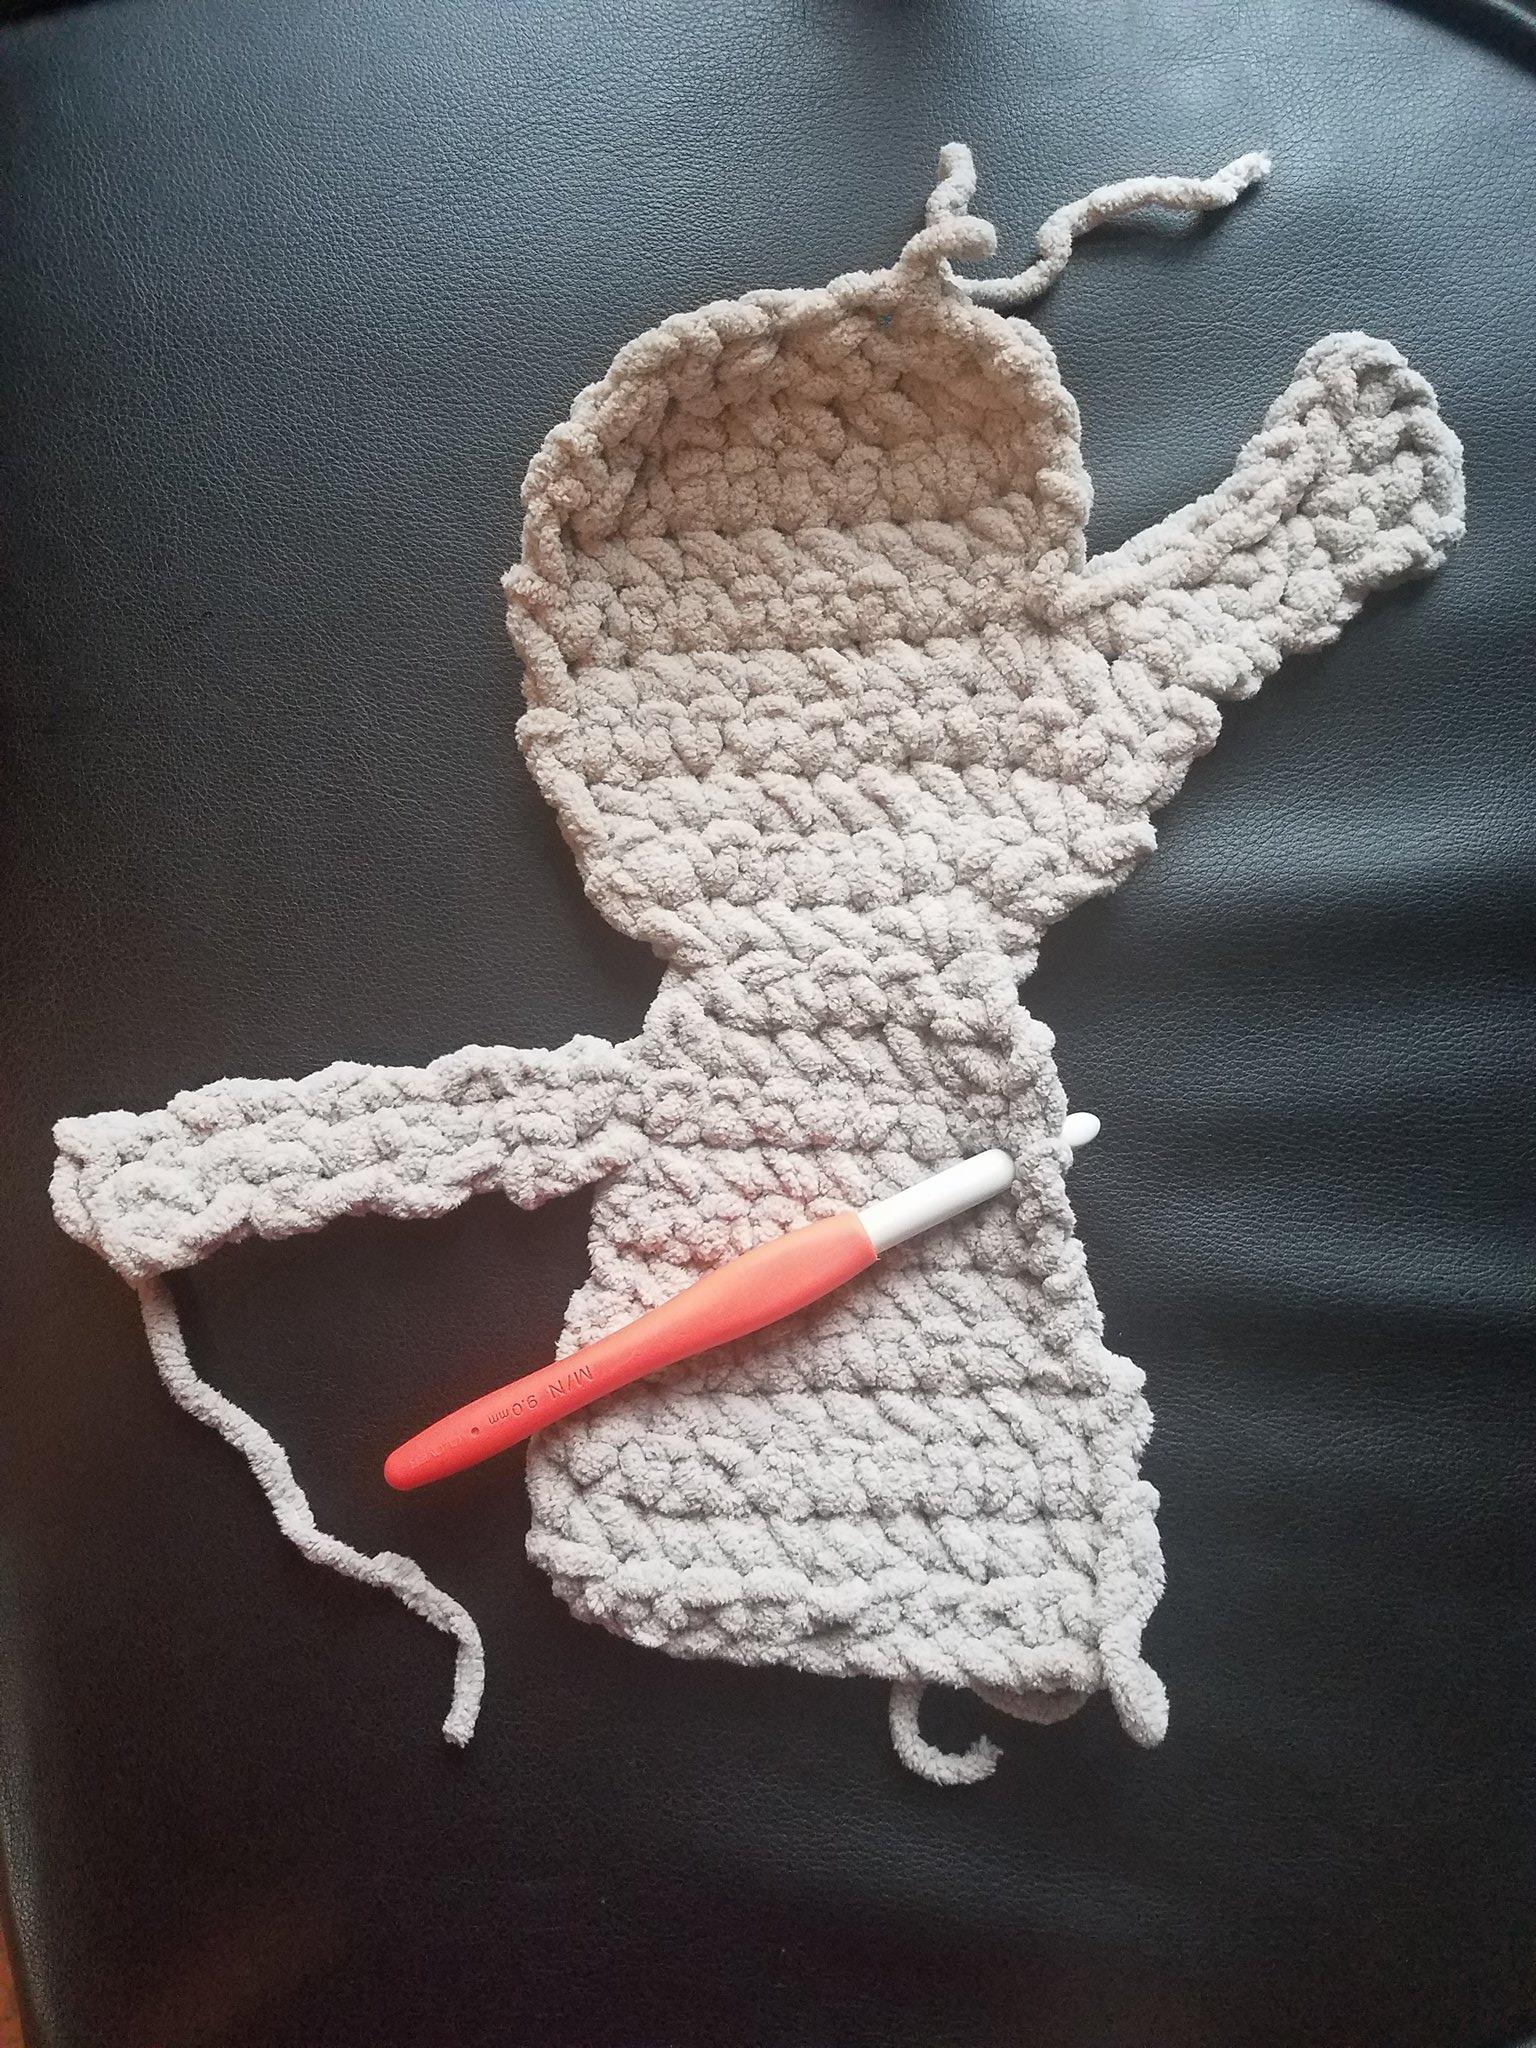
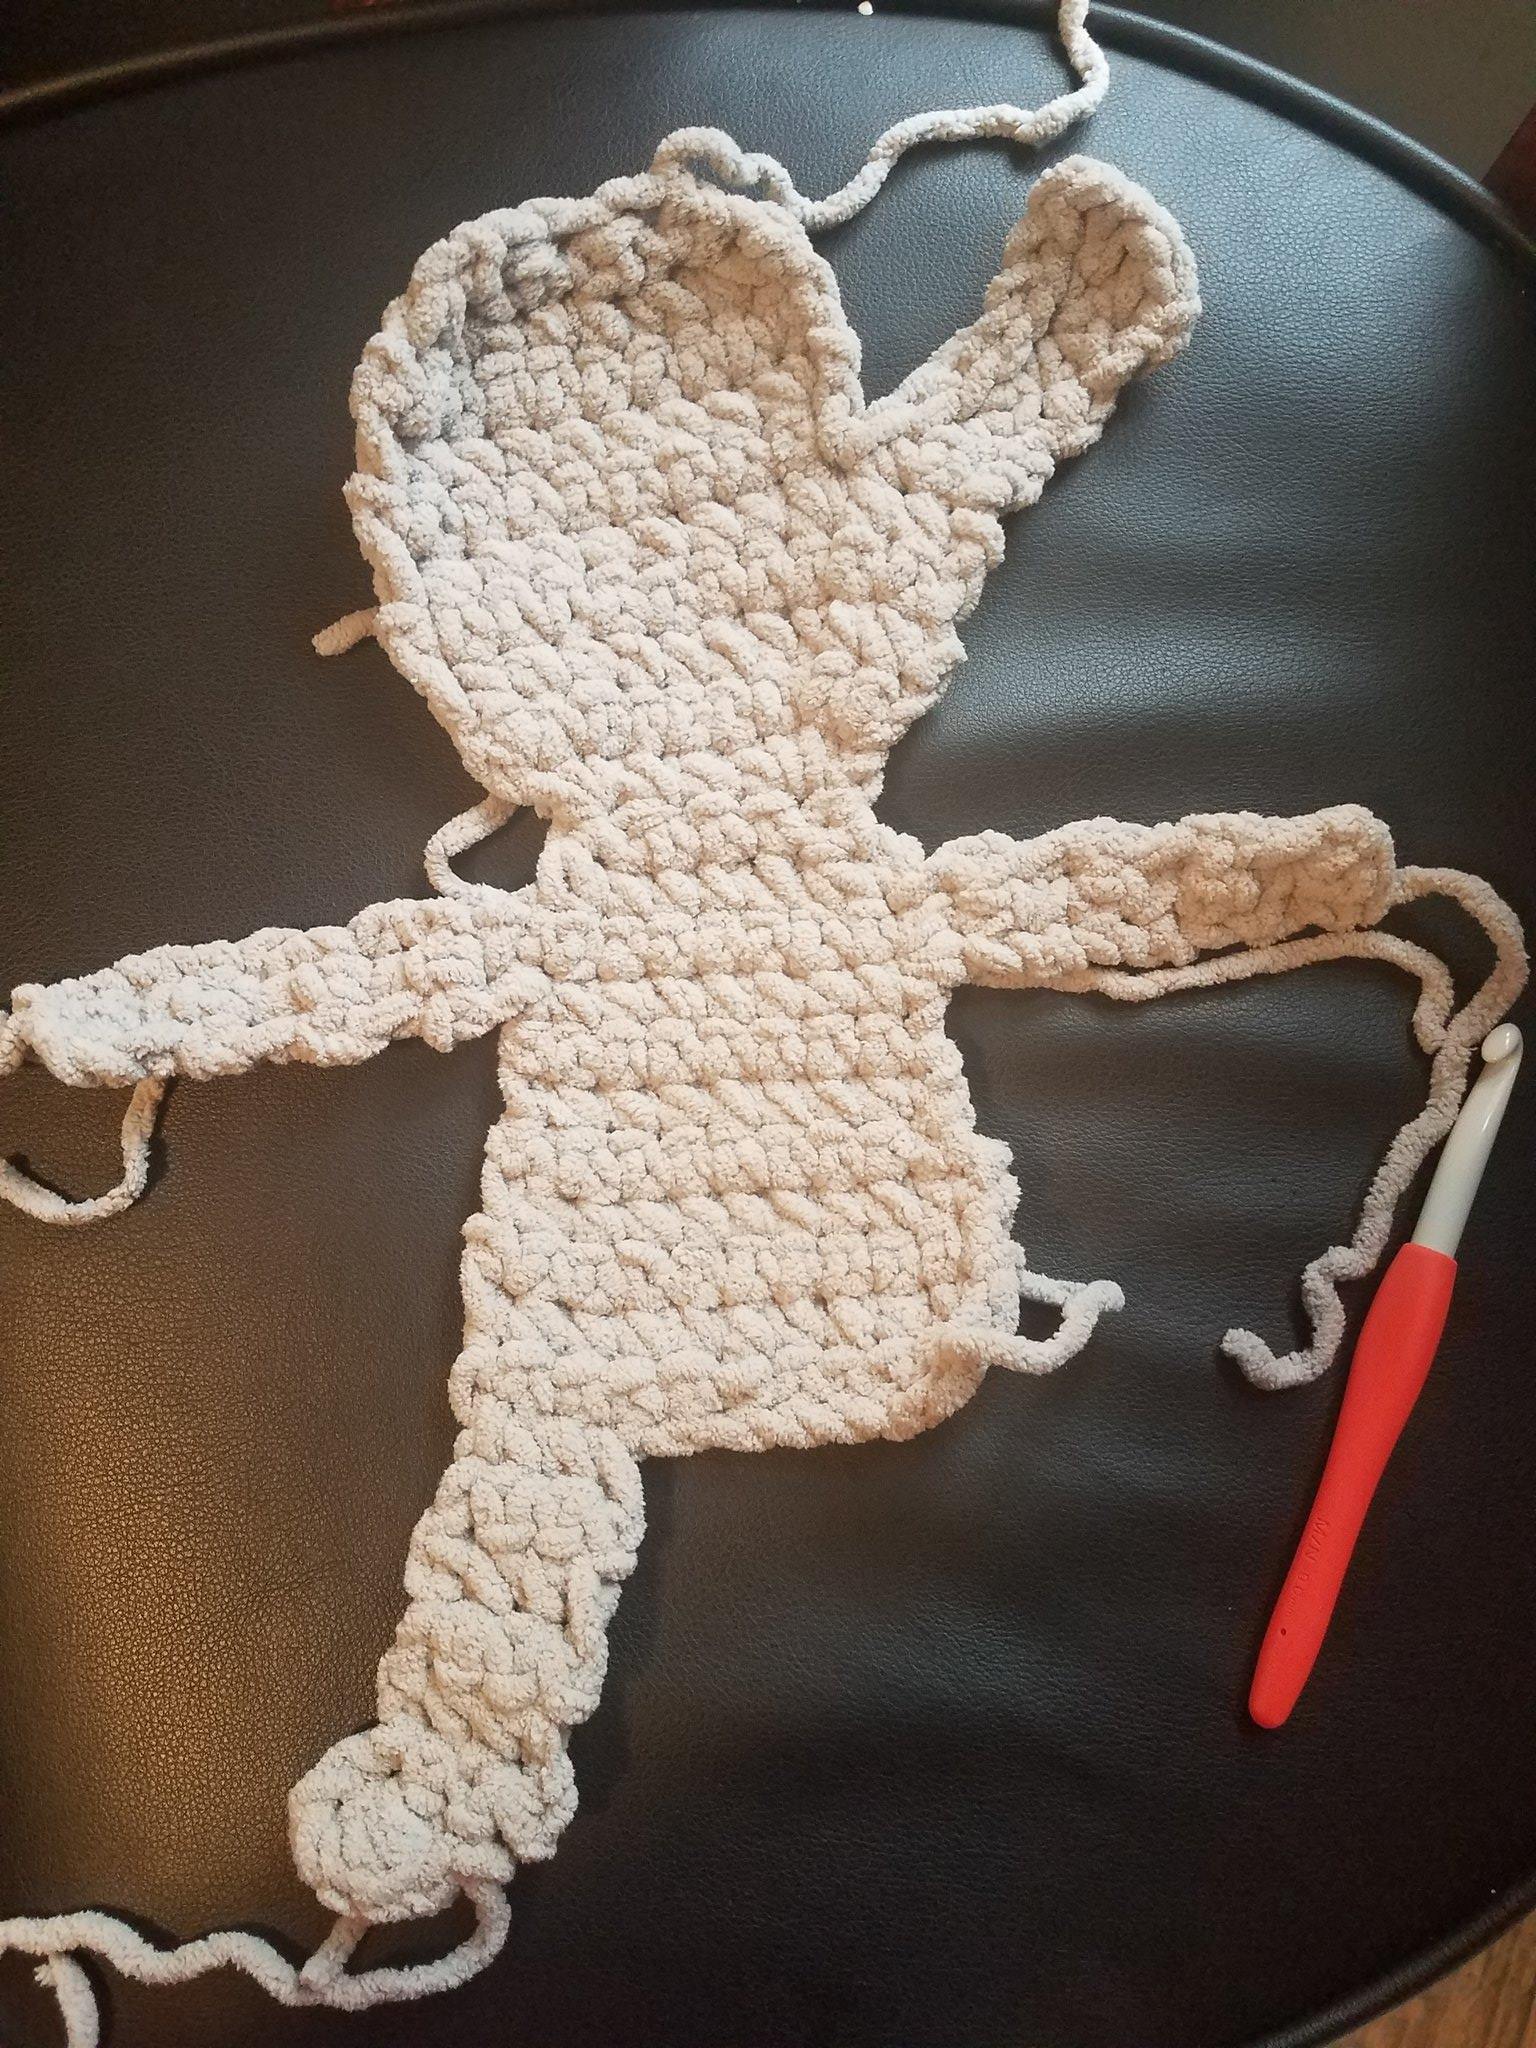
Body Panel (Make 2):
With gray and 9mm hook, chain 11:
Row 1: sc in 2nd ch from hook and each rem chain. (10)
Row 2-4: ch 1, turn, sc in each st across. (10)
Row 5: ch 1, turn, sc dec over 1st 2 sts, sc in nxt 6 sts, sc dec over last 2 sts. (8)
Row 6-9: ch 1, turn, sc in each st across. (8)
Row 10: ch 1, turn, sc dec over 1st 2 sts, sc in nxt 4 sts, sc dec over last 2 sts. (6)
Row 11: ch 1, turn, sc dec over 1st 2 sts, sc in nxt 2 sts, sc dec over last 2 sts. (4)
Row 12: ch 1, turn, 3 sc in the 1st st, sc in nxt 2 sts, 3 sc in last st. (8)
Row 13: ch 1, turn, 2 sc in 1st sc, sc in nxt 5 sc, 2 sc in each of the last 2 sc. (11)
Row 14-15: ch 1, turn, sc in each st across. (11)
Row 16 (Partial): ch 1, turn sc in 1st 2 sc. (2)
Row 17-21: ch 1, turn, sc in the 2 sc across. (2)
Row 22: ch 1, turn, sc in 1st st, 2 sc in last st. (3)
MOVE ROW: We will SLIP STITCH DOWN the side of the trunk rows 22 down to 16, working one sl st in the SIDE of each row around the st at the edge: ch 1, do not turn, loosely slip stitch down, 1 sl st per row end, for a total of 7 sl st.
Resume:
Row 23: There are 9 sts left unworked to left of the trunk base on row 15, work 1 sc in each of the 9 sts across.
Row 24: ch 1, turn, sc in each of the 9 sts across. (9)
Row 25: ch 1, turn, 2 sc in 1st st, sc in each of the last 8 sts. (10)
Row 26: ch 1, turn, sc in each sc across. (10)
Row 27: ch 1, turn, sc dec over 1st 2 sts, sc dec over nxt 2 st, sc in nxt 2 sts, (sc dec over nxt 2 sts) twice. (6)
Row 27: ch 1, turn, sc dec over 1st 2 sts, (sc dec over nxt 2 sts) twice, tie off. (3)
Create Arms:
First Arm:
Row 1: (Position panel so the trunk is facing to the right) Inserting hook from front to back, join the yarn with sl st in the end of ROW 9, ch 1, and sc in the same row, sc in the nxt row end (row 8). (2)
Row 2-8: ch 1, turn, sc in each st across, tie off after row 8. (2)
Second Arm:
Row 1: (Position panel so the trunk is facing to the right) Inserting hook from front to back, join the yarn with sl st in the end of ROW 8, ch 1, and sc in the same row, sc in the nxt row end (row 9). (2)
Row 2-8: ch 1, turn, sc in each st across, tie off after row 8. (2)
Create Legs:
First Leg:
Row 1: (Position the panel so the 1st row is furthest from you, and join the yarn with a sl st in the RIGHT most end stitch, ch 1, sc in the same st and nxt 2 sts. (3)
Row 2-6: ch 1, turn, sc in each sc across. (3)
Row 7: ch 1, turn, 3 hdc in the 1st st, sl st in the last 2 sts, tie off. (5)
Second Leg:
Row 1: (Position panel the same as for first leg and join yarn in the 3rd st from the left edge, ch 1, sc in same st and last 2 sts. (3)
Row 2-6: ch 1, turn, sc in each sc across. (3)
Row 7: ch 1, turn, sl st in 1st 2 sts, 3 hdc in last st, tie off. (5)
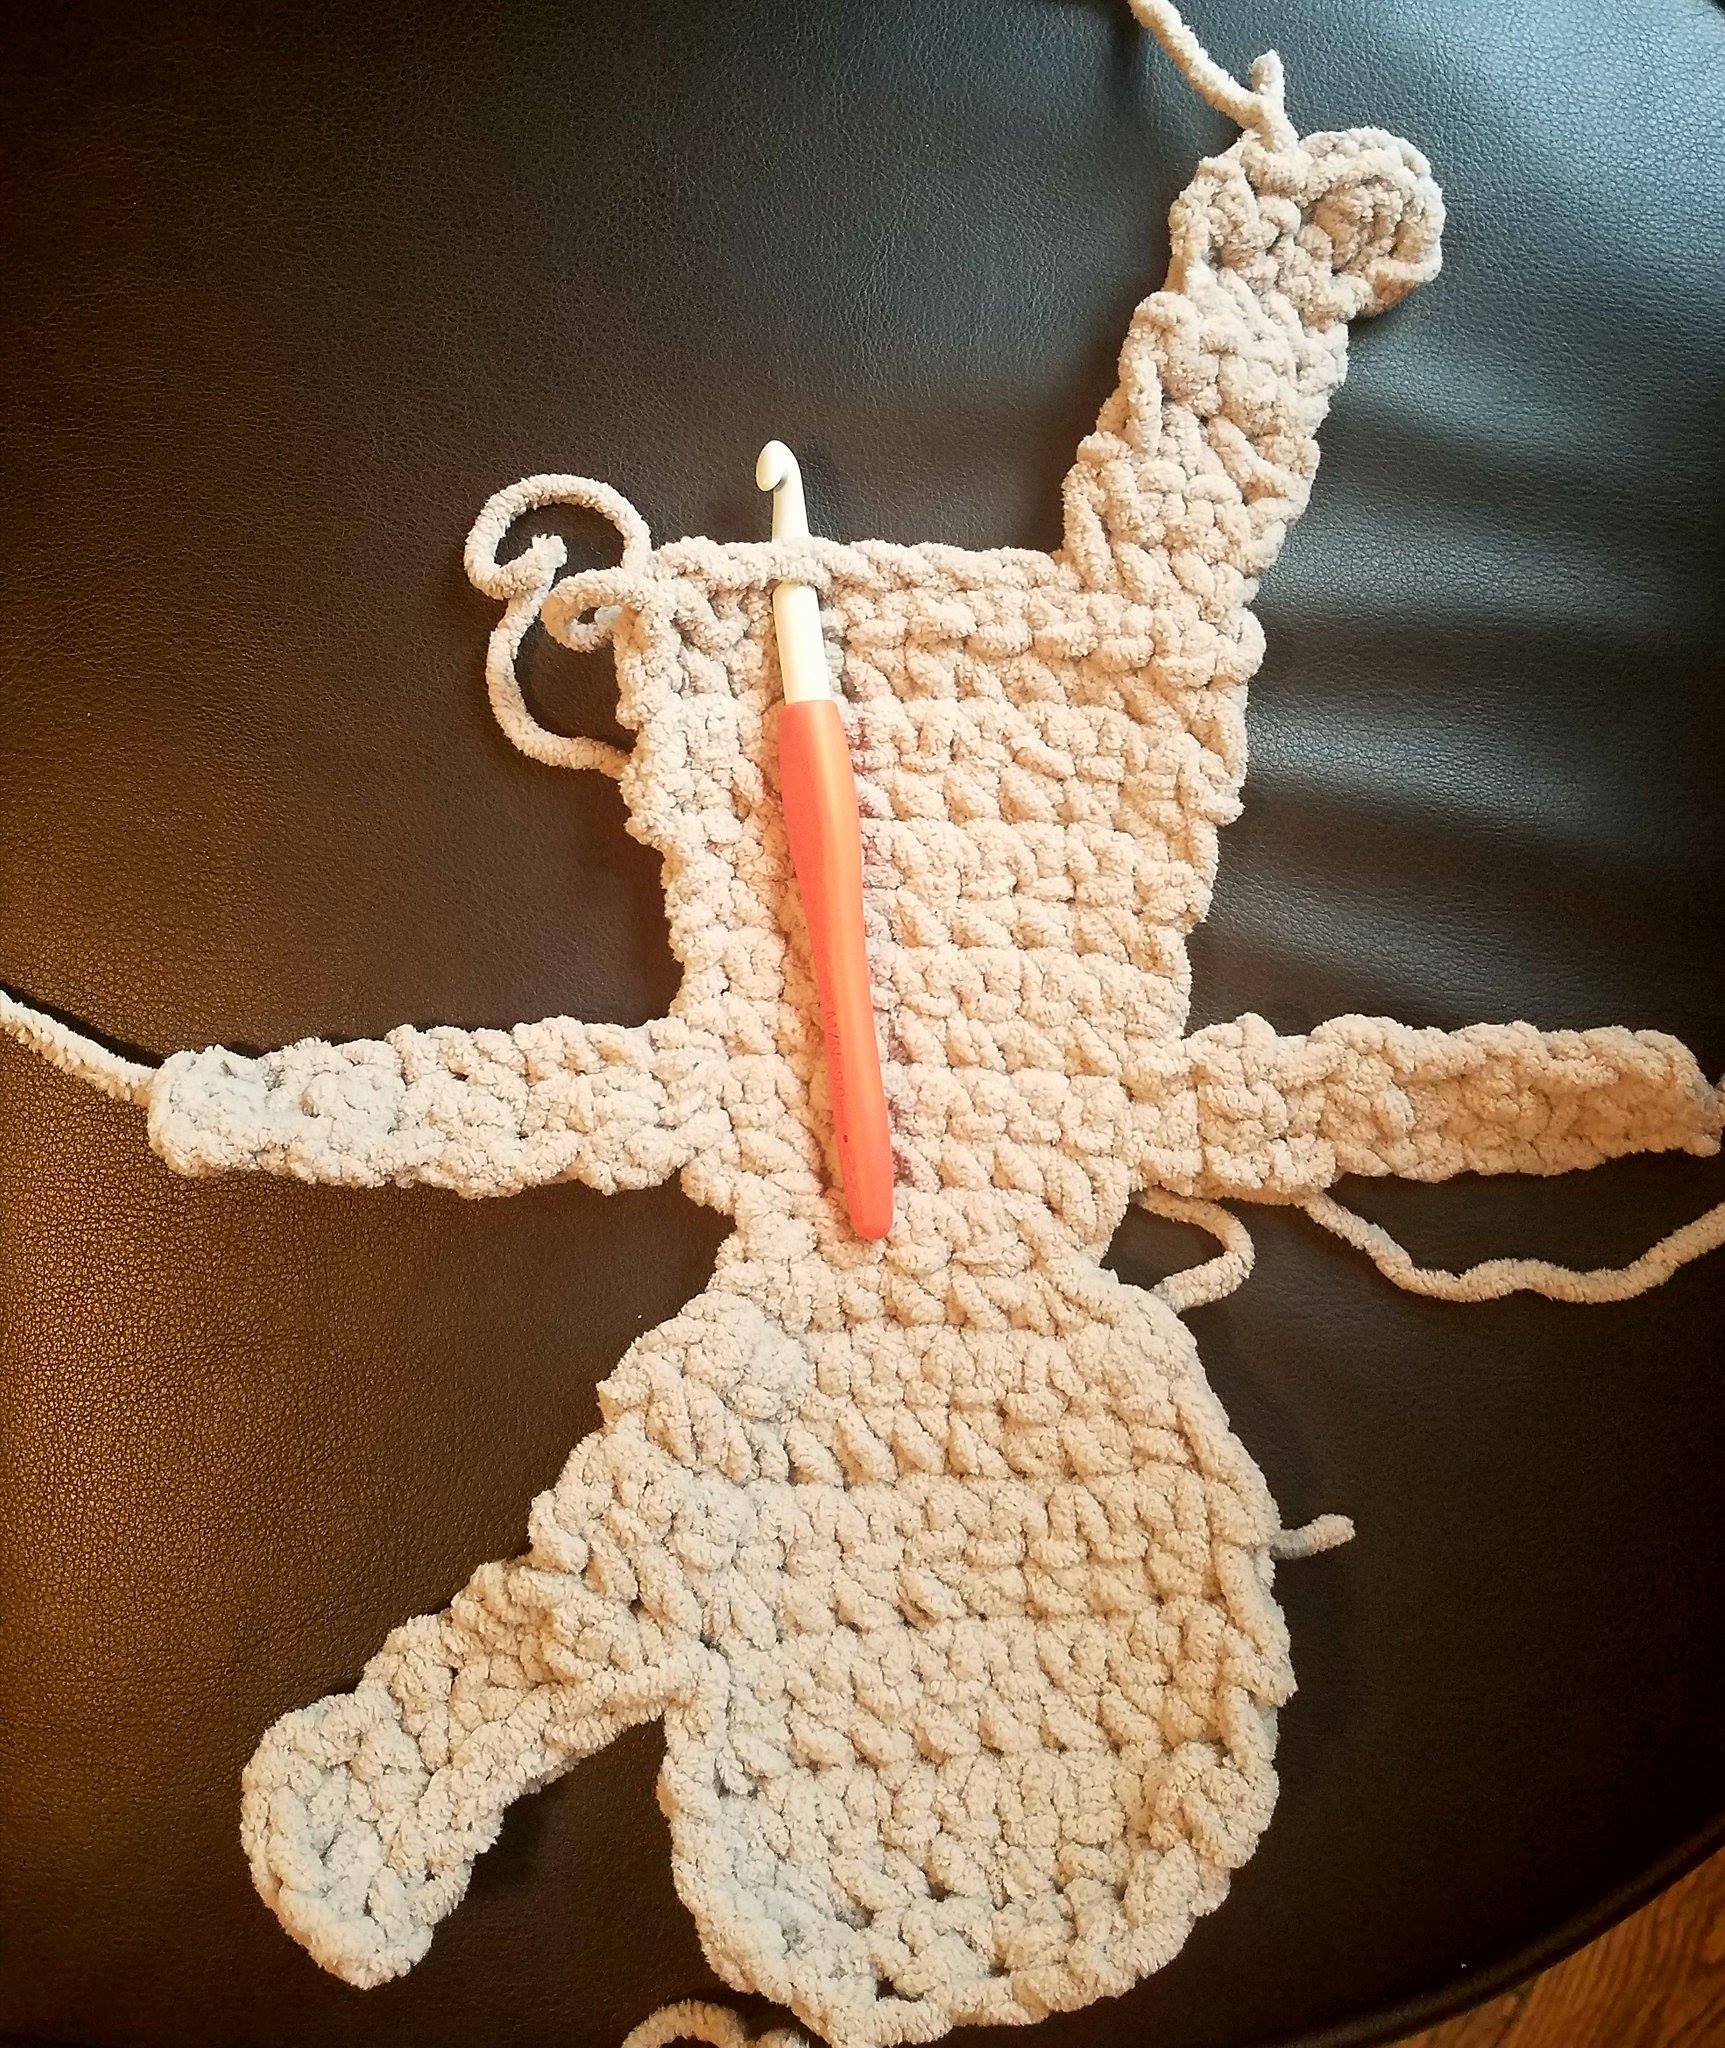
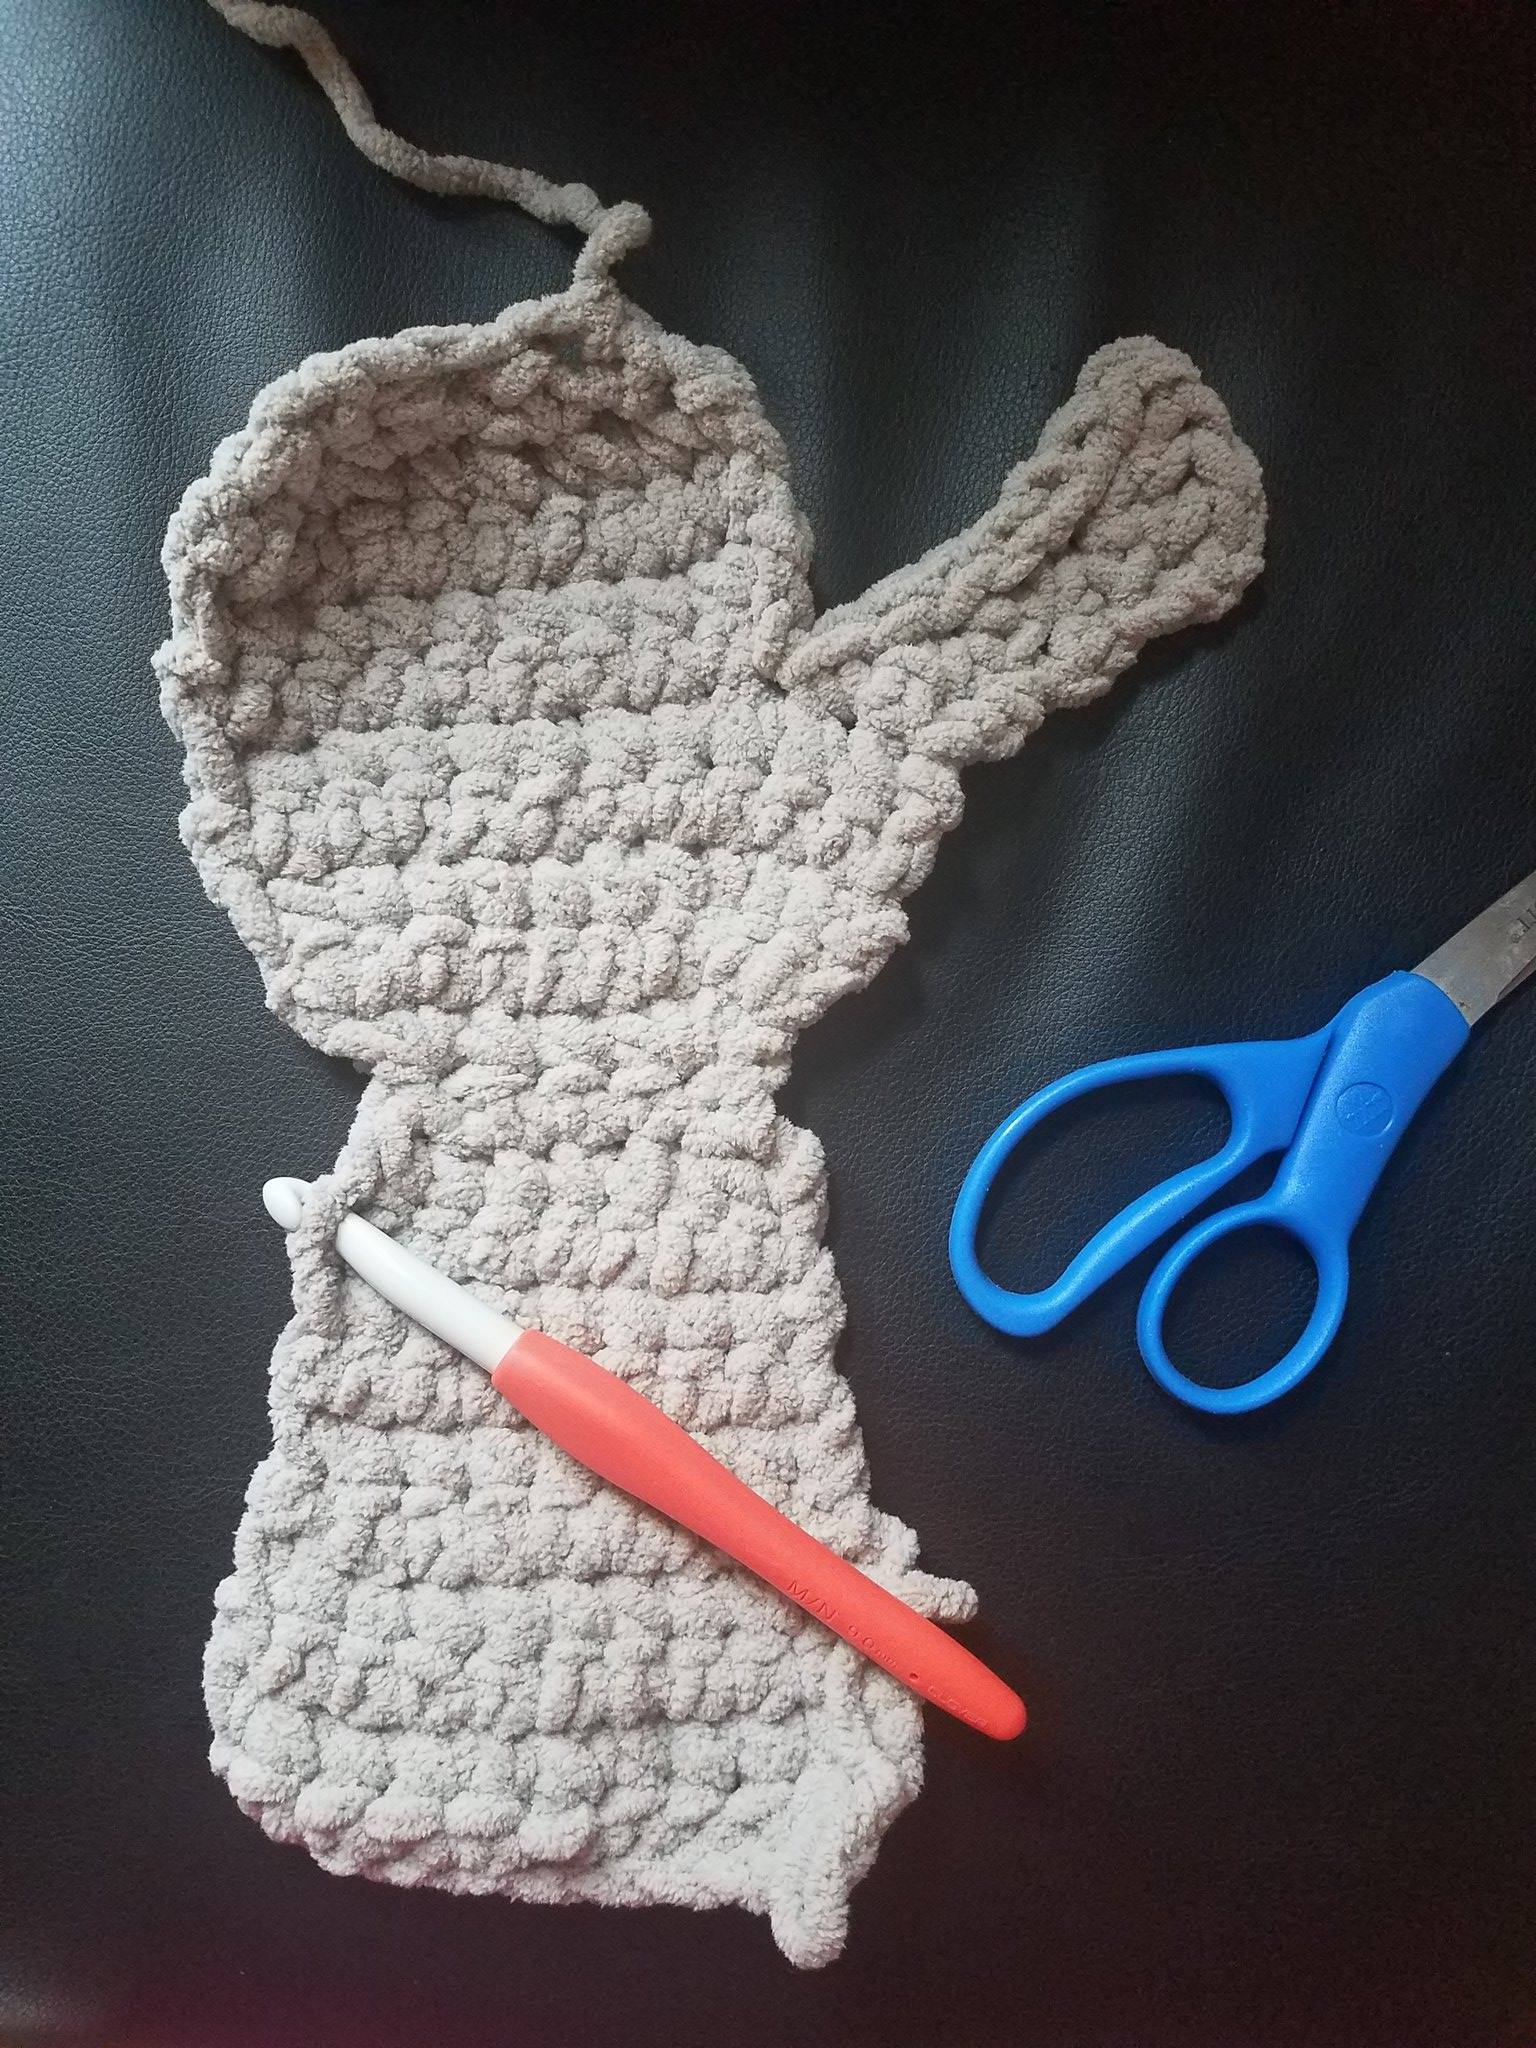
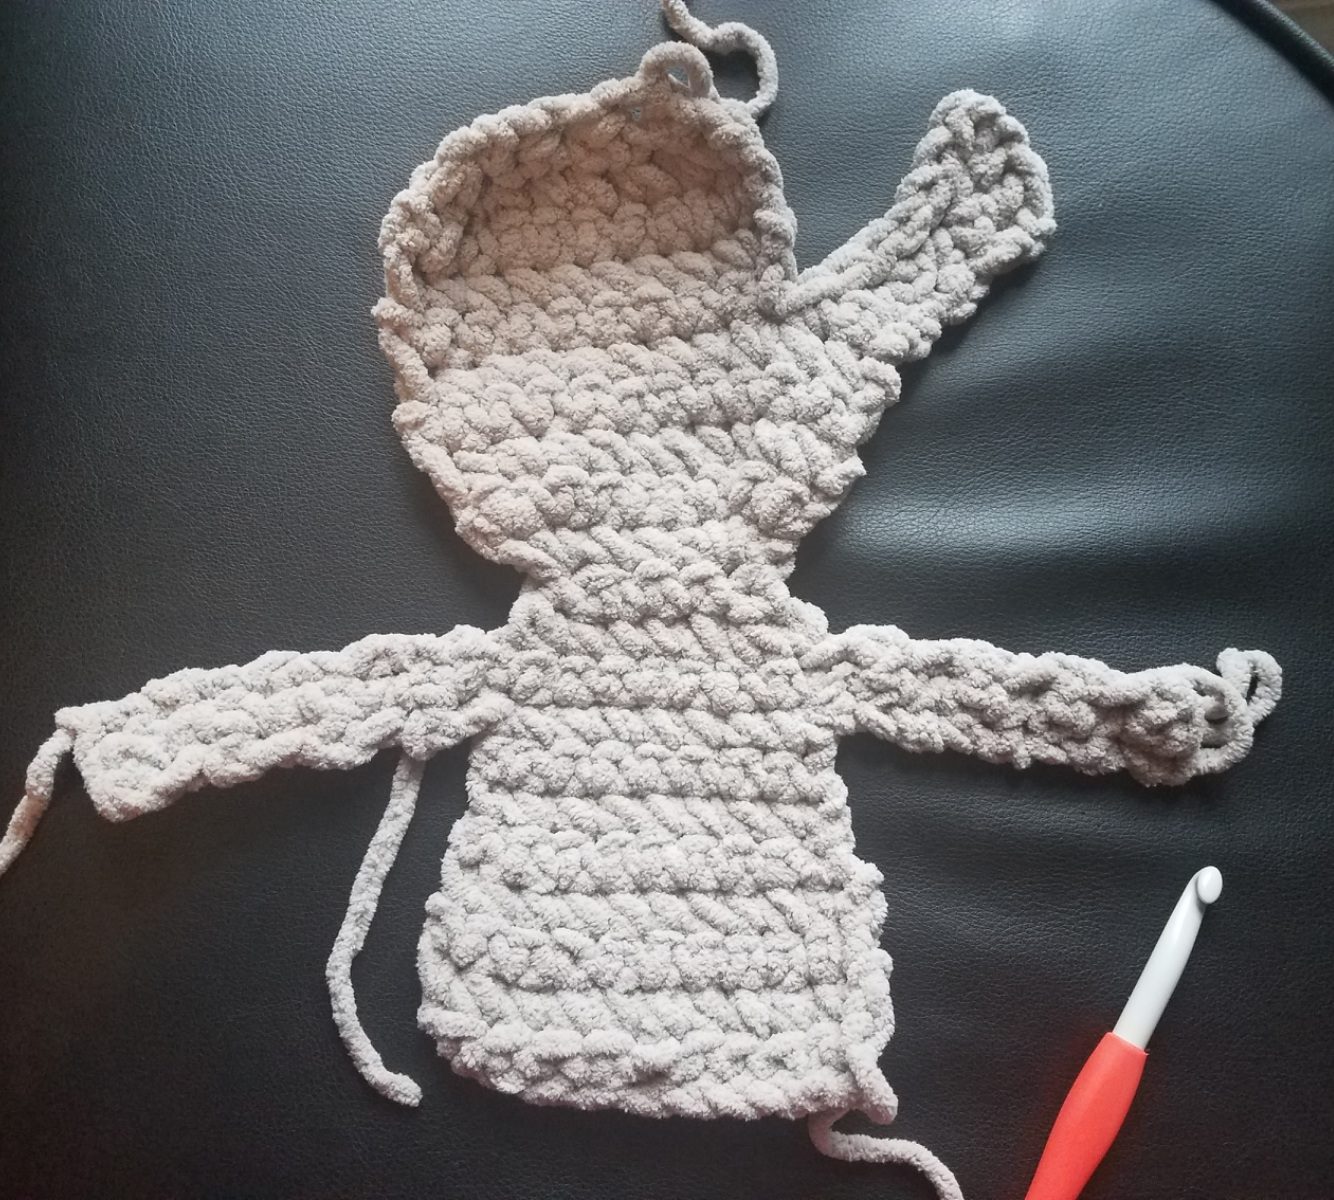
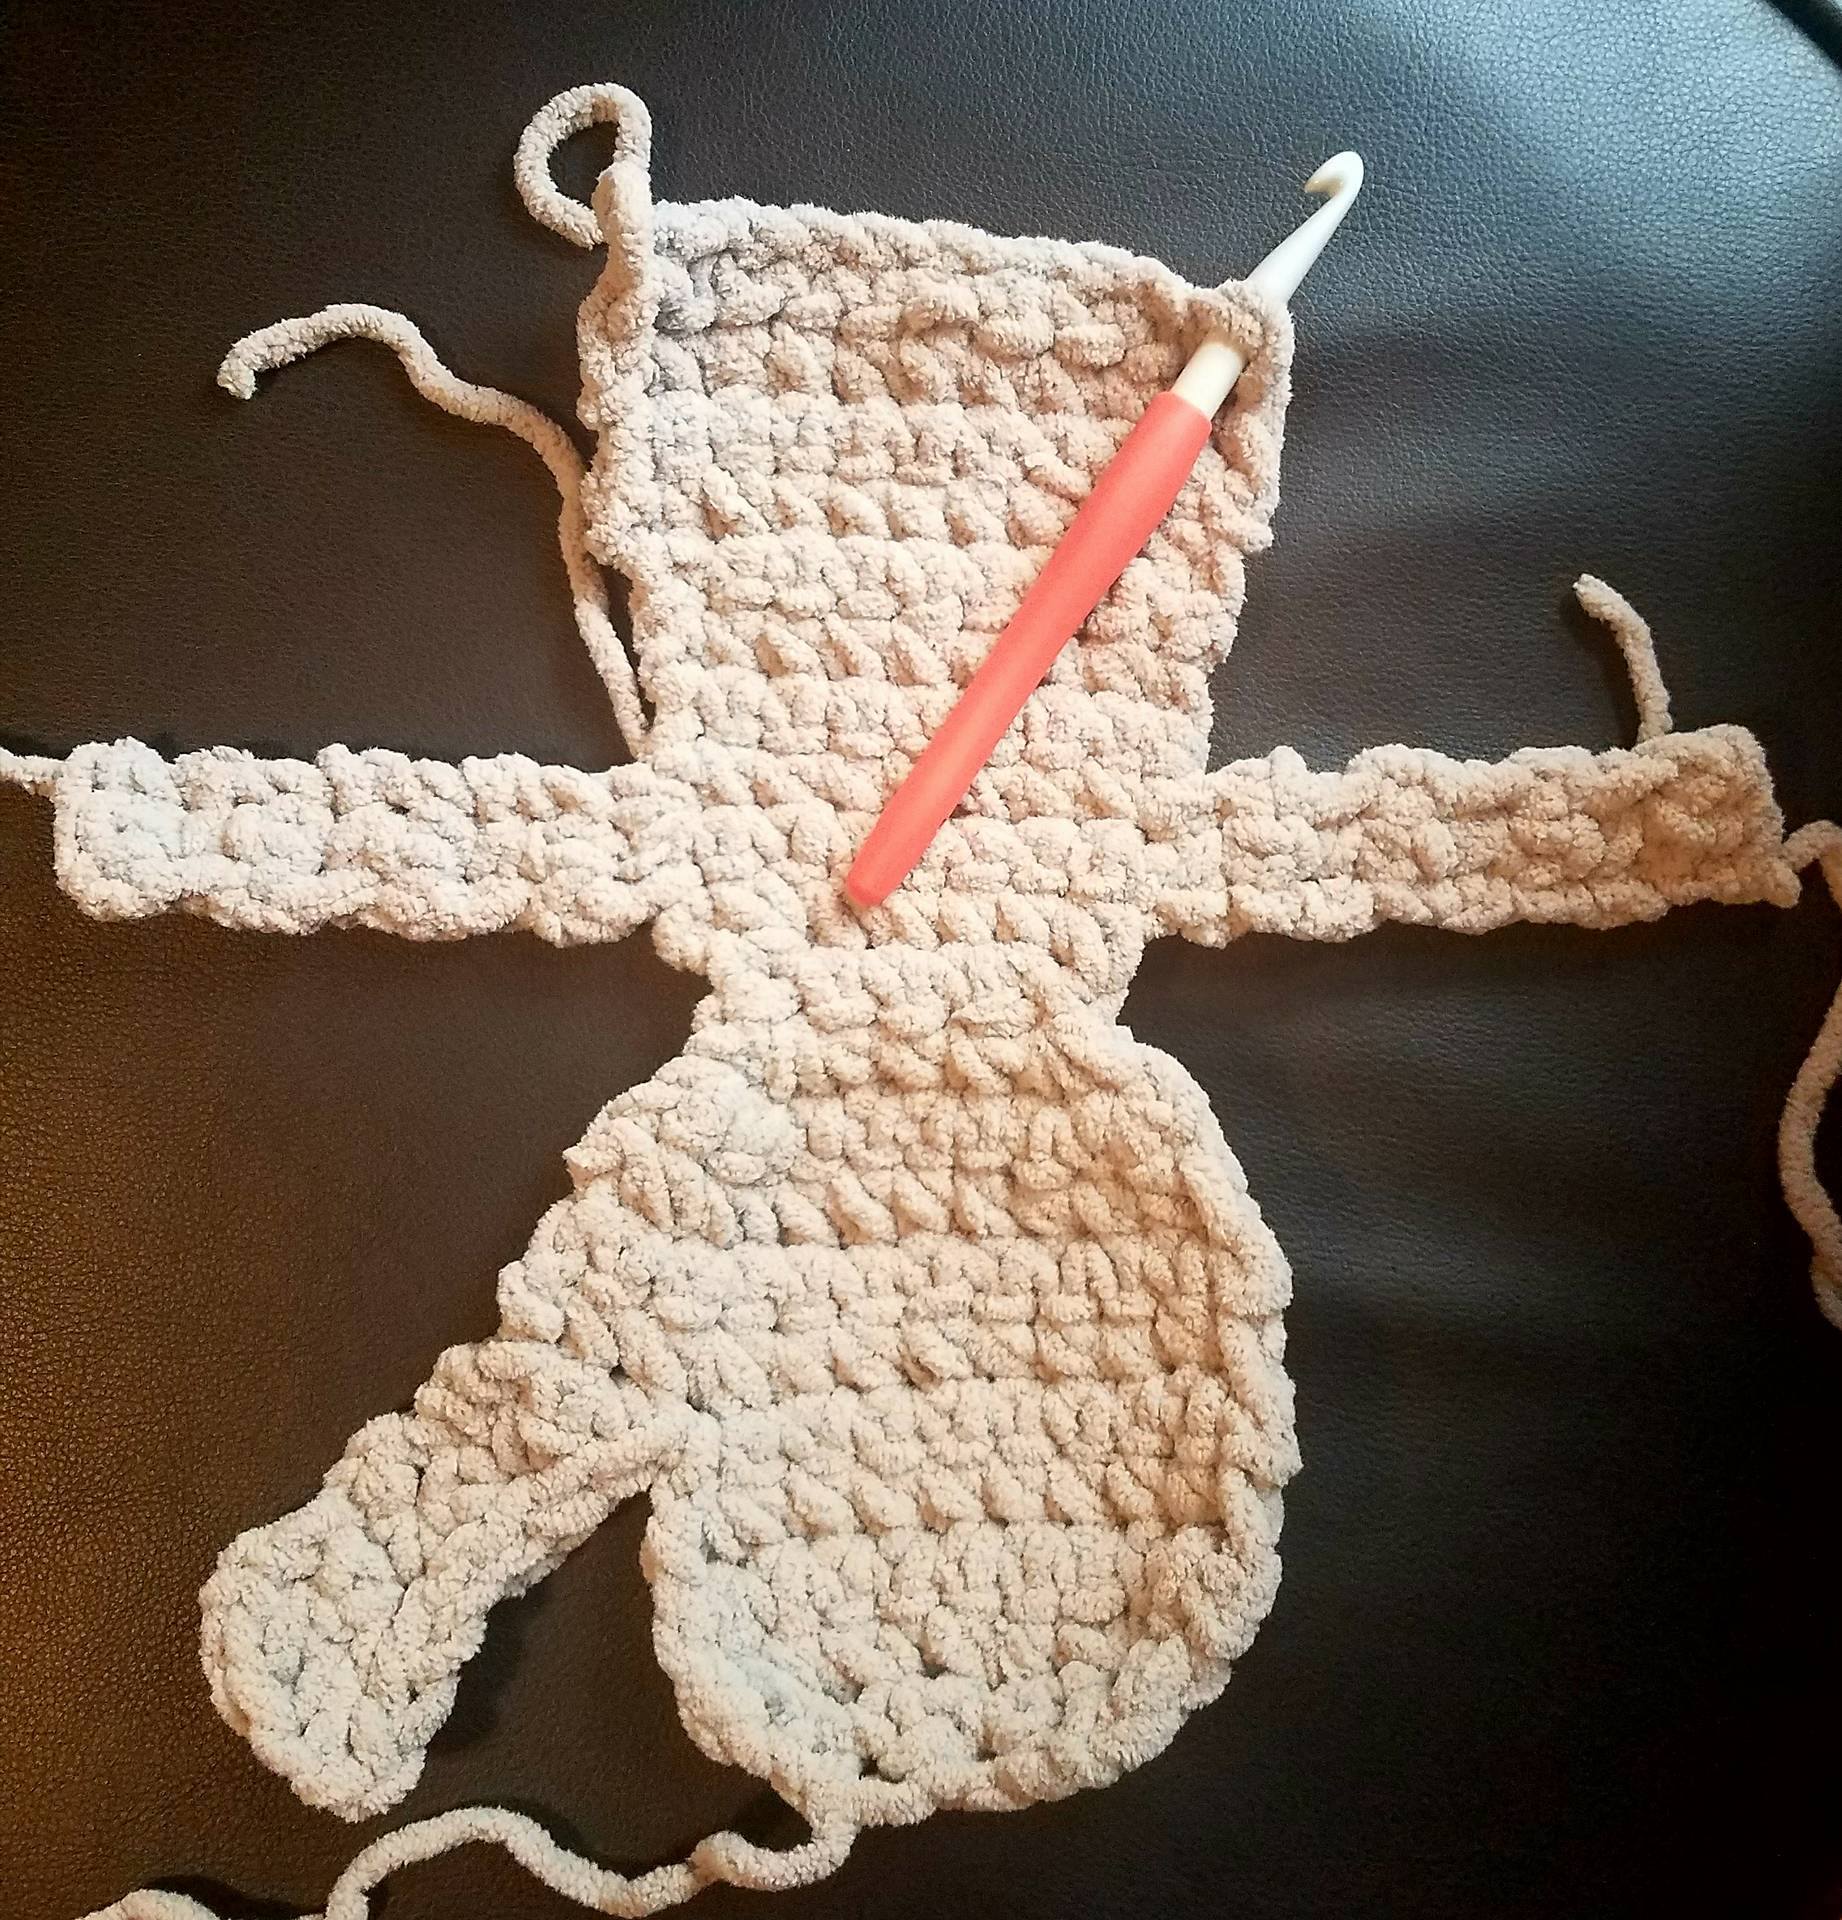
Crochet the Panels Together:
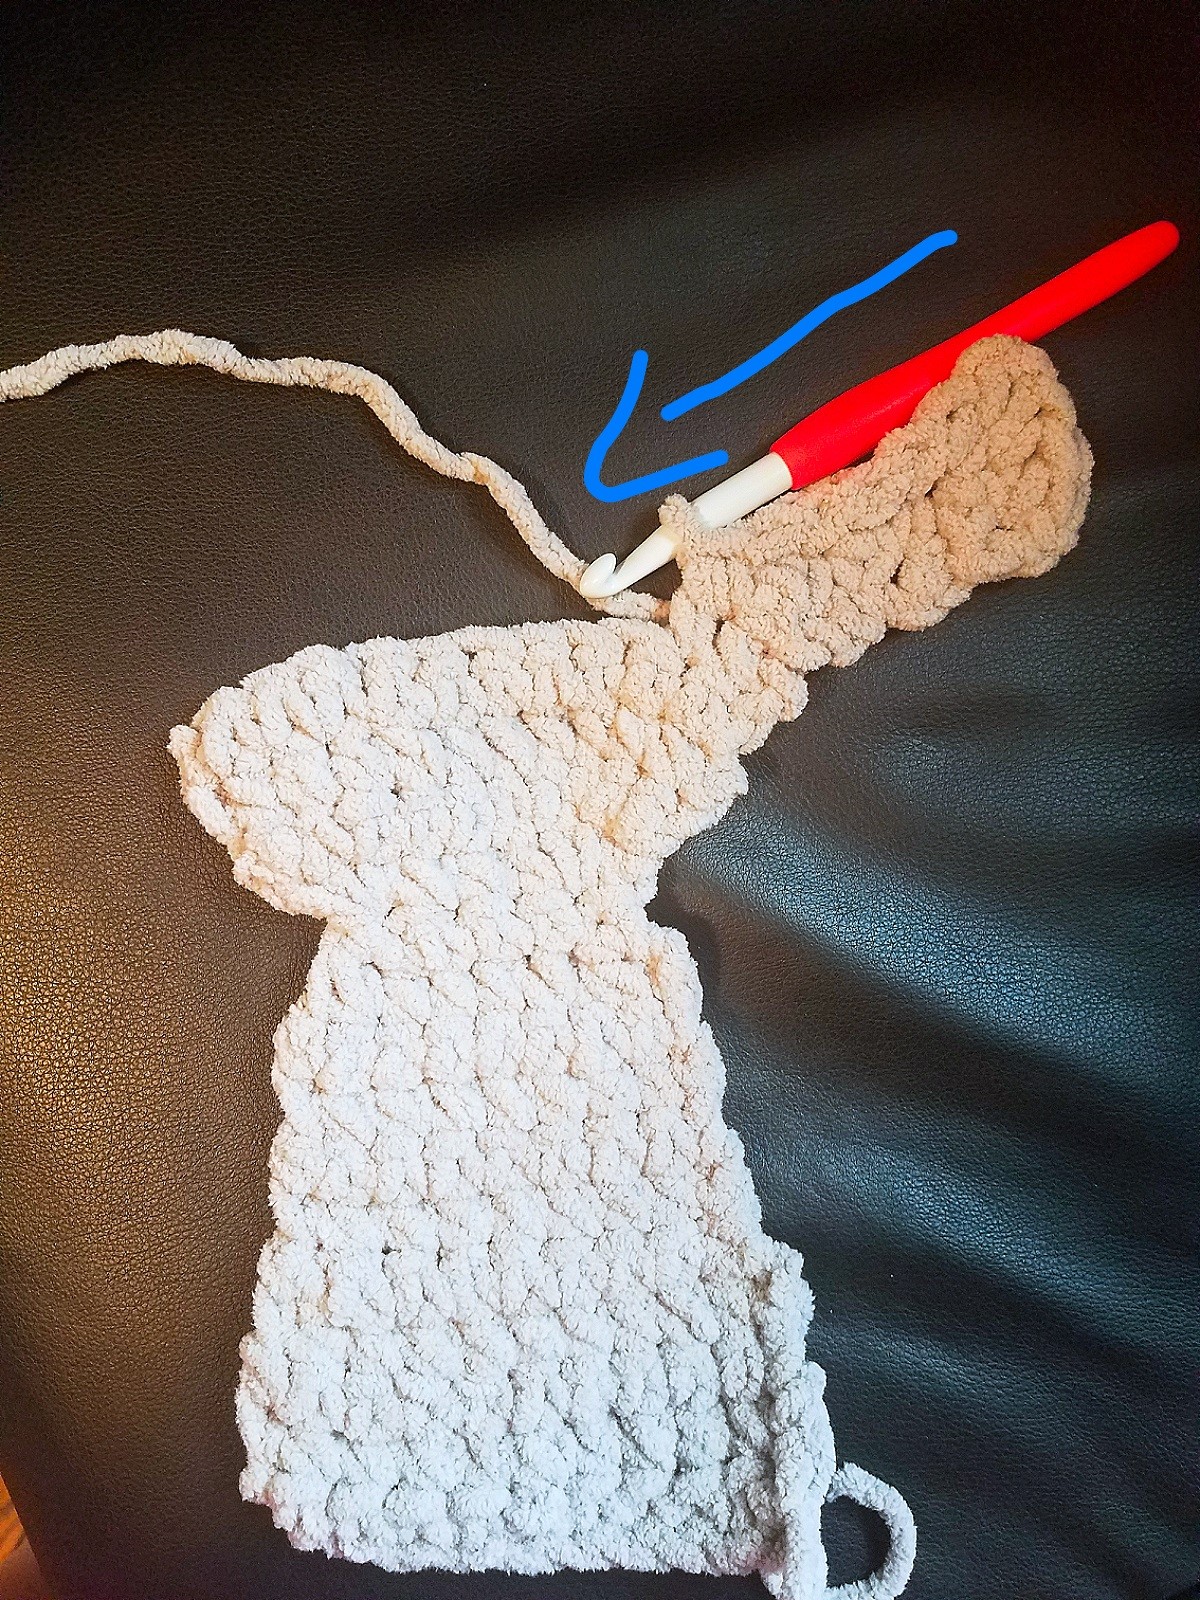
Position the 2 body panels on top of each other matching them. We will join them by edging the entire piece with single crochet, working through both panels at once to attach.
I did NOT weave in my ends on the body panels. Instead, I knotted them firmly to a nearby tail and tucked them inside the body as I worked around. Say what?! No ends.. YEP!
As you seam, stuff with the fiberfill, but do so LIGHTLY. Ragdolls are not supposed to be firm and round, rather just slightly plumped and mostly floppy. Use the hook to push it down into the limbs if needed.
I started by inserting my hook through both pieces in the position shown below.
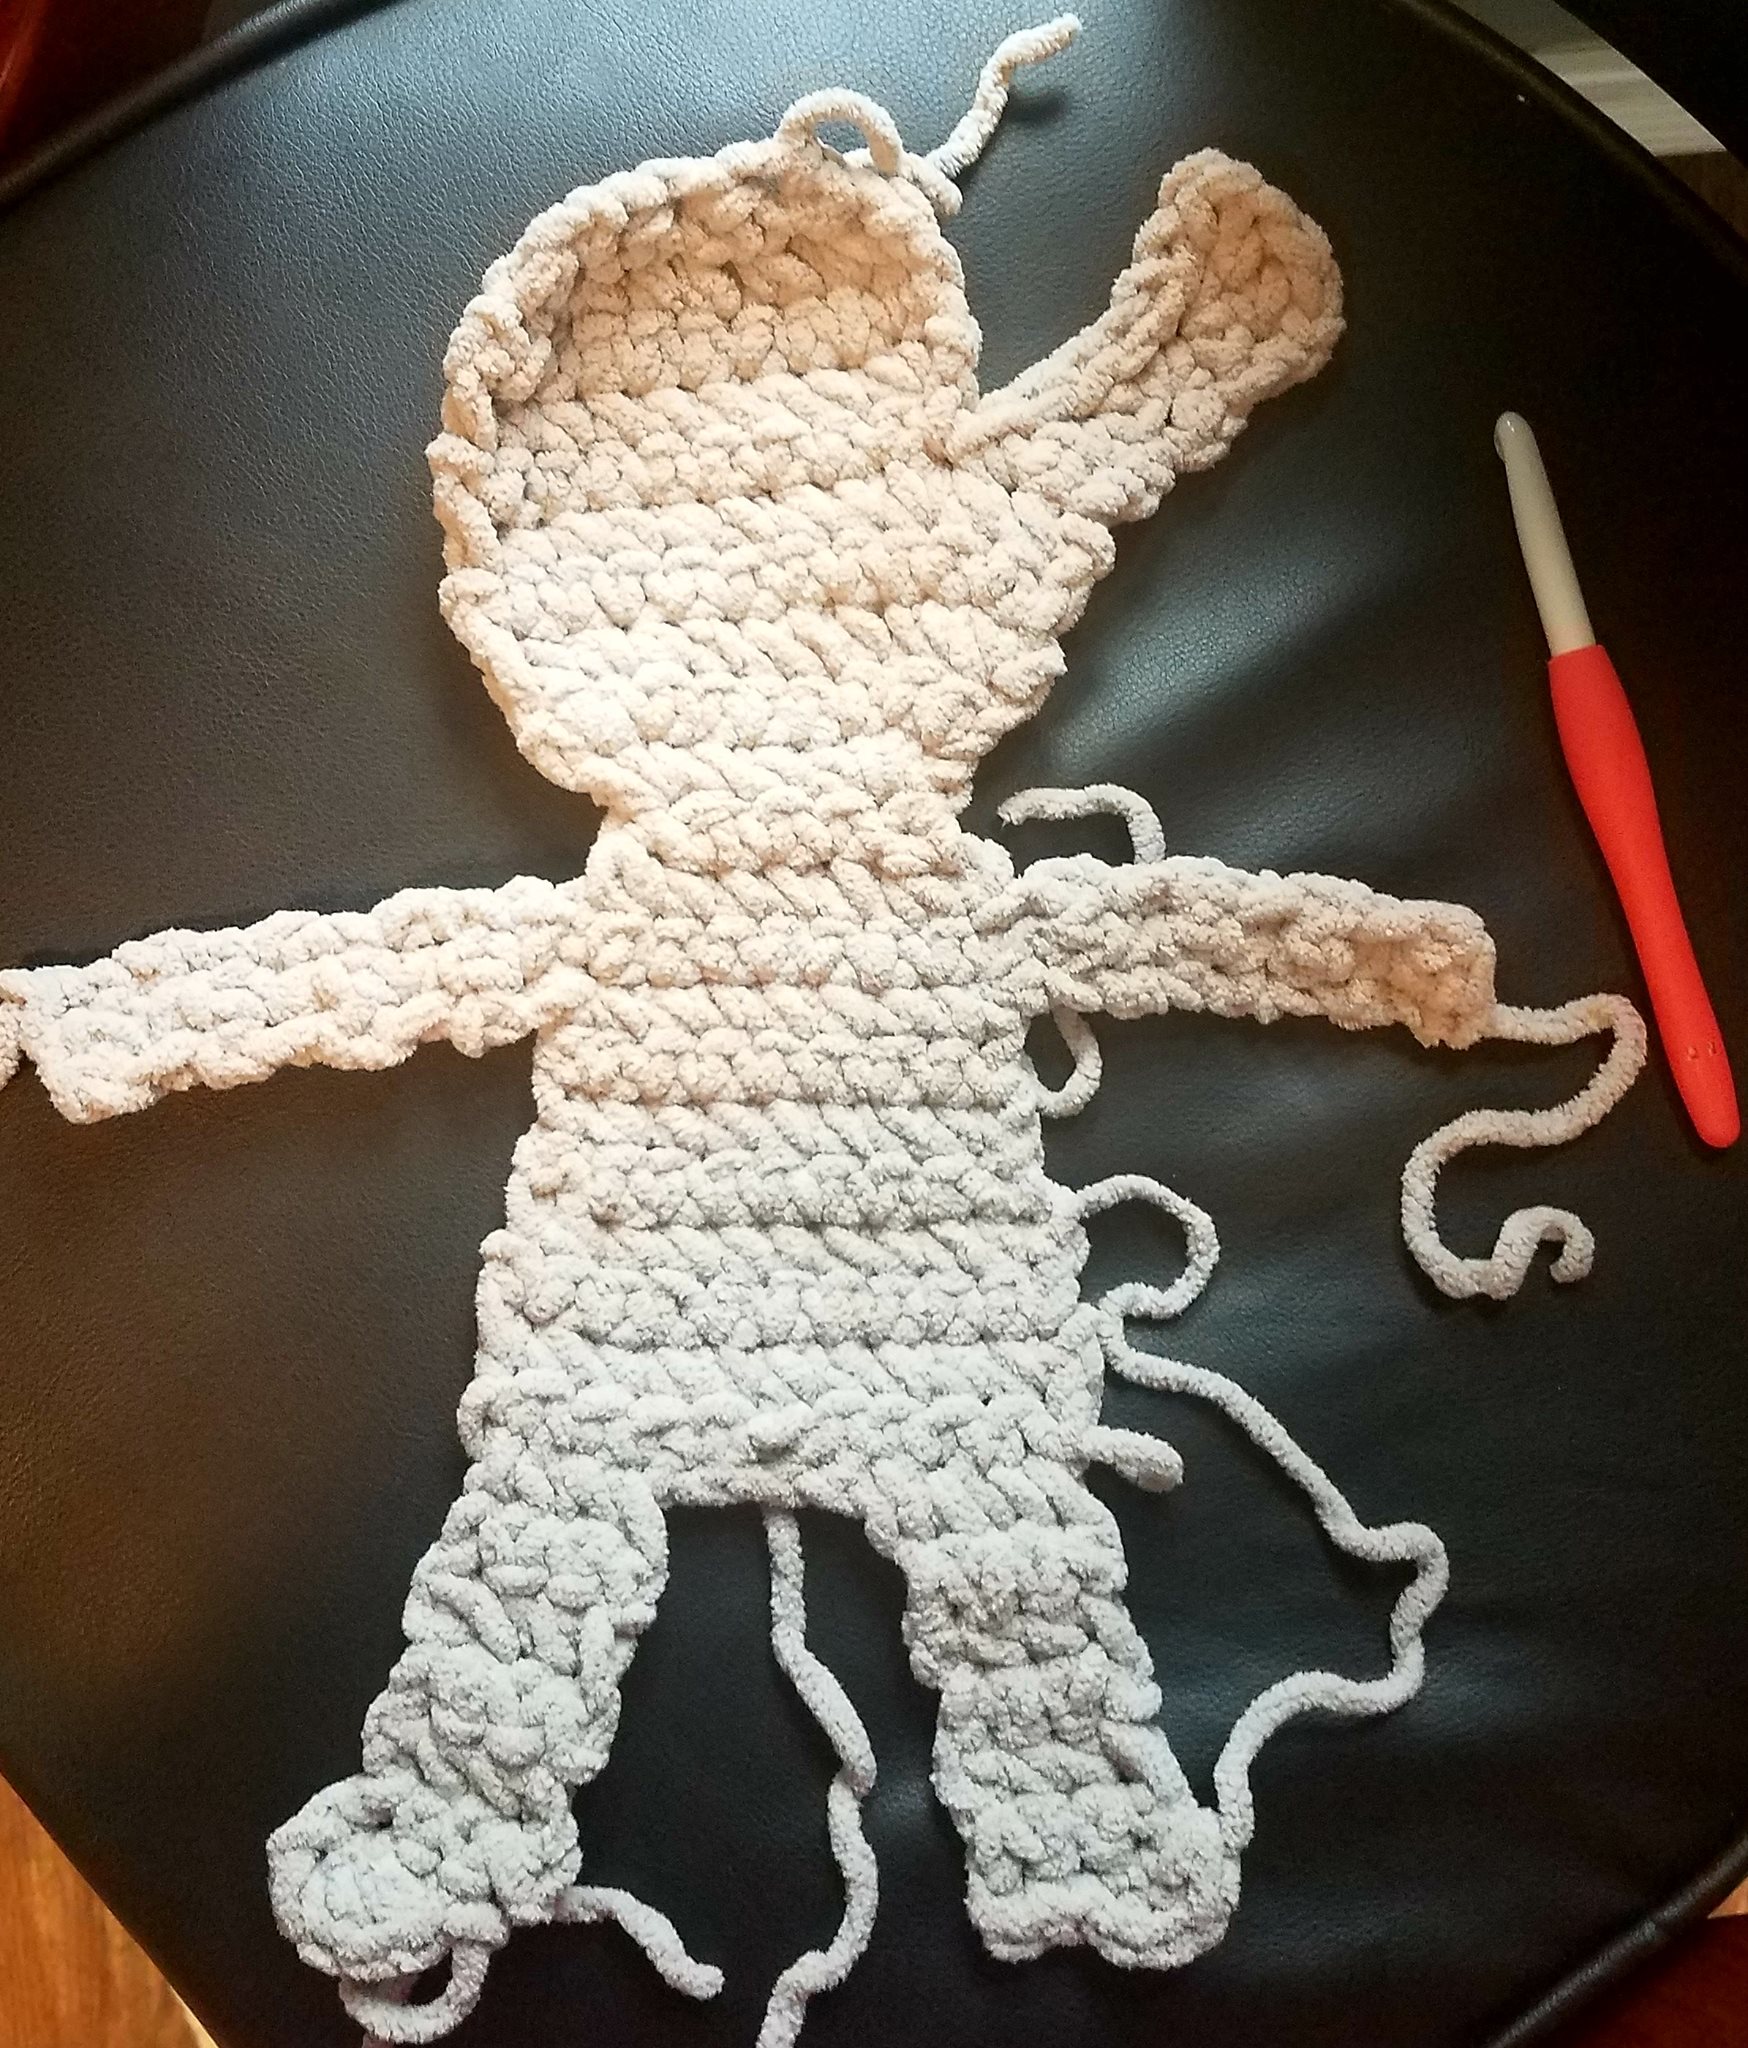
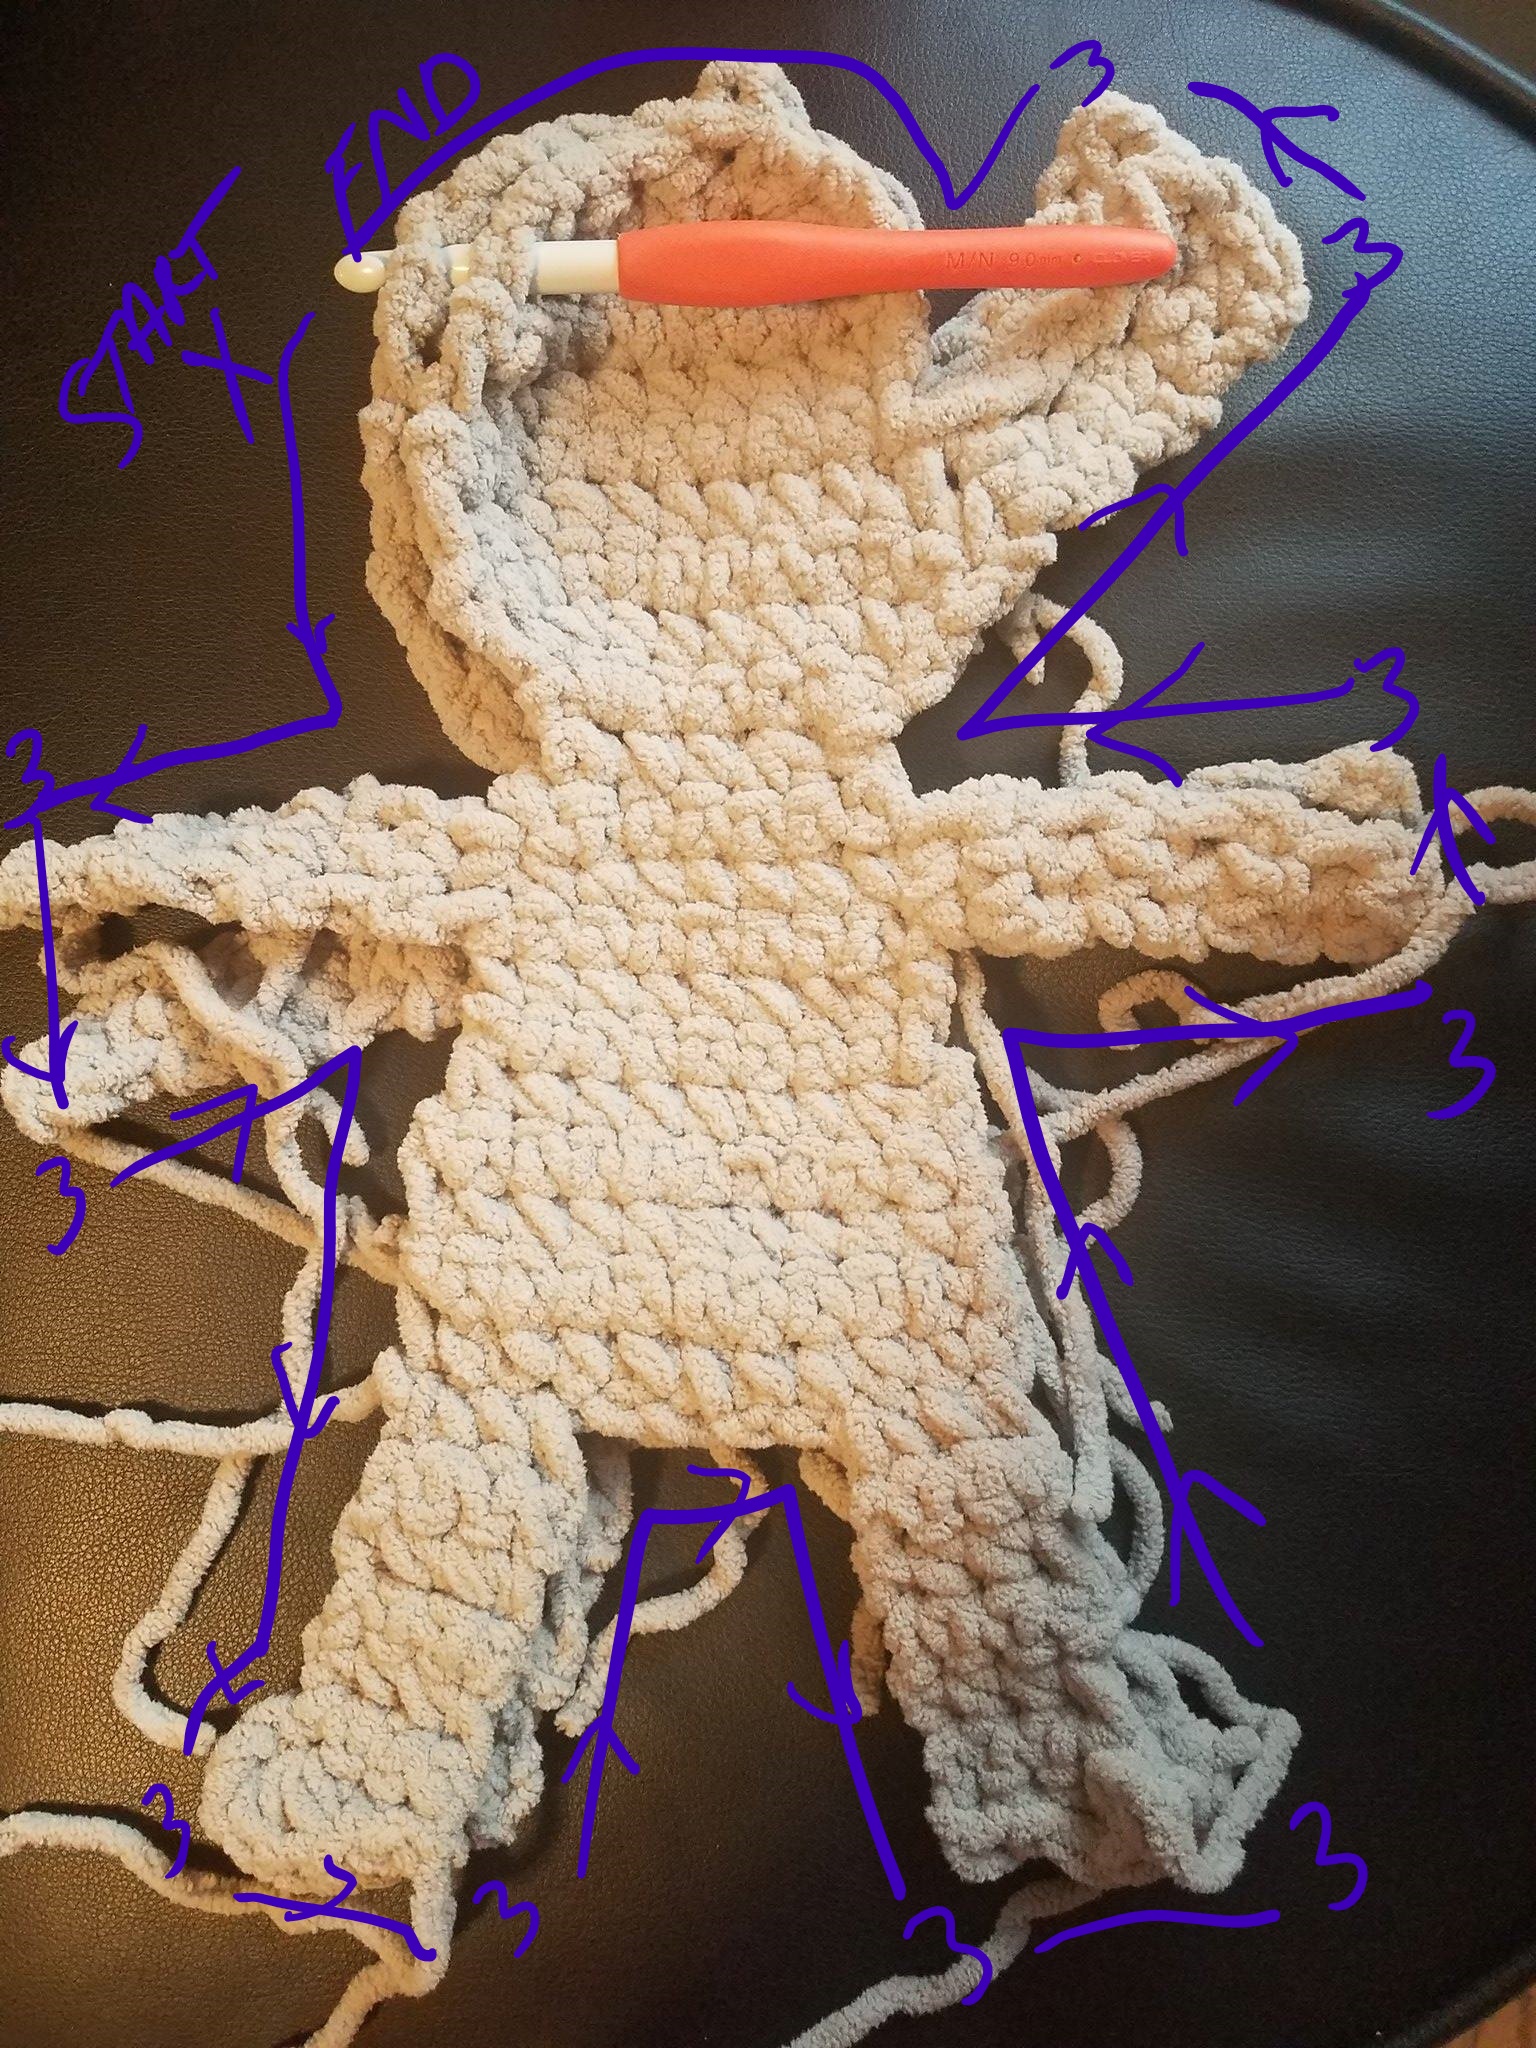
Join Round: After joining the yarn though both thicknesses with a sl st, ch 1, then sc in EVERY stitch and row end around, again working though both panels at once. At the corner stitches of the ends of the arms/feet/trunk; I worked 3 sc in each corner stitch instead of just 1 so as to properly round the corner and not pucker the work. When you are all stuffed and complete the join round so both pieces are joined, sl st to the 1st sc made and tie off.
The image shows where I started, the direction I worked, and the points at which I worked 3 sc to round corners.
Create Tail:
Cut a 24” strand of yarn and fold it in half. Insert the hook on the back side of the elephant where the tail would emerge. Lay the looped end of the 24” strand over the hook and pull it through the stitch on the body. Treating both strands as one, chain 8, tie off. Tie a knot at the end of the 8th chain and trim tails to about ½”. I then tied an extra piece of yarn right around the knot and trimmed to match the others so his tail would have 4 strands of fringe instead of just 2.

Create Outer Ears (Make 2):
With gray, chain 5:
Row 1: sc in 2nd ch from hook and each rem ch. (4)
Row 2: ch 1, turn, 2 sc in the 1st st, sc in the nxt 2 sts, 2 sc in the last st. (6)
Row 3: ch 1, turn, 2 sc in the 1st st, sc in the nxt 4 sts, 2 sc in the last st. (8)
Row 4: ch 1, turn, 2 sc in the 1st st, hdc in the nxt 2 sts, dc in the nxt 2 sts, hdc in the nxt 2 sts, 2 sc in the last st. (10)
Edge Round: ch 1, do not turn, sc in the ends of the next 4 rows (working down the side), 3 sc in the 1st rem loop of beg chain on row 1, sc in the nxt 2 rem loops, 3 sc in the last rem loop, sc one time in the end of each of the 4 rows up the 2nd side of the ear, sl st to the nxt st on the top (row 4), tie off leaving a long tail to seam to head.
Create Inner Ears (Make 2):
With pink, chain 4:
Row 1: sc in 2nd ch from hook and next 2 chs. (3)
Row 2: ch 1, turn, 2 sc in 1st sc, sc in nxt sc, 2 sc in last sc. (5)
Edge Round: ch 1, sl st in the ends of the nxt 2 rows (down the side), 3 sc in the 1st rem loop of beg ch on row 1, sc in the nxt rem loop, 3 sc in the last rem loop, work a sl st in the end of each row up the 2nd side, sl st to the nxt st on top (row 2), tie off leaving a tail to seam to outer ear.
Assemble/Attach Ears:
- Seam Inner Ear to Outer Ear: Using the tail from the inner ear, seam inner ear to outer ear matching up row 1 to row 1. Only stitch through the top strands of the stitches on the outer ear so the pink doesn’t show on the reverse of the ears.
- Seam One Ear to Either Side of the Head: Using the tail from the outer ear, seam the first 2 rows of the ear to the head. Look at the main photo for placement, row 1 of the ear is placed just left of the vertical midline of the head and just about centered from top to bottom. Same for the opposite side of the head, but slightly higher so the top of the ear peeks over the head when viewing from the front.
Make Bow Tie/Hair Bow:
With blue, chain 4:
Rnd 1: 3 sc in 2nd ch from hook, sl st in the next ch, 6 sc in the last ch, now work up the opposite side of the beginning chain in the remaining free loops, sl st in the nxt st, 3 sc in the last st, sl st to the 1st sc made, tie off leave a long a long tail.
Using the long end tail, weave it to the sl st center of the bow and wrap it around firmly 3-4 times, then knot. For a girl elephant, this can be stitched to the ear near the top of row 1. For a boy elephant, stitch it just slightly left of center on the neck.
Stitch on Features:
Using regular black worsted weight yarn and a tapestry needle:
- Stitch on the eye, consisting of an upside down “U” shape and (2) eyelash details. The blanket yarn is thick so I went twice around for my stitches and took care to not tug too hard or the blanket yarn kind of “eats” the features.
- Stitch on a small eyebrow, refer to photo for placement.
- Stitch on a wee smile, again refer to photo.
Weave in all remaining ends.
Thank you! Please show me your work on the Facebook Page “Crochetverse!”
If you are viewing this pattern anywhere but crochetverse.com or downloaded from the Official Crochetverse Ravelry or Etsy store, it is an illegal reproduction copy. Please help me stay on top of this by emailing me, so I may stay afloat and continue to share patterns and ideas with you all! <3
Much Love and Yarn
Stephanie
The information and photos in this posting are the sole copyrighted property of Crochetverse©2017. Please do not copy and paste any of the information contained within either electronically, verbally, or written in part or in whole. Instead, please share the DIRECT LINK to this posting only, and if you do, I thank you for sharing. You of course may sell anything you make from this pattern that you have made with your own two hands, no contract labor or mass productions are permitted. If you credit Crochetverse as the designer, that is greatly appreciated!

Your ragdolls will make wonderful gifts to take to my local hospitals and Ronald McDonald House. The kids will love them. Thank you for sharing your pattern
Thank you! That is such a beautiful use for them. God bless all of you, creators and recipients! <3
Comments are closed.