

")
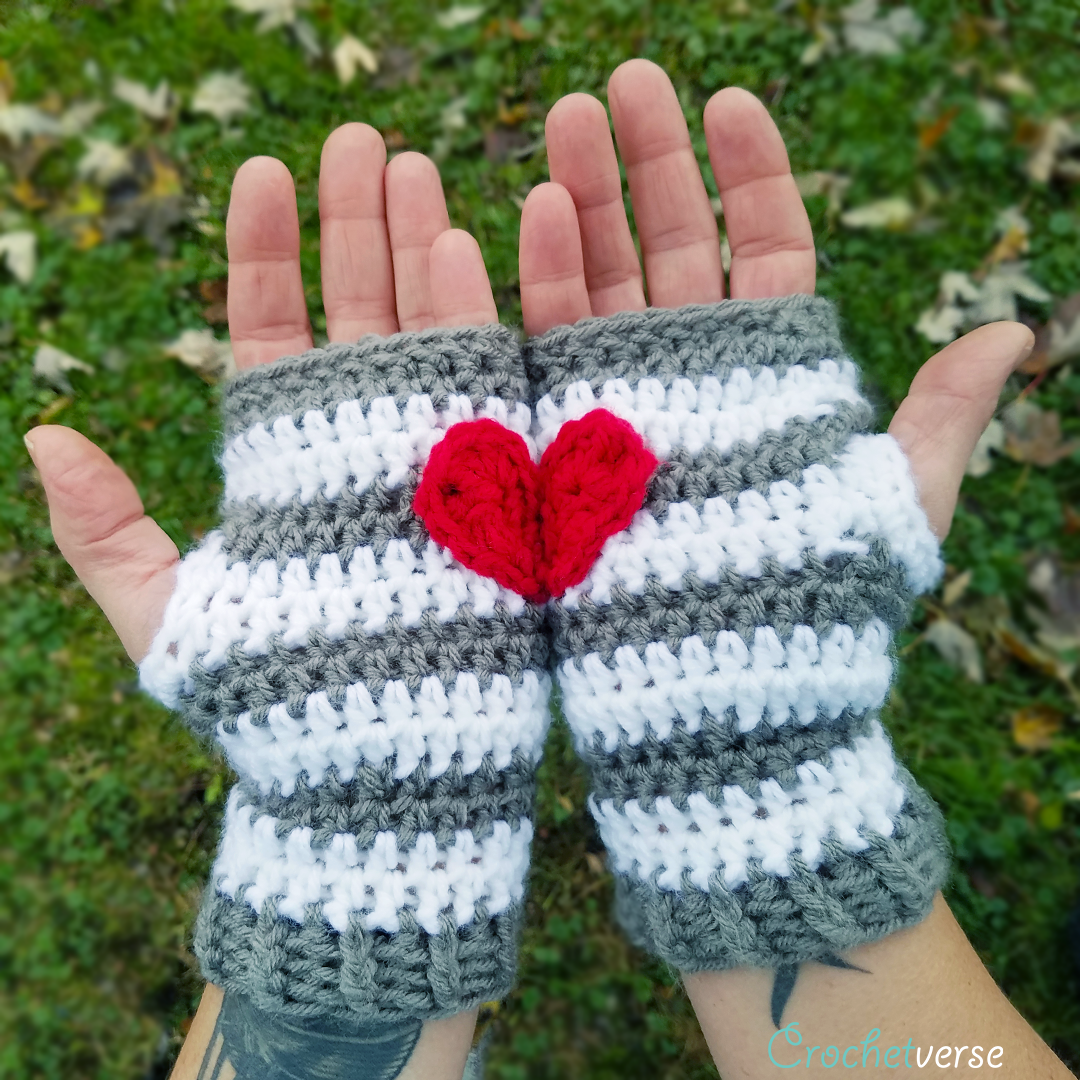
FREE HEART IN HAND FINGERLESS GLOVES PATTERN!
I woke up about 3am and half asleep these popped into my head. I was excited…even at 3am. So, since we could all use a little more love (and warmth), I am sharing this SUPER FAST pattern with you for these! In just over an hour, you can finish these! <3
Let’s Make Them!
Materials:
- no more than 50 yards each of white and gray worsted weight yarn (or the color of your choice). Shown is Red Heart Super Saver in white, gray, and red.
- Size H(5mm) crochet hook -OR- size needed to obtain gauge
- scissors, tapestry needle, tape measure, stitch marker
Gauge:
I am on the tighter side of crocheting, so you should check your gauge to be sure you are near to me. If not, you can go up or down a hook size until our gauges meet. For these, your 1st 4 rounds as worked should measure about 1 3/4″ tall and in 2″ wide you should have about 8 sts.
Sized For: These are one size and should fit most women and teens.
Instructions:
Gloves: (Make 2)
*I begin with a chainless foundation row, they are awesome. If you don’t know how to do them, I learned from this video by Gleeful Things (the video is not my own, I am linking directly to her YouTube posting) https://www.youtube.com/watch?v=7mEMPK4yuF8
If you are in a time crunch and don’t want to learn a new trick today, you can begin my chaining 25 and working round 1 into that after you sl st it to the 1st ch made to form a ring. Beginning chains can be somewhat binding, consider going up one hook size for your CHAIN ONLY so as to avoid this.
Rnd 1: With gray, make a chainless foundation row of 25 hdc, taking care to not twist, join to 1st hdc made to form a ring. You can use the beginning tail to close up the bottom of the row with tapestry needle later.
Rounds are joined but not turned. Mark 1st st of each round to keep track of count.
Color Change Method: When you sl st at the end of the round to the 1st st made, you will perform the final pull through of the yarn with the NEW color and drop, but do not cut, the old color. Place the yarn not currently being used to the INSIDE of the glove or wrong side of the work. This way when we carry, it will be hidden inside.
Each row begins with the color used for that row in parentheses. (G) is gray and (W) is white.
Rnd 2 (G): ch 1, (does not count as a st here and throughout), hdc in same st and in each st around, sl st to 1st hdc made, at end of round, change to white as described in the color change method and drop gray. (25)
Rnd 3 (W): ch 1, hdc in each st around, sl st to 1st hdc made. (25)
Rnd 4 (W): ch 1, hdc in each st around, sl st to 1st hdc made, at final sl st, change to gray, dropping white. (25)
Rnd 5 (G): ch 1, hdc in each st around, sl st to 1st hdc made. (25)
Rnd 6 (G): ch 1, hdc in each st around, sl st to 1st hdc made, changing to white, dropping gray. (25)
Rnd 7 (W): ch 1, hdc in each st around, sl st to 1st hdc made. (25)
Rnd 8 (W): ch 1, hdc in 1st st, ch 6, sk nxt 6 sts, hdc in rem 18 sts, sl st to 1st hdc made, changing to gray, dropping white. (thumbholes created)
Rnd 9 (G): ch 1, hdc in 1st st, hdc in each of the nxt 6 chs (in the chains, not the space), hdc in rem 18 sts, sl st to 1st hdc made. (25)
Rnd 10 (G): ch 1, hdc in each st around, sl st to 1st hdc made, changing to white, dropping gray. (25)
Rnd 11-12 (W): repeat rounds 3-4.
Rnd 13 (G): ch 1, hdc in same and nxt 2 sts, hdc dec over nxt 2 sts, *hdc in nxt 3 sts, hdc dec over nxt 2 sts, repeat from * three times more, sl st to 1st hdc made. (20)
Rnd 14 (G): ch 1, hdc in each st around, sl st to 1st st made, changing to white, dropping gray. (20)
Rnd 15 (W): ch 1, hdc in each st around, sl st to 1st st made. (20)
Rnd 16 (W): ch 1, hdc in each st around, sl st to 1st st made, changing to gray, and CUTTING white. (20)
Rnd 17 (G): ch 1, hdc in each st around, sl st to 1st st made. (20)
Rnd 18 (G): ch 1, hdcfp in 1st st, hdcbp in nxt st, *hdcfp in nxt st and hdcbp in nxt st, repeat from * around, sl st to 1st st made. (20)
Rnd 19 (G): ch 1, hdcfp in each hdcfp and hdcbp in each hdcbp around, sl st to 1st st made. (20)
Rnd 20 (G): ch 1, scfp around each hdcfp and scbp anround each hdcbp around working LOOSELY so as not to bind the opening too much, sl st to 1st st made and cut yarn. (20)
Edge:
With the right side of the gloves facing out and the opening near the fingers facing away from you, join gray with a sl st in the 1st round made in any st around, ch 1, sc in same st and in each st around, sl st to 1st st sc made, cut yarn. Repeat for second glove.
With the right side of the gloves facing out, join white in any st around the thumb opening with a sl st, ch 1, sc in each st and chain around, sl st to 1st sc made, cut yarn. Repeat for second glove.
Half Heart: (Make 1 left and 1 right)
For right palm: ch 5, sc in 2nd ch from hook and nxt, hdc in nxt ch, (2 dc, 2 tc, 3 dc, hdc, sc) all in the last ch, continue to work on the opposite side of the beginning chain working in the remaining free loop and sc in the nxt ch, sl st in nxt 2 chs, ch 2, sl st to 1st st made, tie off leaving a tail to sew to glove later.
For left palm: ch 6, sl st in 3rd ch from the hook and nxt ch, sc in nxt ch, (sc, hdc, 3 dc, 2 tc, 2 dc) all in the last ch, continue to work on the opposite side of the beginning chain working in the remaining free lop and hdc in nxt ch, sc in nxt chs, sl st to 1st skipped ch and cut yarn leaving a long tail to sew to glove later.
*Use the beginning tail to seam closed any hole that was created by working all those sts in the last ch.
Finishing:
1. Weave in all remaining ends on the gloves.
2. Using the long end tail from each half of the heart, sew the right palm heart to the palm of the right glove (the thumbhole will be on the right when in proper position to sew it on). You want to have it slightly to the right of the edge so the heart lines up properly when hands are held together.
3. Repeat step 2, sewing the left palm heart half to the left glove. (the thumbhole will be to the left when in proper position to sew it on).
4. Go forth into the world and share the love…lol, BUT REALLY!
Please head to my Facebook page http://www.facebook.com/crochetverse and show me your new beauties!
Much Love and Yarn,
Stephanie
The information and photos in this posting are the sole copyrighted property of Crochetverse©2017. Please do not copy and paste any of the information contained within either electronically, verbally, or written in part or in whole. Instead, please share the DIRECT LINK to this posting only, and if you do, I thank you for sharing. You of course may sell anything you make from this pattern that you have made with your own two hands, no contract labor or mass productions are permitted. If you credit Crochetverse as the designer that is greatly appreciated!

Hi, thank you for such a cute pattern. I’m working on the hearts and I’m confused as to what 2tc is suppose to mean? Please clarify. Thank you.
April
Hi! 2 tc is two treble (also know as triple) crochet. It is one step further than a double crochet. If you’ve not done one in your work prior, there are tons of good Youtube videos on them. Just search “how to triple crochet” thank you and hope you are enjoying the pattern!
Comments are closed.