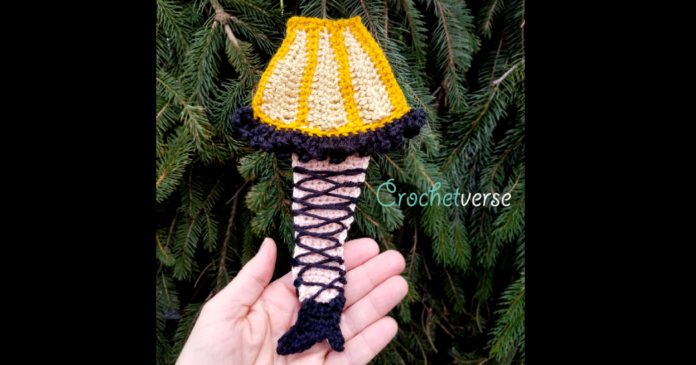
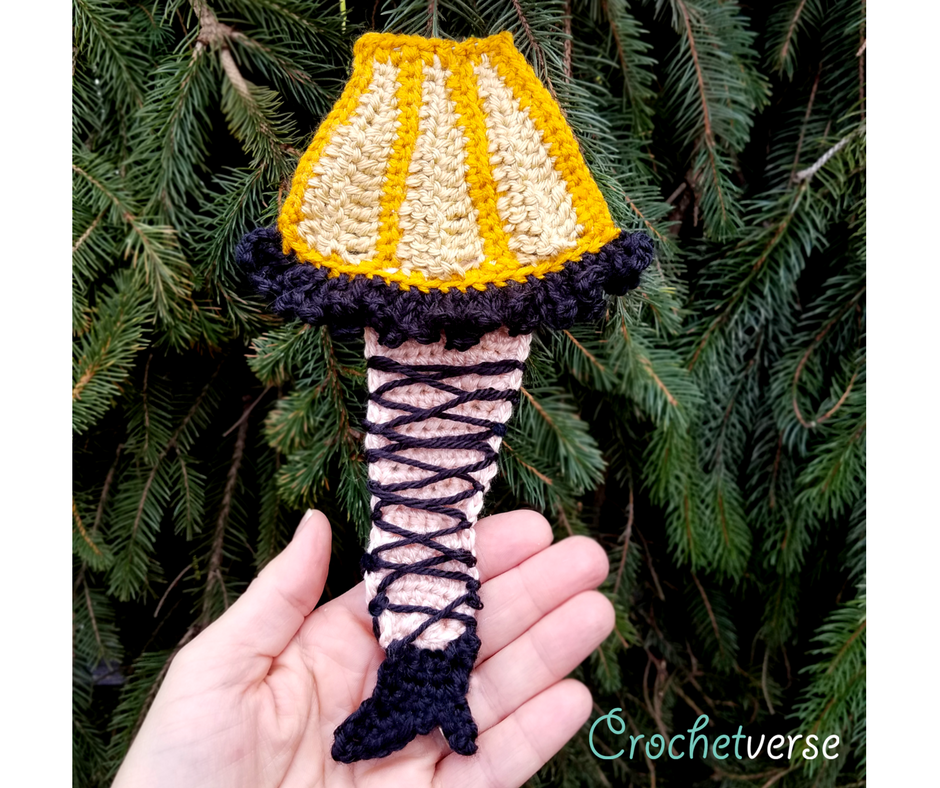
After some back and forth with a fellow creative crocheter, it was determined that this HAD to be an applique in addition to the wine bottle cozy (find that here: https://crochetverse.com/free-crochet-leg-lamp/ )
UGLY CHRISTMAS SWEATER?
STOCKING?
ORNAMENT?
CARRY IT AROUND FOR NO REASON OTHER THAN….CHRISTMAS?
Yeah, I can get on board with all that. So…. HERE is the Leg Lamp Applique…still very FRA-GEE-LAY!
Materials:
– Size E (3.5mm) crochet hook
– About 25 yards each of worsted weight yarn in Dark Gold, Light Gold, Peach, and Black
Shown in Sample:
Dark Gold: Red Heart Super Saver in Gold
Light Gold: Caron Simply Soft in Autumn Maize
Peach: Caron Simply Soft in Light Country Peach
Black: Caron Simply Soft in Black
Normally, I do not mix Caron Simply Soft and Red Heart Super Saver as I feel they are too different in thickness, but for this project I think it’s fine and poses no issue to the finished project.
Finished Sized:
About 9″ tall and 4.5″ wide
Instructions:
With Dark Gold, ch 16:
SUCCESS TIP* Do not work your slip stitches overly tight, they will be too difficult to work into the next row if you do.
Row 1: sl st in 2nd ch from hook and each rem ch across, at the last yarn over pull through of the final sl st; loop Light Gold over the hook pulling that through and dropping the Dark Gold to change colors. (15)
NOTE***To keep this project on the quick side, we will NOT cut the yarn at the color changes. Instead, you will leave it hanging off to the side until it is time to use that color again. When you pick the color back up using it as the final yarn over pull through, be sure to not pull too tightly to avoid puckering the work. Be sure to untangle the colors here and there so you don’t end up with too much hassle, it won’t be much! Less ends to weave. You’re welcome lol!
Row 2: ch 1, turn, sc in the BACK LOOP ONLY (the one closer to you on the work) of the 1st 3 sl st, hdc in the BACK LOOP of the nxt 3 sl st, dc in the back loop only of the nxt 4 sl st, tc in the back loop only of the last 5 sl st. (15)
Row 3: ch 3 (counts as 1st tc so do not work into the st at the base of the ch-3), turn, tc in the nxt 4 sts, dc in the nxt 4 sts, hdc in the nxt 3 sts, sc in the last 3 sts, at the final yarn over pull through of the last sc, drop the light gold and pick up the dark gold again. (15)
Row 4: ch 1, turn, sc in each st across. (15)
Row 5: ch 1, turn, sl st in each st across, at the final sl st, drop the dark gold and pick up the light gold as previous.
Rows 6-9: Repeat Rows 2-5
Rows 10-13: Repeat Rows 2-5, tie off light gold, do not tie off dark gold.
EDGE THE TOP OPENING:
Row 1: ch 1, sc across the top egde working around the ends of the rows, cut dark gold.
SUCCESS TIP: Work so that you are encompassing the posts of the sts that are at the ends and I also worked around the strands that were carried at the color changes, it really helped make it look neat and clean. It took me 9 evenly space sc to work neatly across as a guide point.
EDGE THE BOTTOM OPENING:
Row 1: With the right side of the piece facing you and the larger bottom edge further from you, join the dark gold with a sl st around the stitch at the rightmost edge, ch 1, sc evenly across working as you did for the top opening edge, cut dark gold.
SUCCESS TIP: It took me 20 sc to work evenly across. When working into the tc and ch-3 around the bottom edge DO NOT encompass them completely. Instead, insert your hook into the strand of the actual stitch only grabbing a side loop or two so that a large gap is not created as you edge!
ADD “FRINGE”
With the bottom larger edge further from you and the right side of the piece facing up, join black with a sl st in the BACK LOOP ONLY of the rightmost stitch:
Rnd 1: ch 10, *sl st in next st, ch 10, repeat from * across, sl st in the last st, cut black.
SUCCESS TIP: If you happen to be using Red Heart Super Saver, you may want to make your fringe a ch-8 instead of a ch-10 so it is not overly bulky.
LEG:
With peach, leave about a 10” beginning tail and ch 11:
Row 1: hdc in 2nd ch from hook and in each rem ch. (10) (Skipped ch does not count as a st)
Row 2-5: ch 1 (does not count as a st here and throughout the leg), turn, hdc in each st across. (10)
Row 6: ch 1, turn, hdcdec over 1st 2 sts, hdcdec over nxt 2 sts, hdc in rem 6 sts. (8)
Row 7: ch 1, turn, hdc in 1st 6 sts, hdcdec over last 2 sts. (7)
Row 8-10: ch 1, turn, hdc in each st across. (7)
Row 11: ch 1, turn, hdc in 1st 5 sts, hdcdec over last 2 sts. (6)
Row 12: ch 1, turn, hdcdec over the 1st 2 sts, hdc in last 4 sts. (5)
Row 13: ch 1, turn, hdc in 1st 3 sts, hdcdec over last 2 sts. (4)
Row 14: ch 1, turn, 3 hdc in 1st st, hdc in last 3 sts. (6)
Row 15-17: ch 1, turn, hdc in each st across. (6)
Row 18: ch 1, turn, (hdcdec over 2 sts) THREE times total, do not tie off. (3)
EDGE LEG:
Rnd 1: ch 1, turn, sc evenly around working 1 st in the end of each row (1st across the last row of the leg made, to make sure you are working the right direction) and in st and end of row, working 3 sc in each corner, sl st to 1st sc made, cut peach.
SUCCESS TIP: It took me 63 sc to evenly edge the piece. Make sure you turn so the right side of the edging round faces up and the leg curves the right way (calf bump to the right)
SHOE:
Position the piece, so the short edge (row 18 of the leg piece) faces away from you and the curve (calf) of the leg is to the RIGHT and the wrong side of the leg edge round is facing you, join the black yarn with a sl st in the right most st of the short edge in the corner:
Row 1: ch 1, sc in the nxt 6 sts. (6)
Row 2: ch 1, turn, sc in the 1st 4 sts, scdec over last 2 sts. (5)
Row 3: ch 5, turn, sc in 2nd ch from hook and nxt 3 chs, sc in the last 4 sts of the row, ch 5.
The following are partial rows and don’t work all the way across.
Row 4: Turn, sc in 2nd ch from hook and nxt 3 chs, sc in nxt 2 sts of the row, sl st in the nxt st.
Row 5: ch 1, turn, skip the 1st st because that ch-1 counts as the 1st sl st and sl st in the nxt st, hdc in nxt 3 sts, sl st in nxt 2 sts, cut black, leaving about a 12” tail.
To “firm” up the show without making it bulky, I used the end tail and whipstiched around the ends of the rows of the shoe, before weaving them in to trim flush.
STITCH ON STOCKINGS:
With about a 50” strand of black, begin by pulling the yarn through the stitch on the right of the leg, where the shoe and skin meet, knot it right there at the edge so it is firmly attached.
Now, stitch across the leg and wrap the yarn around the edge and to the back then insert the needle from back to front in the stitch of the edge round just a few rows up, stich around the edge stitch 2 times, then move across to the opposite side of the leg a few rows up and do the same. Repeat this all the way until about 3 rows short of the top of the leg, then repeat back down the leg criss crossing over the previous stitches to form a grid. You should end up back down on the opposite side from where you started where the shoe and skin meet, tie off.
You can liken the stitching to the way a shoe lace is criss crossed on a shoe to help you visualize how to stitch it.
Finishing:
Using the beginning tail from the leg at row 1, stitch the leg into position under the fringe so it looks like it is coming out of the lamp.
Weave in any remaining ends.
You can sew this to ANYTHING! Stockings, Ugly Christmas sweaters, E6000 glue should work too! Dip it in liquid starch (in the detergent section of your store and CHEAP!) Lay it flat to dry and add a loop and make it an ornament!
I would really love to see what you make! Show me on one of the social media sites linked below!
Much Love & Yarn,
Stephanie
The information and photos in this posting are the sole copyrighted property of Crochetverse©2016. Please do not copy and paste any of the information contained within either electronically, verbally, or written in part or in whole. Instead, please share the DIRECT LINK to this posting only, and if you do, I thank you for sharing. You of course may sell anything you make from this pattern that you have made with your own two hands, no contract labor or mass productions are permitted. If you credit Crochetverse as the designer that is greatly appreciated! If you are seeing this pattern anywhere but www.crochetverse.com, you are being presented a stolen copy. I work really hard to make fun stuff for all my crochet family. Please let me know if you see this elsewhere!


