

")
If you follow me…even a little…you KNOW I am obsessed with all things 80s!
And, much to my Lisa Frank style rainbow unicorn delight, I recently saw that a new SMURFS movie was coming out in a few weeks! SO, what else to do, but head DIRECTLY for the yarn and make a Papa Smurf Customization for my base pattern, the Blank Canvas Onesie!
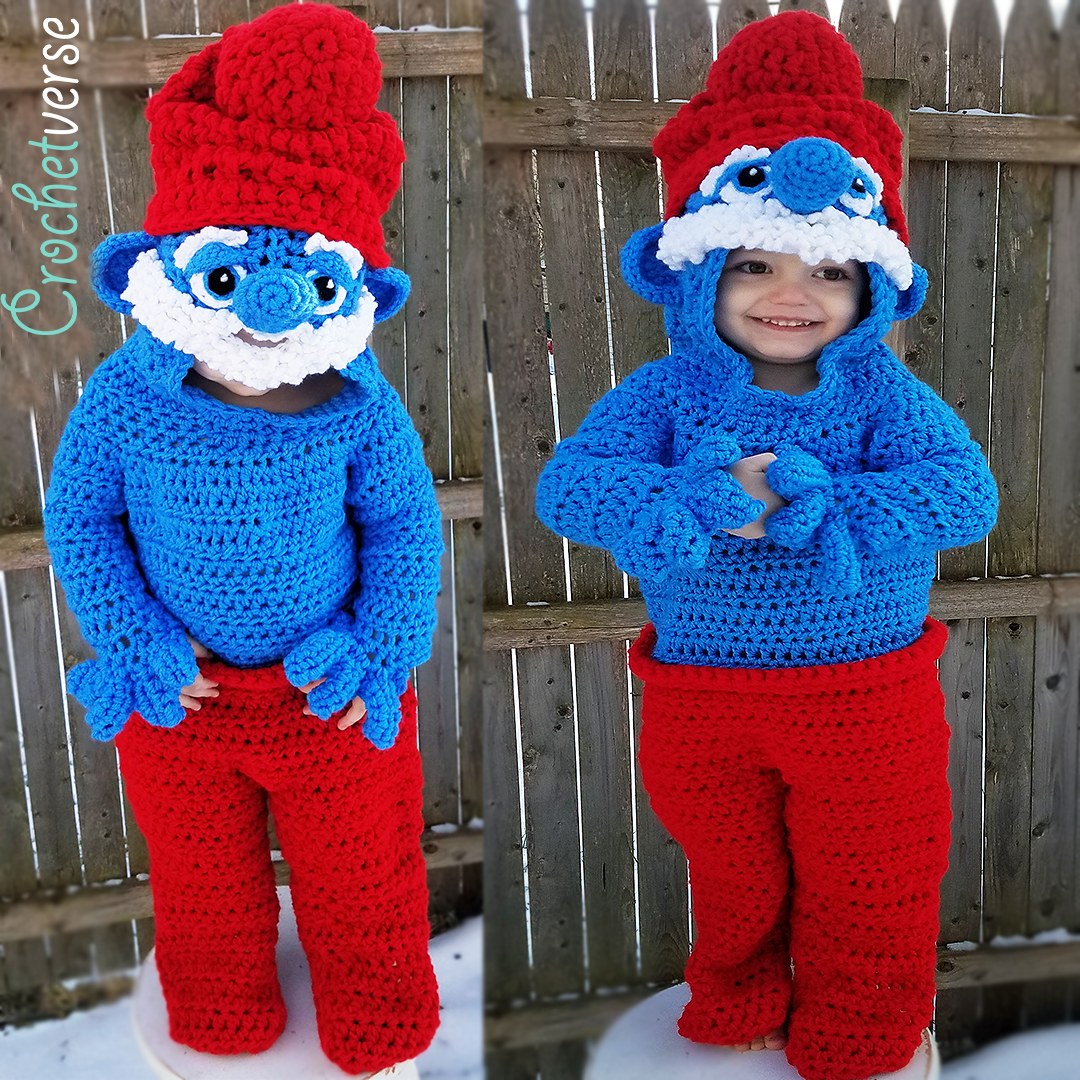
This tutorial here is a step by step GUIDE to the customization, it will follow though the points to customize the Blank Canvas Onesie into a Papa Smurf! Feel free to adjust as needed to meet your size or visual desires. I feel these guidelines will work with ALL the children and teen sizes, and may need a little adjusting if you want to do adult. My sample here I have created is a 2T/4T so you may gauge!
My Blank Canvas Onesie pattern is NEEDED to make this Papa Smurf. It gives you ELEVEN sizes of a full crochet onesie. I have had it tested and made it many times; and I am always here to help if needed. It is chock full of photos and charts too! That can be purchased through Ravelry here:
http://www.ravelry.com/patterns/library/blank-canvas-onesie
This is an image of the basic onesie, again eleven sizes 0/3 months to men’s XL. It can be any length sleeve or leg you desire. It opens in the back so all embellishments remain clearly visible.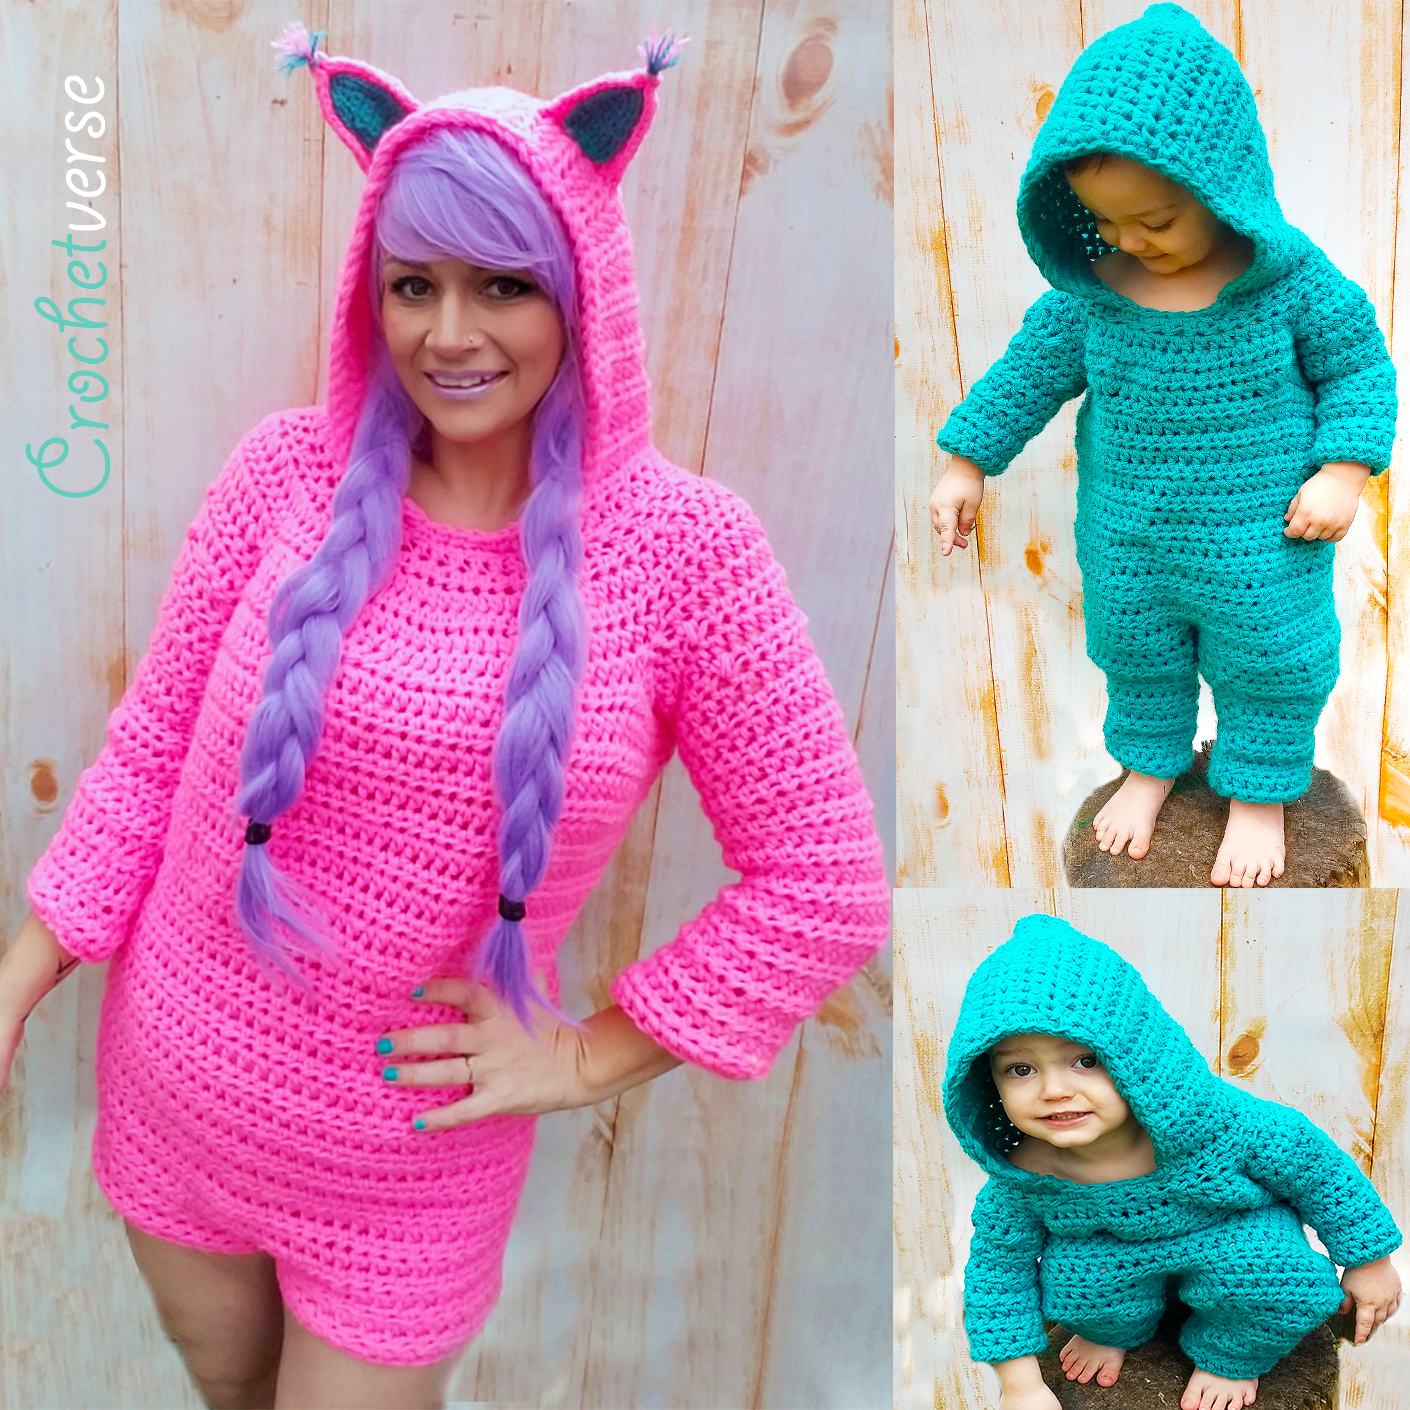
After you get your copy of the basic onesie, follow along below as I detail out the steps I took to make the blank onesie into Papa Smurf!
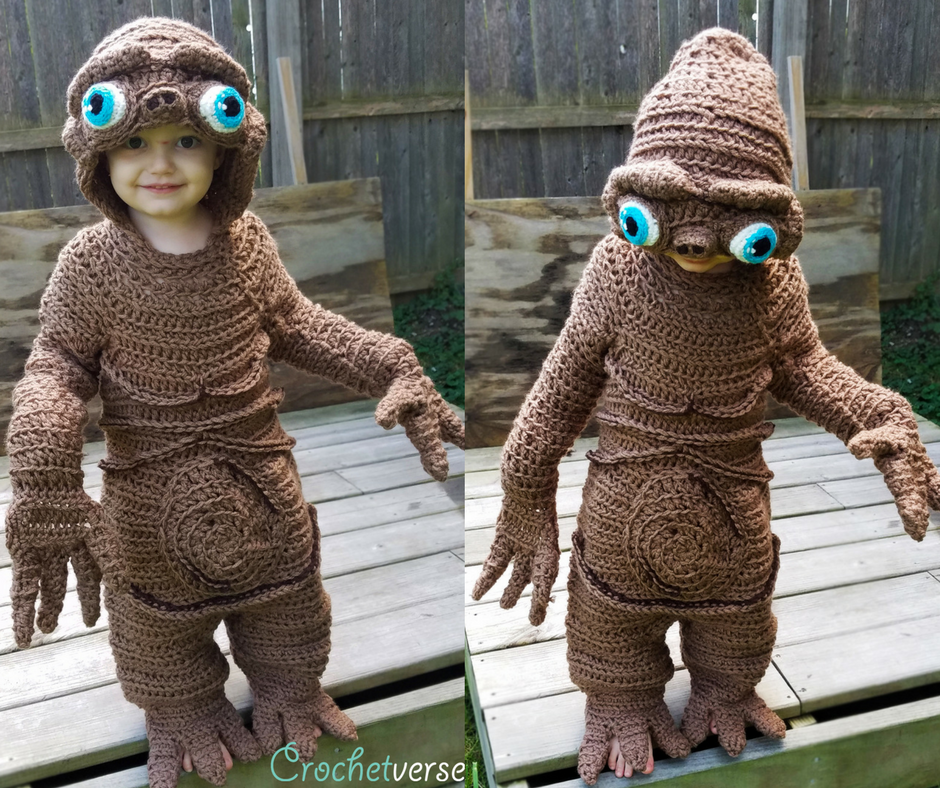
This whole blank canvas onesie pattern was inspired to be created when my ET costume went (to my AMAZEMENT) viral last Halloween! Here he is!
Please always feel free to contact me through one of the social media sites listed at the end of this post, I am here to help you have success with your Crochetverse patterns!
So, let’s get to it:
Again, my sample is a 2T/4T, adjust as needed for your size:
I used Red Heart Super Saver Jumbo: (2) Cherry Red, (2) Delft Blue, (1) White and did NOT use all of them by any means. I just prefer to have 2 separate skeins to pull from when I work double strand.
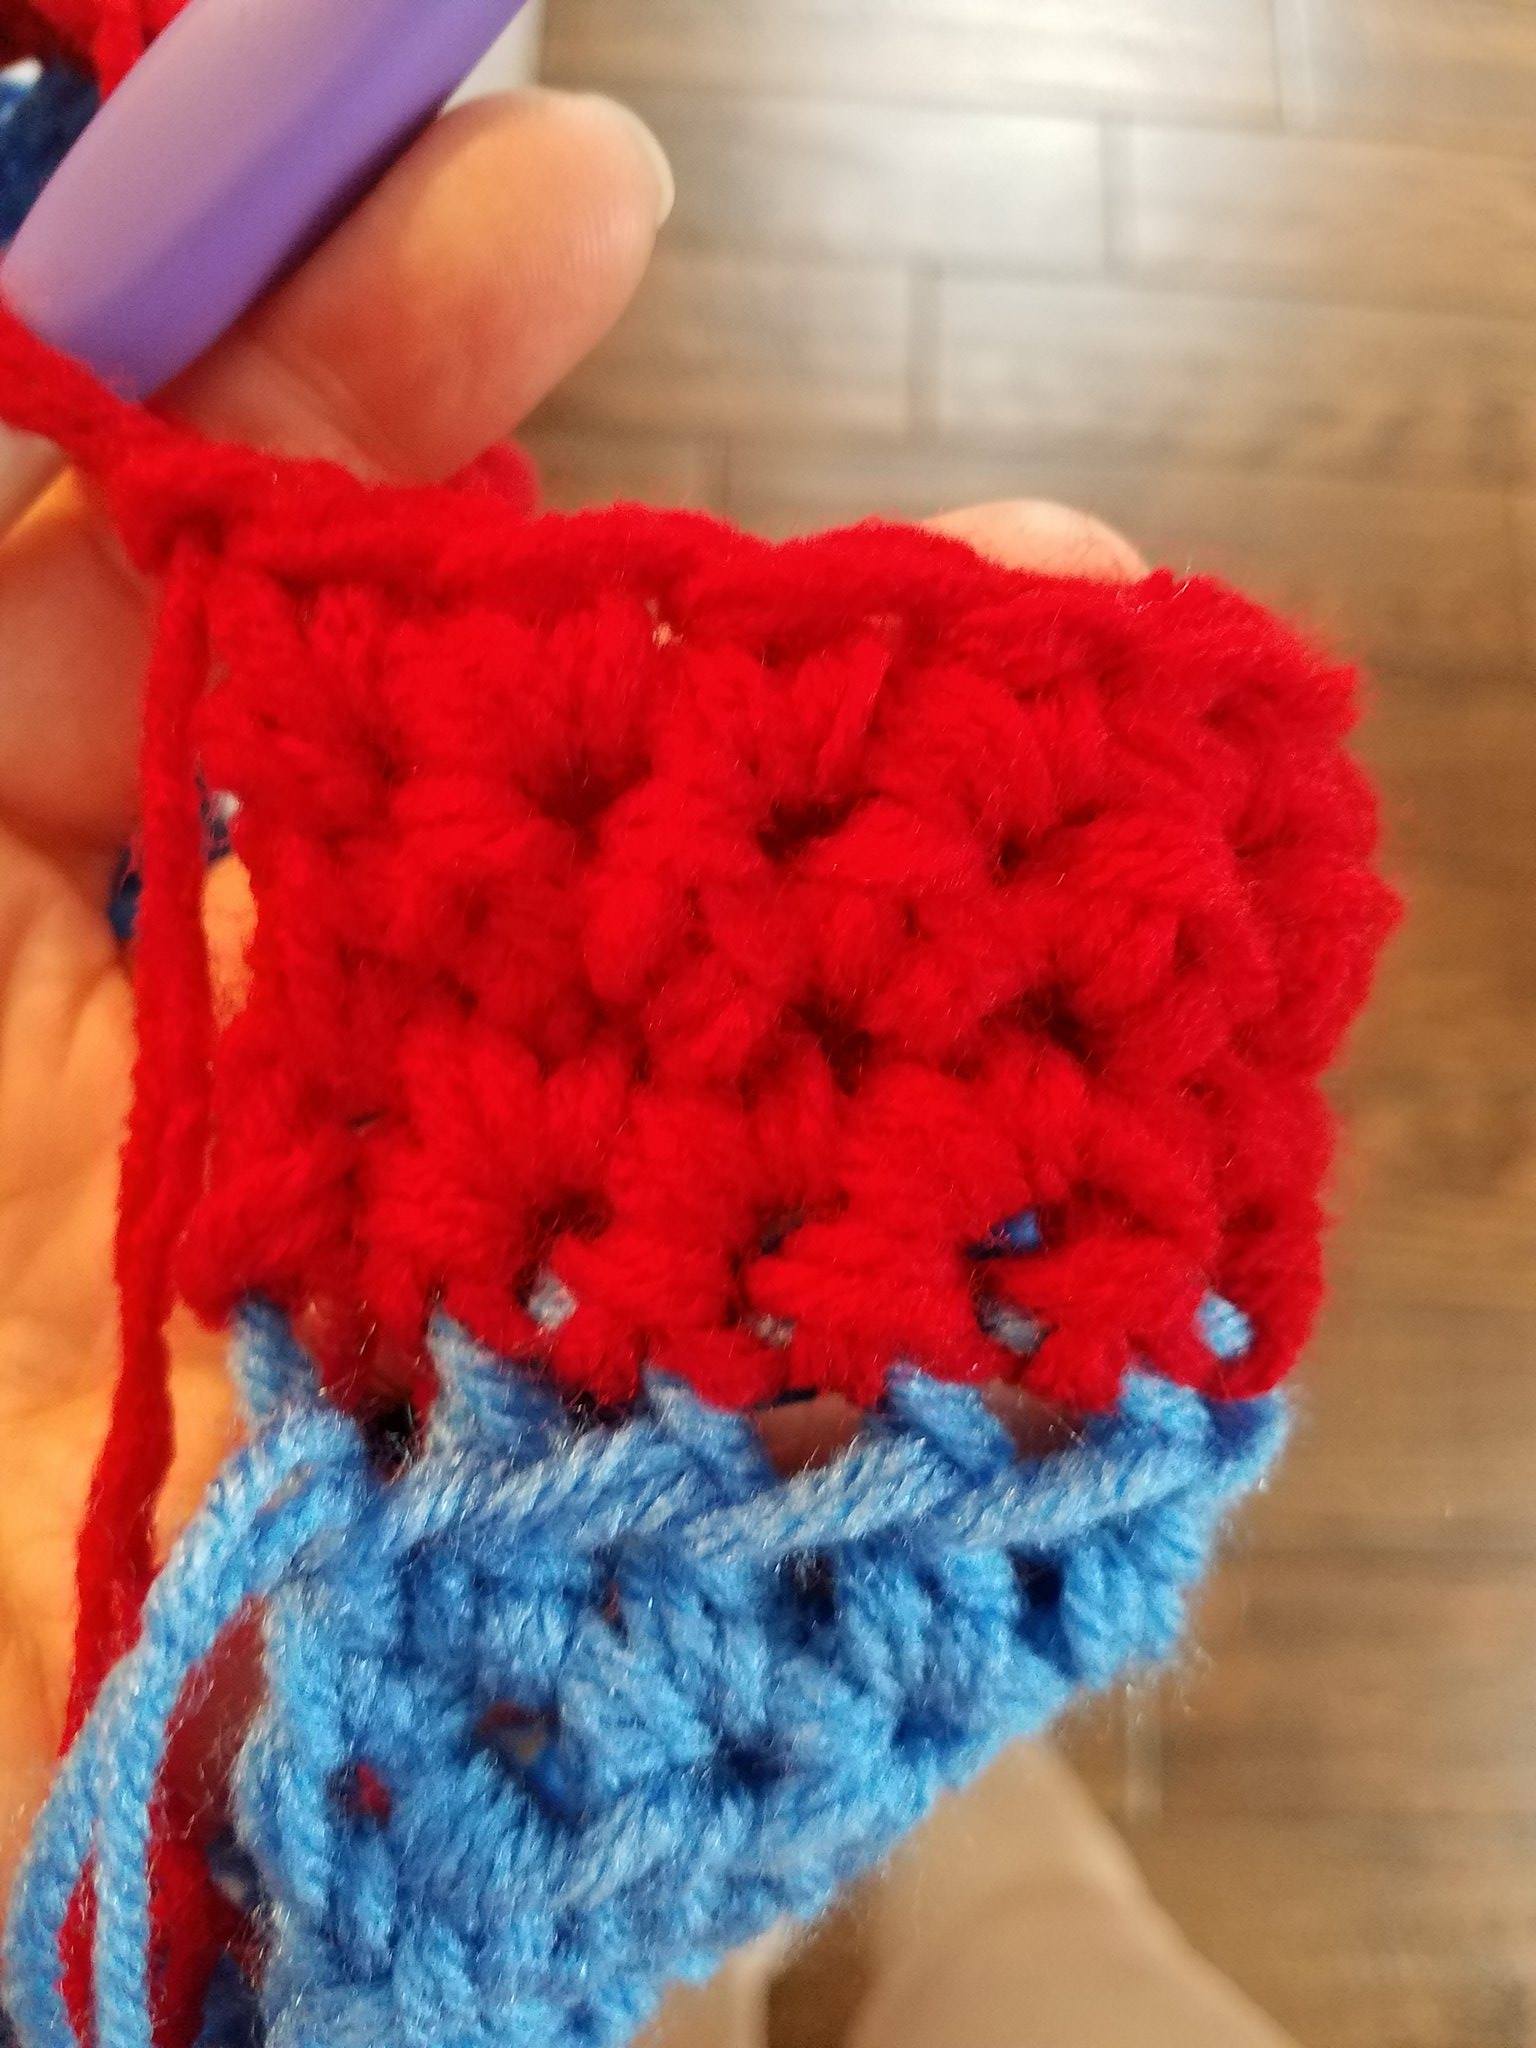
Step 1: Create pattern as instructed beginning with blue until you are THREE rows short of finishing the “torso section”. (for the 2T/4T, I stopped at row 12 of torso section)
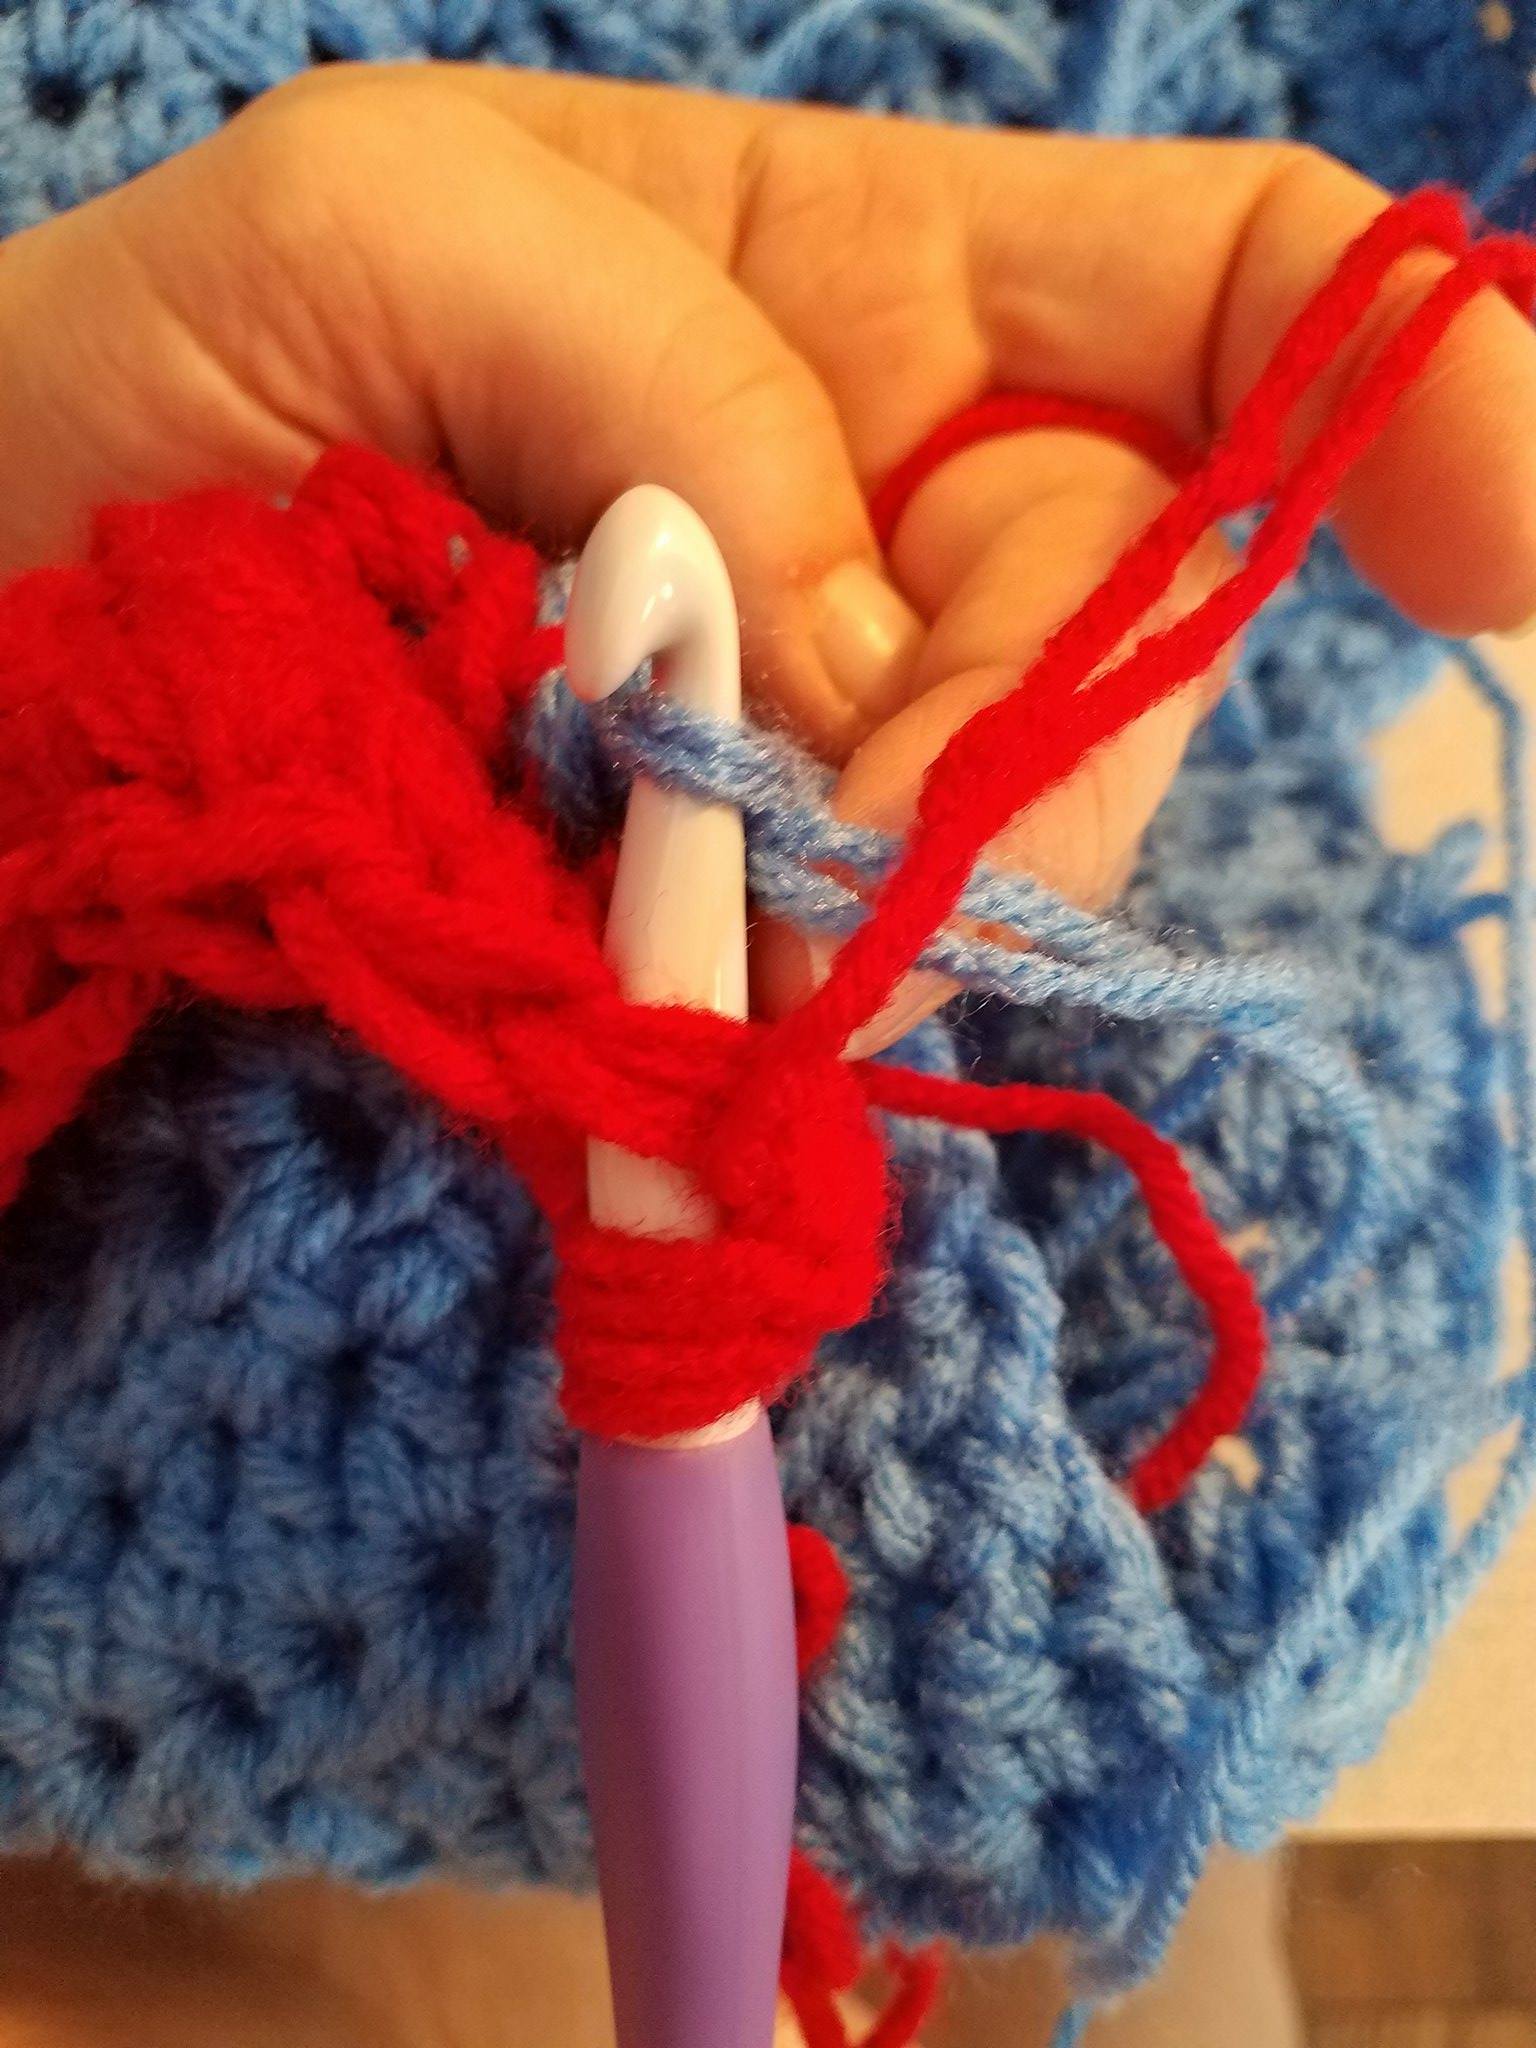
Step 2. Create “PANTS ROLL”: You want to end the blue on a row with the wrong side of the piece facing you so the 1st row of the red for the pants roll is worked on the right side of the garment facing you.
(The pants roll does NOT count as any rows on the garment as far as the pattern is concerned) Four rows of sc should do it for all the sizes. If you want a more prominent pants top roll, work to 6 rows of sc.
Row 1: Join red with a sl st to the FRONT LOOP ONLY (The one closer to you) made on the previous row, ch 1, and sc in the same FRONT LOOP ONLY and in each FRONT LOOP ONLY across.
Row 2-4: ch 1, turn, sc in same st and in each st across.
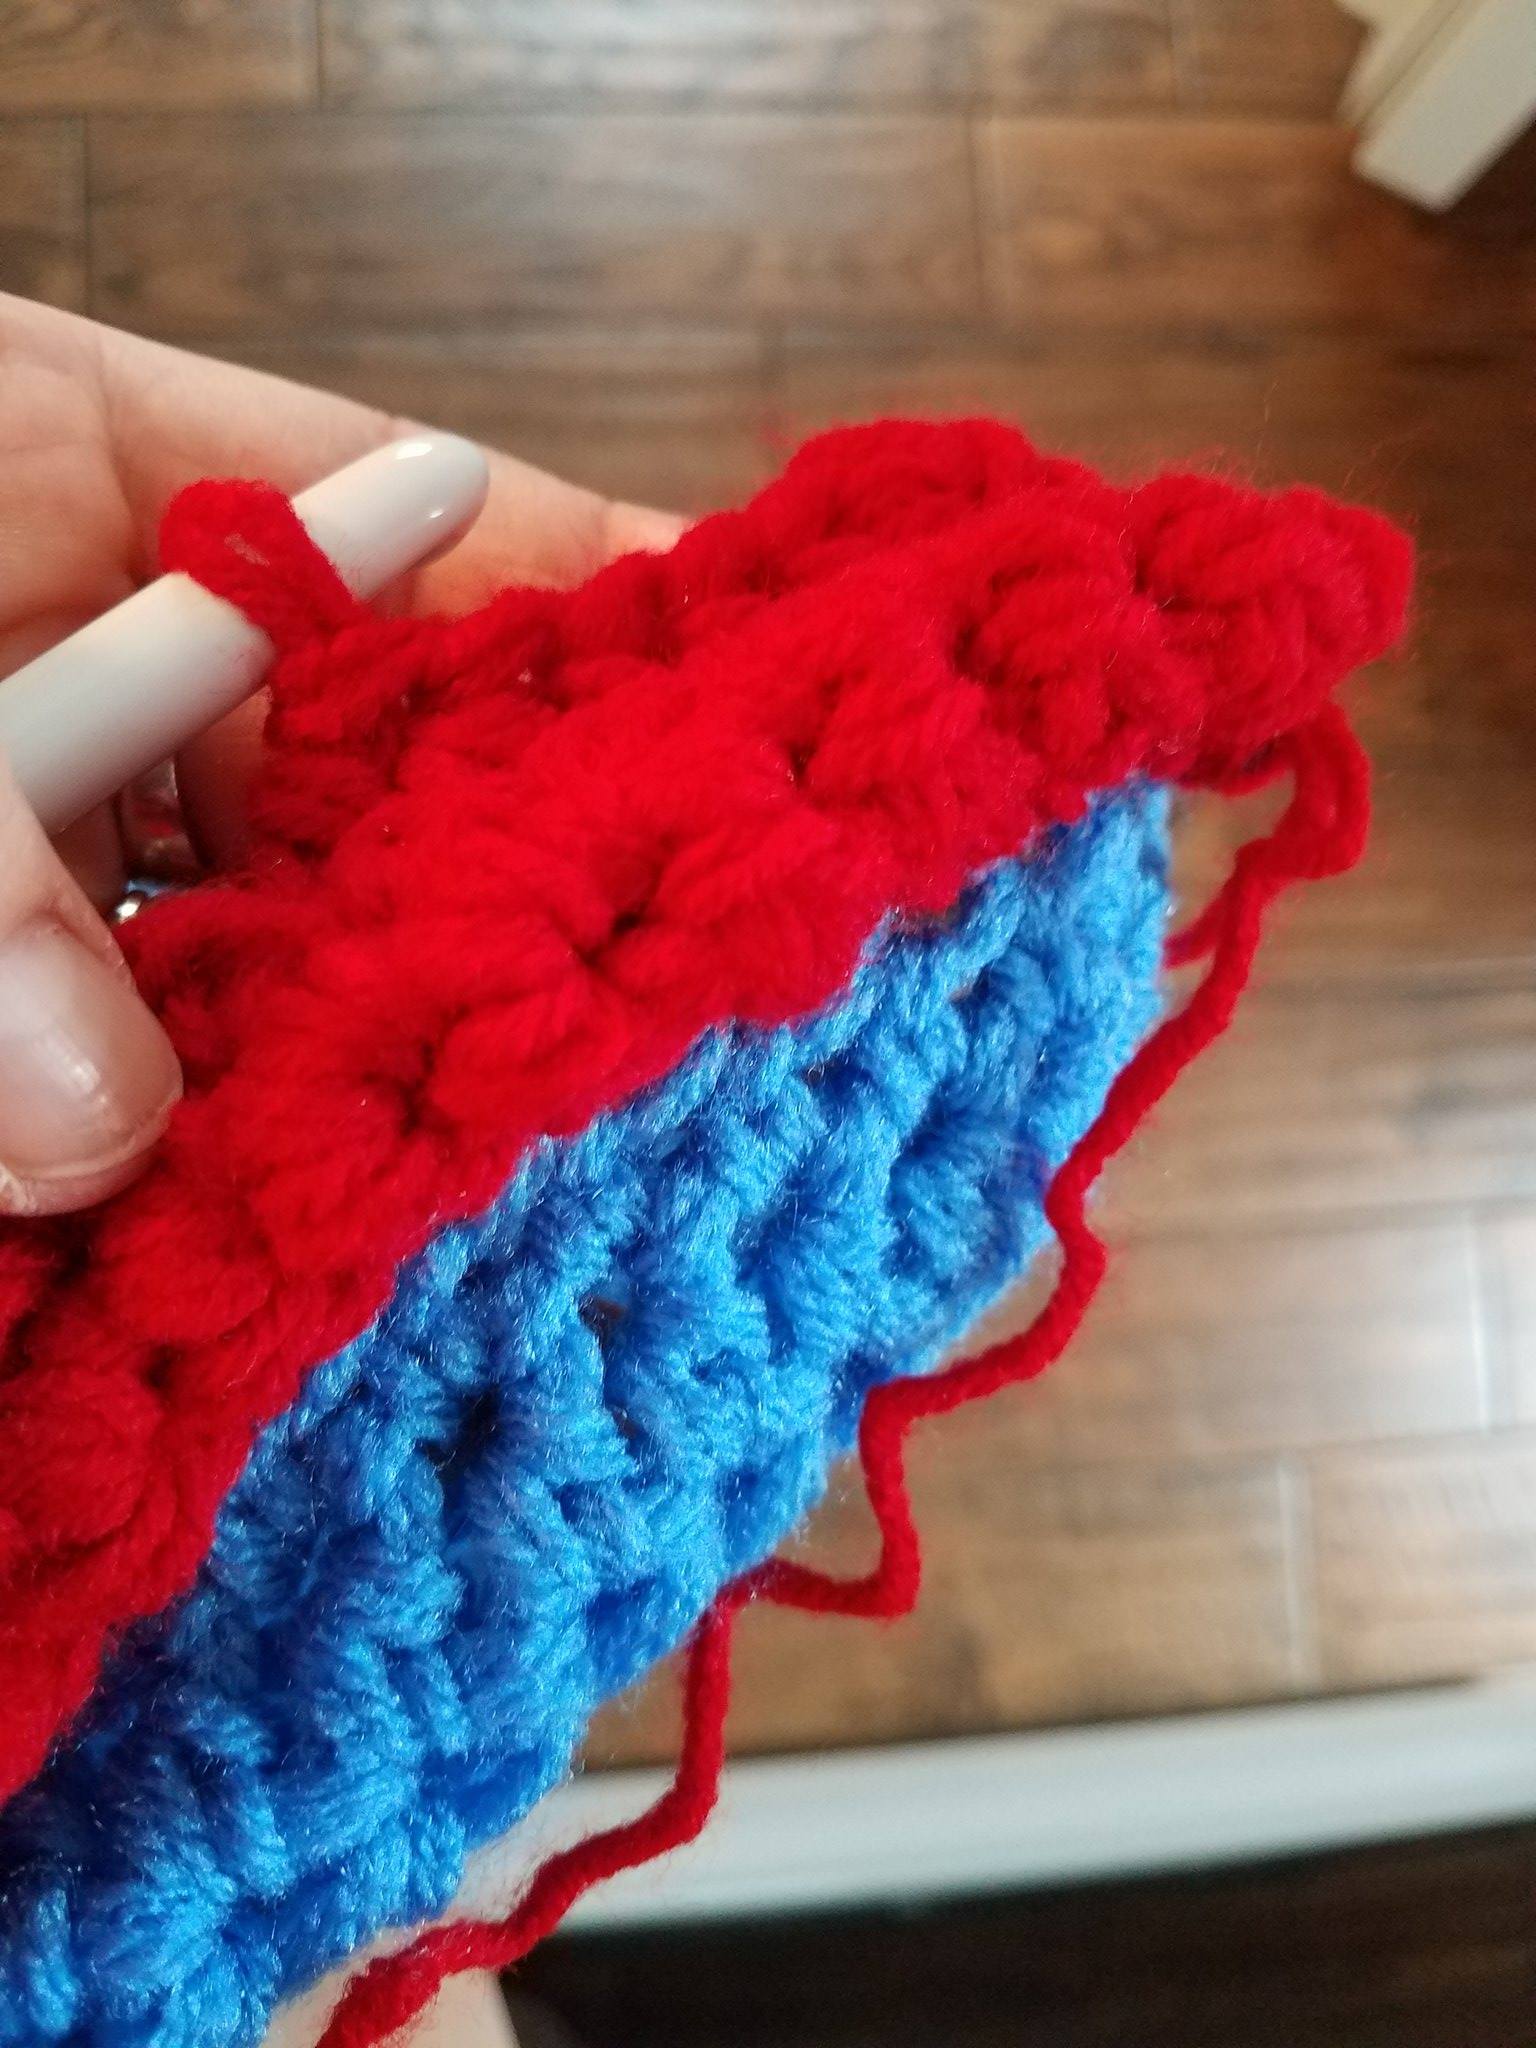
Then for the 1st row that DOES count towards the main pattern rows to finish off the “torso section” as written, we will work it though BOTH loops of the last row of sc AND the REMAINING BACK LOOP of the last row made in blue. This will create a roll/ridge on the front side of the work, simulating the top of the pants.
From Top to Bottom: 1. All 4 rows of sc complete (not counted as pattern rows)
- 1st row of hdc that DOES count towards the last few rows remaining to work on the
“torso section” on the pattern, worked through the sc AND back loop of the st below.
3. The pants roll ridge created on the right side of the work.
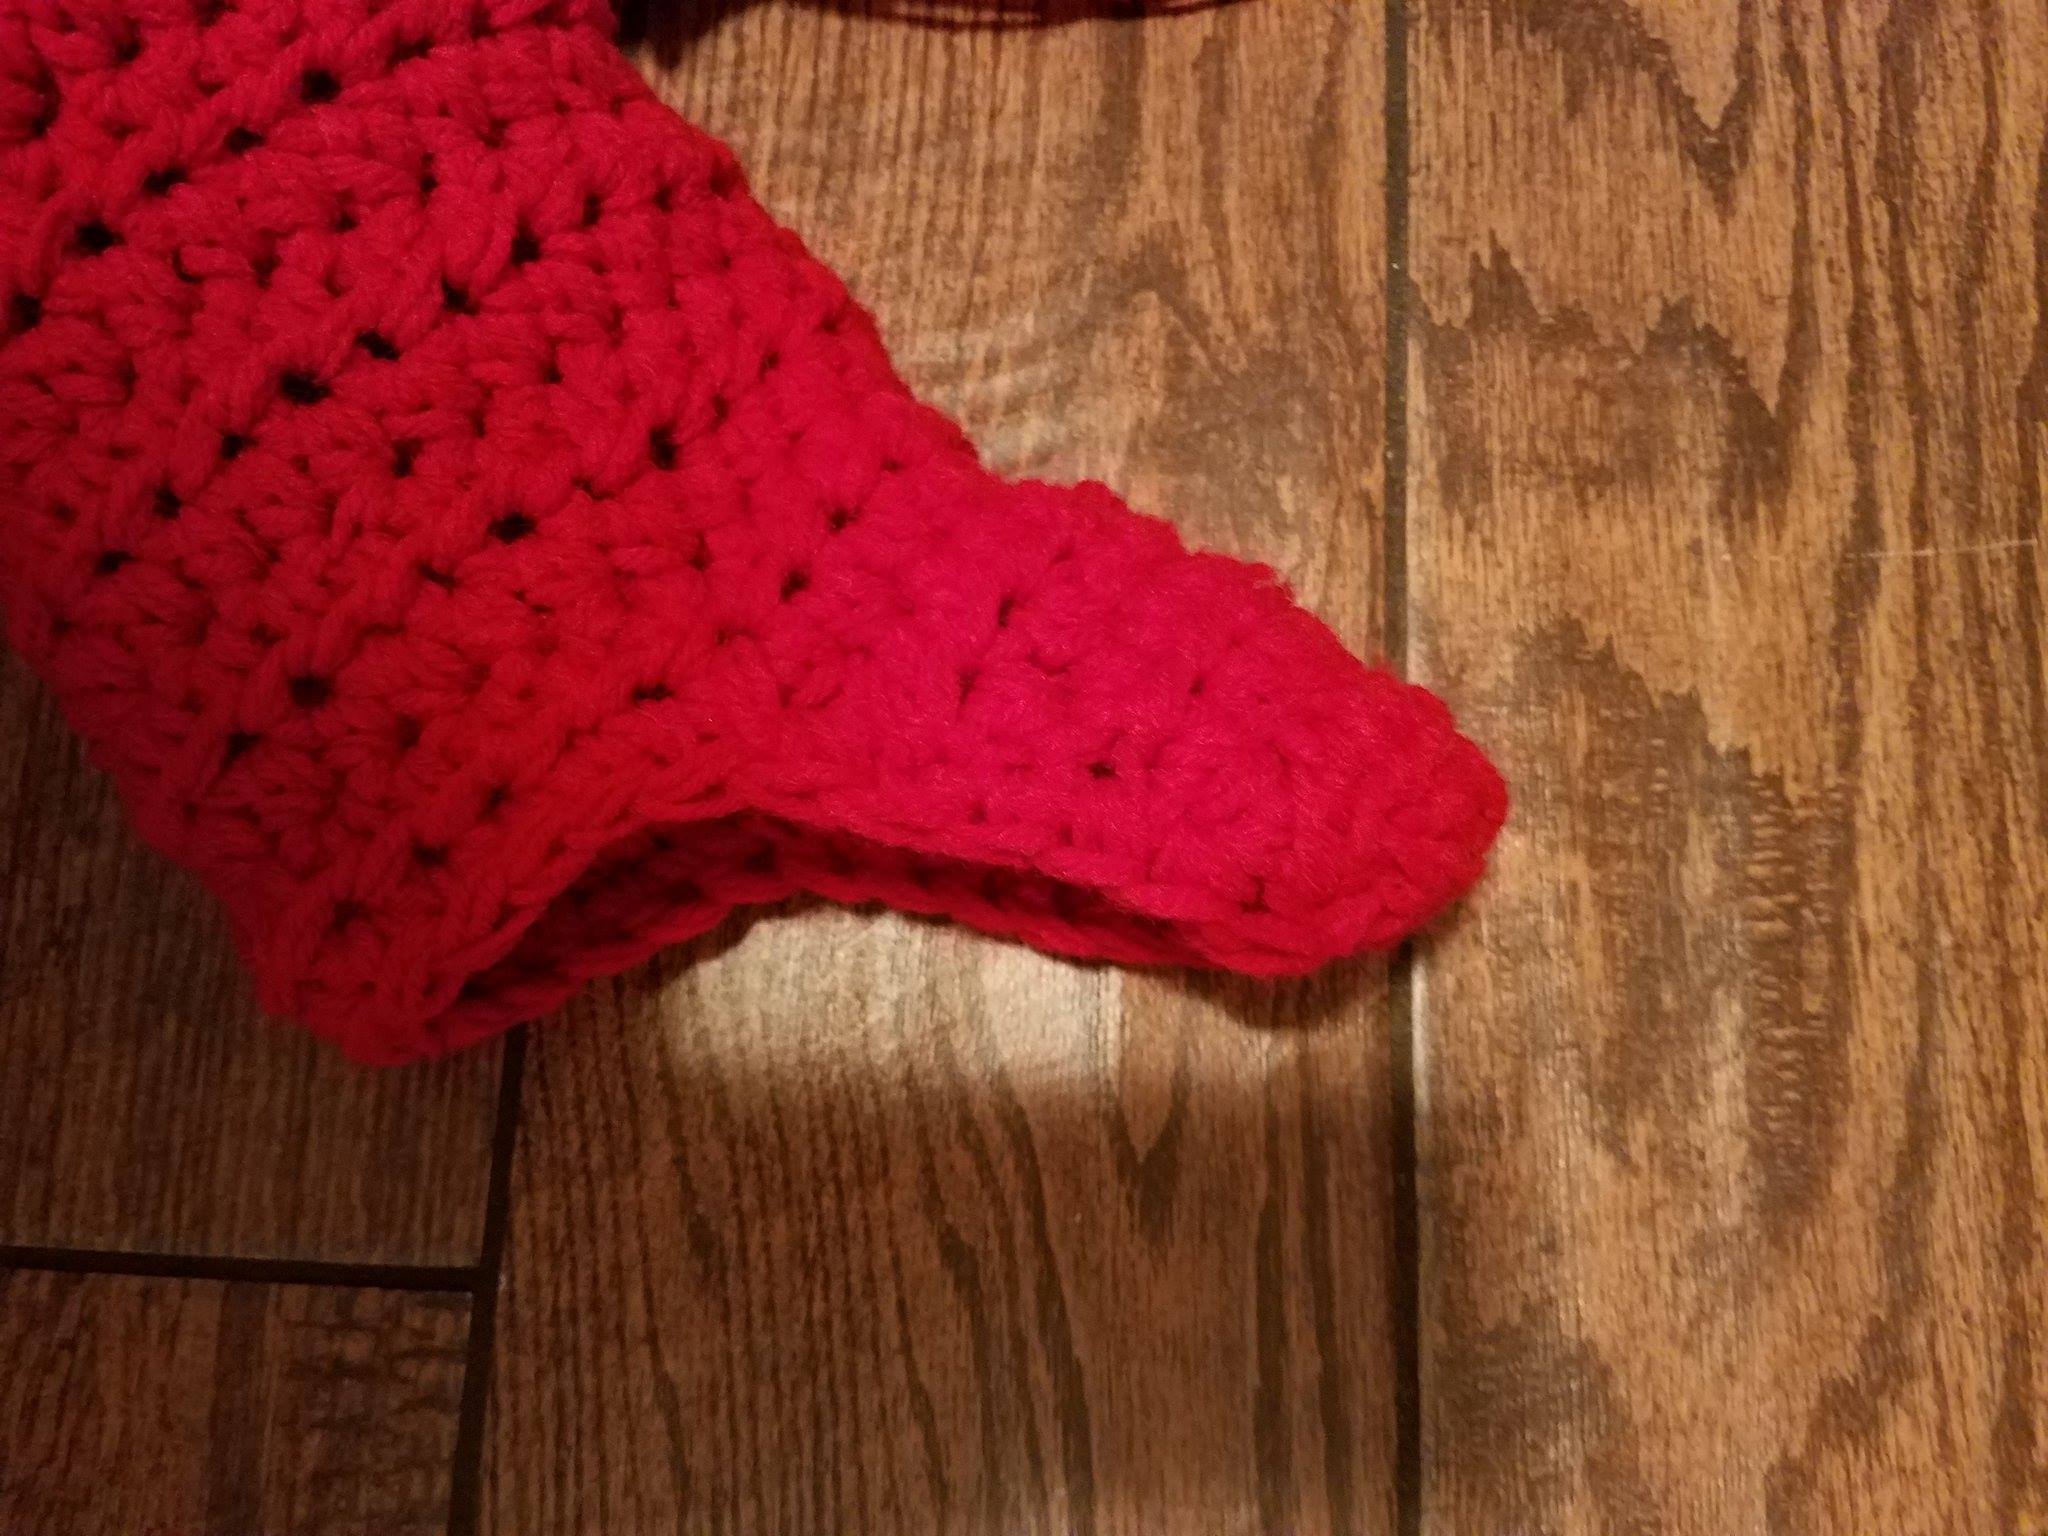
Step 3: Finish the rest of the pattern in red for the bottom half as written creating the “remainder of the torso”, “crotch gusset”, and “legs” in red. If desired*: I chose to decrease for the lower leg so it tapered in some. The 2T/4T has 13 rounds total for the length and begins with 30 sts. I did 7 rounds as written at 30 sts each, then decreased down to 24 in the 8th round and completed the final rounds at 24 sts each. *
Step 4: Create the FEET ELONGATION: After the final round of the leg, I carried on to create an extension to give the appearance of the covered foot of the Smurf. Flatten the leg down in half. I worked the FRONT half of the stitches to create the foot cover. My final round of my leg had 24 stitches in it, so I worked the 12 stitches that were on the front of the leg when pressed flat. For the 2T/4T, I worked as follows:
Row 1: 12 hdc across the front 12 hdc of the last round of the leg. (12)
Row 2: hdcdec over 1st 2 sts, hdc in the nxt 8 hdc, hdcdec over the last 2 sts. (10)
Row 3-5: hdc in each st across. (10)
Row 6: hdcec over 1st 2 sts, hdc in nxt 6 sts, hdcdec over last 2 sts. (8)
Row 7: hdcdec 4 times. (4)
Your goal here is to create a tapered extension that narrows to the toe and is long enough to cover the foot of the intended wearer. Adjust as needed.
ROUND 8: Once you have created the above extension, you will work around the ENTIRE leg opening in sc for 1-2 rounds for a child and probably 3-4 for an adult.
Here is what it looks like unworn. Notice how the foot extension is worked off the front half of the leg opening until it is long enough to cover the foot entirely and tapering though decreasing as you work. Then, to “cup” it into a cover shape, you will sc around the ENTIRE opening of the leg and around the extension working in the sides of the rows as well.
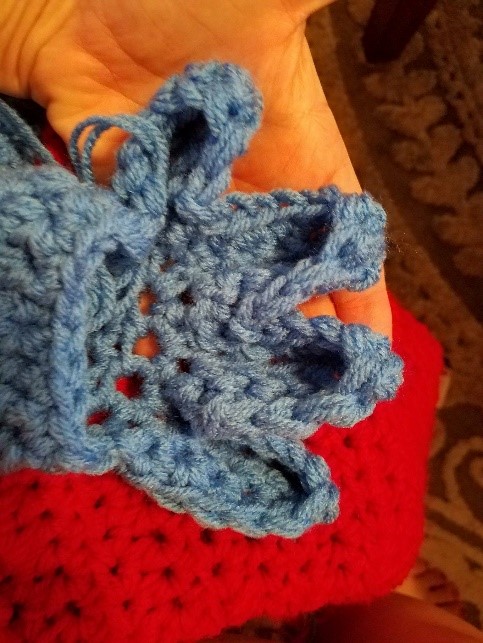
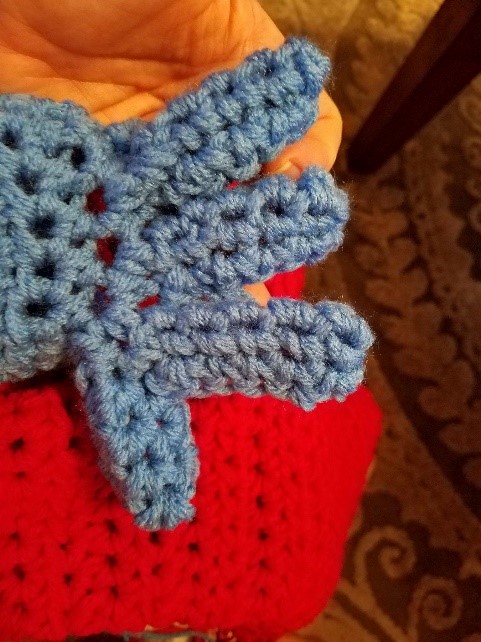
Step 5: WORK arms as written and create HANDS:
Work arms with blue as written. Once done, flatten the last round opening. You will be working in the TOP half of the opening to create the hand. Join the yarn with a sl st in the st center of the top when laid flat:
Create FINGERS: Chain 5, hdc in 2nd chain from hook and nxt 3 chs, sc in the same st at the base, *sc in the nxt st, chain 6, hdc in 2nd ch from hook and nxt 4 chs, sc in same st at the base. This creates a slightly shorter thumb and three fingers.
Edge Round 1: Do not tie off and in the same way you edged the ENTIRE opening of the “shoe” at the bottom of the leg; do the same here. You will sc in each sc, remaining loop of the chains on one side of the finger, and in each st around the finger. Don’t add stitches to round corners, we want the opening to “cup”.
Edge Round 2: chain 1 and turn, then sc around the finger and thumb openings only one more time to add a little more depth to them, then tie off. If desired, leave a long tail and then using that tail seam up the rear of the fingers and thumb to “round” them into a tube shape. I did NOT do that on my sample.
Repeat it for the other sleeve. On one side you will work the thumb first and on the other side you will work the fingers first. Be sure you place the thumbs opposite as real hands are.
Here is the front and back of the hand extension:
Step 6: EDGE THE FACE OPENING AND THE BACK OPENING: Work according to the pattern, then add one more round on the face opening so there is more area to add the facial features onto. For this sample, I chose buttons instead of a zipper. I edged only one side of the opening in 2 more rows of hdc, then a row of sl st. I stitched the buttons to the shorter side, then layed the extra rows over them and just pushed the buttons thought the gaps between stitches in the rows to secure.
Step 7: Create and seam on hat:
I am not one for reinventing the wheel if it is not needed. So, when I saw a fellow designer had created a well done Smurf hat in double strand worsted weight yarn, just as I was using; I jumped on the opportunity to support another person’s designs and bought the pattern. I created it as written for a child with the changes described below and seamed it to the top of the hood as if it was being worn by the Smurf.
I worked double strand in red with a N/P hook.
I eliminated round 13-16, and then also eliminated round 18. Then finished up as written because I didn’t want the hat to sit too far down on the hood for this project.
I left a long tail after the final stitch and used that to seam to the hood. I placed it on my head form for proper placement when I was attaching the hat to the hood and the facial features below in the next step. I used the tail to enhance the folds of the hat too.
I stuffed the tip with red yarn because the holes were somewhat gapped, I think regular polyfil would have shown too much for my liking.
You can find that pattern by Holly Tacey here:
http://www.ravelry.com/patterns/library/smurf–vexy-smurf-crochet-hat-pattern
Step 8: Add features ears, eyes, nose.
Ears: Double strand blue but drop down to a K(6.5mm) crochet hook for added firmness.
Row 1: Make magic circle, ch 1, 6 sc in the ring, pull to close.
Row 2: ch 1, turn, 2 sc in the 1st st, sc in nxt 4 sts, 2 sc in last st. (8)
Row 3: ch 1, turn, sc in 1st st, 2 sc in nxt st, (sc in nxt st, 2 sc in nxt st) three times total. (12)
Row 4: ch 1, turn, sc in 1st 2 sts, 2 sc in nxt st, (sc in nxt 2 sts, 2 sc in nxt st) three times total. (16)
Row 5-6: ch 1, turn, sc in each sc across, tie off after row 6 leaving a long tail to seam to head.
Continue increasing in the same manner if you need a larger ear for an adult size head.
With the flat side against the head, seam in a CURVED fashion to either side of the head below the hat using the tails. View the hat from the front, back and top; pin them in place; then seam them on.
Nose: Double strand blue with a K hook
Rnd 1: Make magic circle, ch 1, 6 sc in ring pull to close.
Rnd 2: Do not turn, do not join throughout the nose piece, 2 sc in each sc around. (12)
Rnd 3: (sc in nxt 2 sc, 2 sc in nxt sc) four times total. (16)
Rnd 4-5: sc in each sc around.
Rnd 6: (sc in nxt 2 sc, scdec over nxt 2 sc) four times total. (12)
Rnd 7: (sc in nxt sc, scdec over nxt 2 sc) four times total. (8)
Rnd 8-9: sc in each sc around, tie off. Stuff with yarn scraps.
Using tail seam to face. Use main photo as a guide. I smushed it so it was slight oval in shape as opposed to perfectly round. Then, I used the tail and went into the hat and about round 6 of the nose to slightly stitch the nose in an upturned position.
Eyes: Made in blue, black, and white. Single strand with a G hook.
Main eye base (Make 2): With white, make magic circle, ch 1:
Rnd 1: 6 sc in ring, pull to close, sl st to 1st sc made.
Rnd 2: ch 1, turn,2 sc in each sc around. (12)
Rnd 3: ch 1, turn, hdc in nxt st, 2 dc in nxt st, hdc in nxt st, sc in nxt st, 2 sc in nxt st, sc in nxt sc, 2 sc in each of nxt 3, sc in nxt sc, 2 sc in the nxt st, sc in the nxt st, sl st to 1st hdc made, tie off leaving a long tail to seam to face later. (18)
Iris (Make 2): With blue, make magic circle, ch 1:
Rnd 1: make 6 sc in the ring, pull to close.
Rnd 2: do not turn or join, 2 sc in each sc around, sl st to nxt st, then tie off leaving tail to seam to eye base later. (12)
Pupil (Make 2): With black, make a magic circle, ch 1:
Rnd 1: make 6 sc in the ring, sl st to 1st sc made, tie off, leave tail to assemble eye later.
Assemble each eye: Stitch the black pupil on centered on the blue iris. Stitch that assembly on the rounder side of the main eye base (opposite the hdc,2dc,hdc almond side) and slightly towards the top of the base. Stitch a white eye “sparkle” with just a needle and white yarn. Each sparkle should be at about the 1 o’clock position on the black pupil of the eye. I went in and out 3x for each sparkle. Then, stitch the eye assembly in place on either side of the nose. They turn slightly down towards the cheek and lay about 33% overlapping to the nose.
Eyelids: (Make 2) In blue, single strand, G hook.
Row 1: ch 5, sc in 2nd chain from hook and nxt ch. (4)
Row 2: ch 1, turn, 2 sc in 1st st, sc in nxt 2 sts, 2 sc in last st. (6)
Row 3: ch 1, turn, 2 sc in 1st st, sc in nxt 4 sts, 2 sc in last st. (8)
ROUND 4: ch 1, then work a sc in the end of each row up, sc in each remaining loop of the beg chain across the top of row 1, sc in the end of each row down, then tie off leaving tail to seam to face.
Seam the eyelid just slightly overlapping the top of the eye on the face with row 3 on the bottom and row 1 on the top. Repeat for other eye.
Eyebrows: (Make 2) In white, single strand, and G hook.
Chain 10:
Row 1: ch 2 more then sl st in 3rd chain from hook, (ch 2, sl st in nxt ch) twice, (ch 3, sl st in nxt ch) three times, (ch 4, sl st in nxt ch) four times, tie off leaving a tail to seam to face.
With the chain 4’s to the center, seam each brow over each eye.
Beard: With white, single strand, and G hook.
Chain 55:
Row 1: sc in 2nd chain from hook and in each ch across. (54)
Row 2: ch 4, turn, sl st in 1st in the BACK LOOP ONLY of the 1st st, *ch 4, sl st in the BACK LOOP ONLY of the next st, repeat from * across to the end.
Row 3: ch 1, turn, scdec over the 1st 2 remaining unworked free loops from row 1 (they are sitting at the back of the row, furthest from you, behind the chain-4 loops), sc in the nxt back loop, *scdec over the nxt 2 unworked loops, sc in the nxt unworked loop, repeat from * across to the end. (36)
Row 4: repeat row 2.
Row 5: ch 1, turn, sc in each remaining free loop in the back across. (36)
Row 6: repeat row 2.
Row 7: repeat row 5.
Row 8: ch 4, turn, sl st in the 1st st, (ch 4, sl st in the nxt st) thirteen times, ch 8, sk the next 8 sts, sl st in the nxt st, ch 4, sl st in the same st, (ch 4, sl st in the nxt st) thirteen times, tie off leaving a long tail to seam to hood later.
PARTIAL ROWS for the ch-8 to create mustache:
Row 1: With the loopy side facing, join the yarn with a sl st in ch-4 loop just to the right of the rightmost chain of the ch-8, ch 1, sc in same loop, sc in the nxt 8 chs, sc in the loop directly after the ch-8.
Row 2: ch 4, turn, sl st in same sc, *ch 4, sl st in nxt st, repeat from * until the end, tie off.
The final step is to seam the beard to the face. Use the main photo as a guide. I seamed it across the VERY TOP of the face opening, only have it hang over a little so you do not obstruct the view of the wearer. The mustache section was seamed directly onto the base and under the nose.
Weave in all remaining ends.
Be sure to use caution if this is for a child. Keeping your baby safe is the NUMBER ONE priority! Use all toys, including this costume under constant supervision! If you want to change anything you feel is needed to make you comfortable, please do!
PLEASE SHOW ME on my social media linked below or ask questions!
If you are viewing this pattern anywhere but crochetverse.com or downloaded from the Official Crochetverse Ravelry or Etsy store, it is an illegal reproduction copy. Please help me stay on top of this by emailing me, so I may stay afloat and continue to share patterns and ideas with you all! <3
Much Love and Yarn,
Stephanie
The information and photos in this posting are the sole copyrighted property of Crochetverse©2016. Please do not copy and paste any of the information contained within either electronically, verbally, or written in part or in whole. Instead, please share the DIRECT LINK to this posting only, and if you do, I thank you for sharing. You of course may sell anything you make from this pattern that you have made with your own two hands, no contract labor or mass productions are permitted. If you credit Crochetverse as the designer, that is greatly appreciated!

This is adorable and so is the model!! Thank you!!
Thank you so so much!
Think your onesie could be made into Gumby? I know you love all things 80’s. 🙂 Hope to see that pattern one day. Love your work!
That would be SOOO cute! I love that idea! I have to add that to the list for sure!!! <3
Comments are closed.