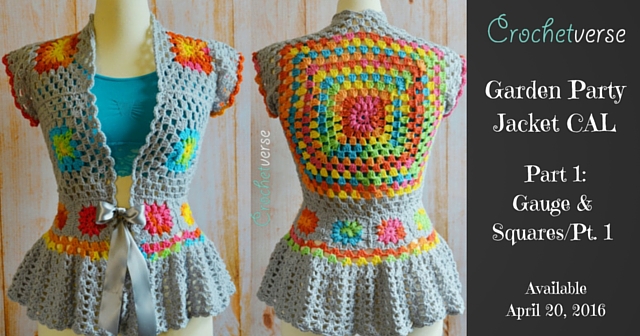
Hello, It’s finally time! Warmest welcome to Part 1 of the Garden Party Jacket Crochet-Along!
Up this week: Checking Gauge and Squares/Part 1
If you’ve missed the “Introduction and Supply” blog post for the CAL, that can be accessed HERE!
My name is Stephanie and this here is yours truly:
At 16, I sat down on a fabulous 70’s brown plaid couch with wooden arms, next to my Grandma, and she taught me to crochet. I cherish that gift more than I can express, but I’m sure you understand. I am completely passionate about everything crochet and color: from designing and yarn, to the beautiful people I have had the pleasure to meet over the years.
I’ve designed and chosen the Garden Party Jacket as my first Crochet Along because I want to share the pleasure of being able to wear something you’ve made with your own two hands. I am an independent designer who has been blessed with an enormous amount of support from our crochet community. I hope to share my knowledge with all of you. I am certain that on this venture, I will learn from you as well.
Although I have been designing and crocheting for what feels like an eternity, this is my 1st Crochet Along. I ask that if I have any little bumps in the road, you bear with me. I will work feverishly to make this as smooth and enjoyable as I possibly can. Crochet is supposed to be fun and happy, and I will do my best to deliver!
I’ve chosen to make this four parts, over 4 weeks. Each part should be relatively easy and not require too much time commitment to complete in the week.
I have been greatly blessed to have the CAL translated into alternate languages, so that crocheters around the world may join us! First, I must express an ENORMOUS amount of gratitude to each and every translator who worked so diligently. I would also like to thank the CAL – Crochet A Long Group on Facebook for guiding and supporting me. I cannot offer enough thanks to them! I will post the links for the alternate languages here, simply click on the link to be taken to the blog posting that correlates to this week’s part, in your chosen language:
There are two steps to this week:
Step 1: Confirm Size/Gauge Check
Step 2: Make 8 small squares in your size
Step 1: CONFIRM SIZE/GAUGE CHECK
IMPORTANT! CONFIRMING SIZE:
Due to such a wonderful and huge response to the announcement of the CAL, I assembled a second test team to double and triple check my work.
They discovered two things:
- Sizing is generous for the garment, as each size covers 2 sizes. You will NOT want to simply choose your “off the rack” size. Most chose to go down a size, but not all. STOP HERE before proceeding and review the updated sizing information in the “Info and Supply” blog post that can be found here: HERE
- The stitch pattern tends to loosen in nature the larger it becomes and as more rounds are added. This means you will want to check as you proceed next week into the medium and large squares to be sure you are still meeting gauge. I will remind and guide you on that next week.
NOW, GAUGE CHECK:
(Often regarded as a naughty word in crochet! 😉 )
CONFESSION: I’m like you. I see gauge information and utter a little growl without even expecting to! But…I promise to make it quick and painless because it is ABSOLUTELY necessary for a wearable garment. If your afghan comes out a bit too large, no big deal, more to cuddle under! If your garment comes out too large or too small, you’ll probably be doing more than uttering a growl under your breath! Haha!
Some people prefer a pattern given as a step by step guide and others prefer straight to the point, no frills. In this post you will see a detailed pattern with photos and at the very bottom, you will find the pattern posted very plainly with no images. The choice is yours!
To test gauge, generally, you will create a swatch or work a small portion of the pattern, then stop to measure your work.
For our gauge check, we will:
FIRST: Crochet the 1st THREE rounds of our smallest square and pause to check.
SECOND: Carry on and complete ONE small square for our chosen size and check again.
I’ve used a size “I” (5.5mm) crochet hook for my garment. So, this will be a good place for you to begin.
Scrolling below to the pattern either step-by-step or plainly written: Grab your intended yarn for the project and an I (5.5mm) hook, and create ONE SMALL square through ROUND 3 ONLY, regardless of the size you plan to make, then report back to this spot:
I’ll wait patiently……………..
Yay, you’re back!! With ONE SMALL SQUARE completed through ROUND 3 only! Go you! Now…Let’s see how your tension for the first part of the gauge check is.
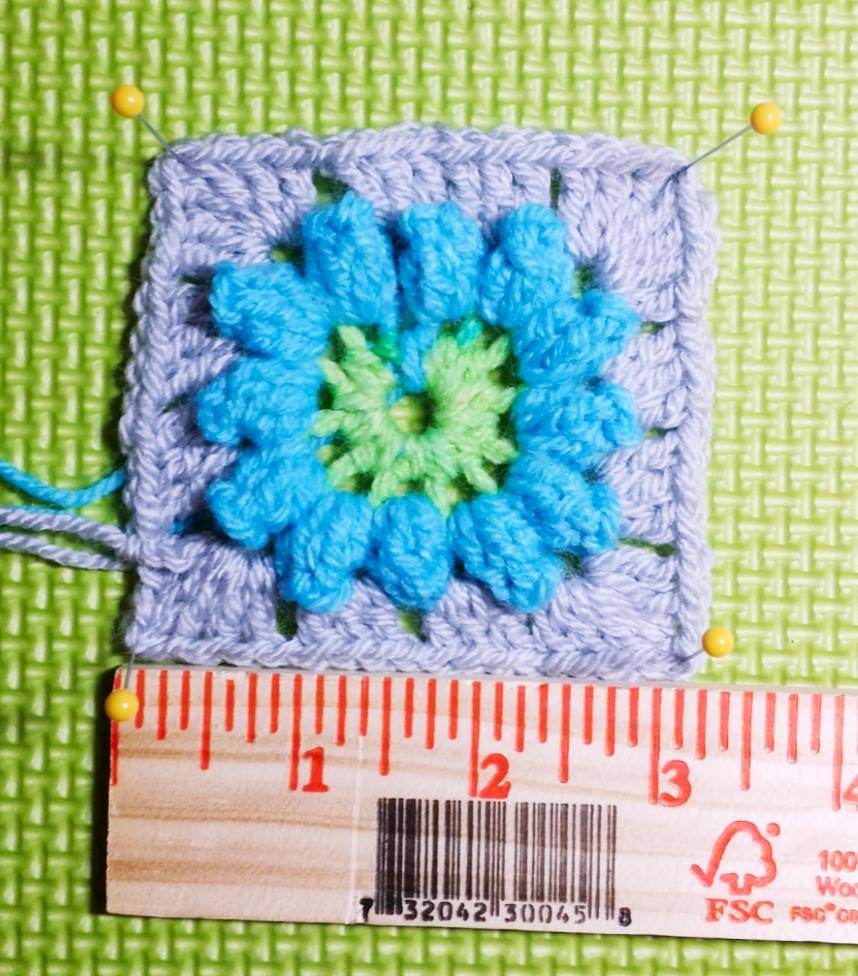
The square is probably not perfectly square right now, that’s ok. Next week, after we have all our squares completed, I will teach you how to block them so they are nice and squared up for assembly. For now (without stretching, simply shaping square) pin the gauge test square out on a foam mat or folded towel. No tugging needed, just squaring up. Then, place a ruler along one edge of your pinned out square as shown here:
GOAL GAUGE is 3.25″ wide for the square at this point through ROUND 3 ONLY. As you can see, I’m dead on with this square. Yay me, you’d think I’ve already made 100 of these. I actually have. Half of them maybe in my sleep. LOL.
Now on to yours:
If your square is LESS than 3.25″, this means you have TIGHTER tension than me and you need to try the next hook size LARGER, first try a J (6.0mm) then re-measure. If you are at 3.25″, then you’re all set and proceed with that hook. If not, try the next hook size until you measure correctly.
If your square is MORE than 3.25″, this means you have LOOSER tension than me and you need to try the next hook size SMALLER, first try a H (5.0mm) then re-measure. If you are at 3.25″, then you’re all set and proceed with that hook. If not, try the next hook size until you measure correctly.
NOW, Let’s move onto the SECOND PART OF THE GAUGE TEST:
Take that square you just made and following the pattern for YOUR size, complete ONE small square completely as instructed.
Now, RECHECK: As I stated, the outer rounds, by nature, are looser than the beginning rounds, hence our two part check.
Here is what your one completed small square should measure in width for each size:
| SIZE: | WIDTH OF SMALL COMPLETED SQUARE (inches) |
| XXS/XS | 3.25” |
| S/M | 4.25” |
| L/XL | 5″ |
| 2X/3X | 6” |
| 4X/5X | 6.5” |
If your square is LESS than the chart states, this means you have TIGHTER tension than me and you need to try the next hook size LARGER, then re-measure. If you are at the correct width, then you’re all set and proceed with that hook. If not, try the next hook size until you measure correctly.
If your square is MORE than the chart states, this means you have LOOSER tension than me and you need to try the next hook size SMALLER, then re-measure. If you are at correct width, then you’re all set and proceed with that hook. If not, try the next hook size until you measure correctly.
Ok, so what if you are super close, but still a tiny bit off?!
Take a deep breath, Darlin’.
You want to be as CLOSE as you can be, but the world will keep on spinning if you are a teeny bit off (Acceptable difference must be LESS than 1/4″. If more, recheck gauge). Blocking can assist to make them proper size. It’s probably better to be a bit under, than a bit over, as crochet is SUPER stretchy by nature. Get as close as you can and then carry on.
STEP 2: MAKE EIGHT SMALL SQUARES IN YOUR CHOSEN SIZE:
Using either the step-by-step or simply-written pattern below for the small squares, make EIGHT of them following directions for YOUR chosen size. Each size larger will have additional rounds, and the pattern will indicate when to stop for your size.
Remember that all pattern instructions and information is written in the following format:
XXS/XS (S/M, L/XL, 2X/3X, 4X/5X)
For example, if you are making the L/XL, you will want to use the information given second within the parenthesis. Many sized clothing patterns are presented this way, so this knowledge should help you in future patterns as well!
Pattern Instructions: (Photo Detailed, Scroll to below for basic written)
Abbreviations used in the pattern, refer back here as needed:
AC accent color Nxt next
Beg beginning Pop popcorn
Beg pop beginning popcorn Rep repeat
Ch chain Rnd round
Dc double crochet Sl st slip stitch
Hdc half double crochet Sp(s) space(s)
MC main color
*Stitch Count Note: most counts will be given as the number of 3dc groups on one side. To count this, include the 1 3dc group of the corner on the side, the 3dc groups in between, and the last 3dc group of the next corner on the same side.
Special Stitches: (most popcorns, include a ch-1 as the last step, please note, this one does NOT)
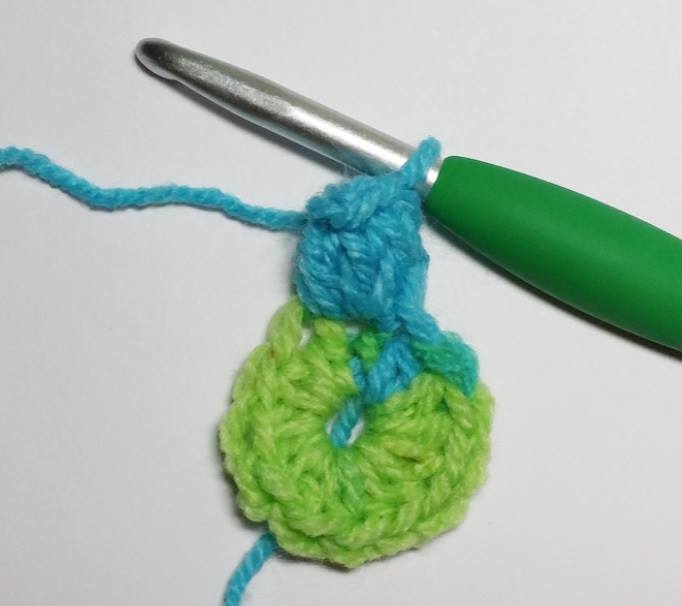
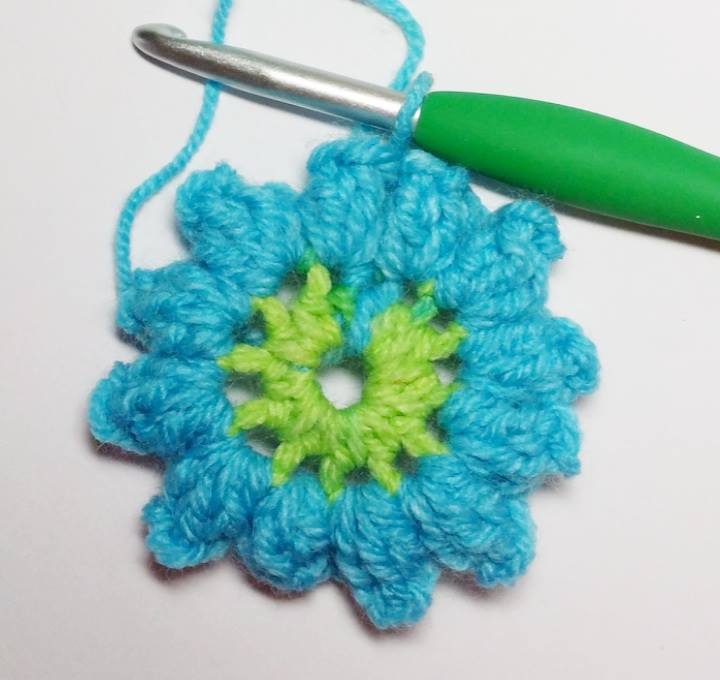
Beginning Popcorn (beg pop): chain 3 (counts as a dc), make 4 dc in the same space, remove hook from loop on the hook. Insert hook from front to back in the top of the beg ch-3, pull the dropped loop through the chain to complete the popcorn.
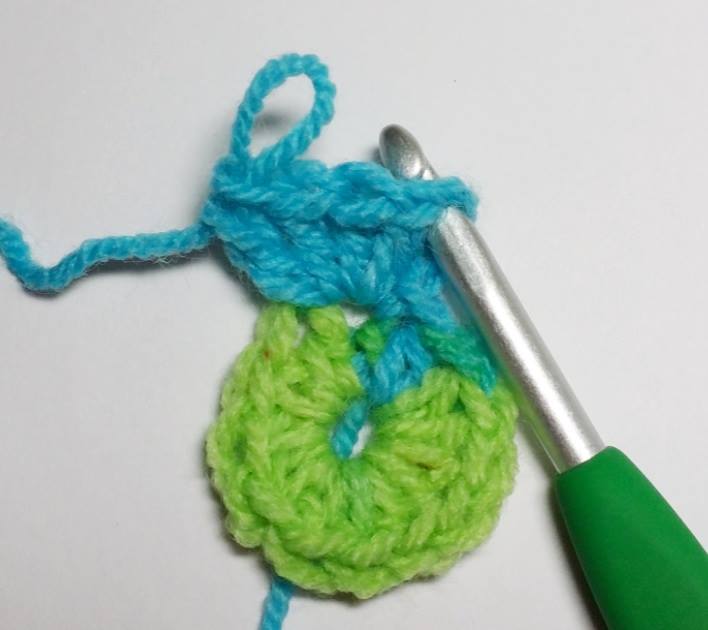 Left: The loop dropped and reinserted in top of ch-3.
Right: Pick the dropped loop up and pull it through the chain to close the popcorn.
Popcorn (pop): make 5 dc in the indicated stitch, remove hook from the loop on the hook. Insert hook from front to back under the 2 bars (as normal) of the 1st dc made of the group, pull the dropped loop through the 1st dc to complete the popcorn. *Reference photos above if needed.
Pattern begins here:
Small Square: (Make 8 in your size) Do not turn rounds. Leave 6″ beginning and end tails.
Should you choose fewer colors: simply carry on by slip stitching to the correct spot in the pattern for the next round, as opposed to tying off and rejoining your new yarn.
Should you choose more colors: tie off as you choose, and rejoin your new yarn with a slip stitch in the correct spot for the next round.
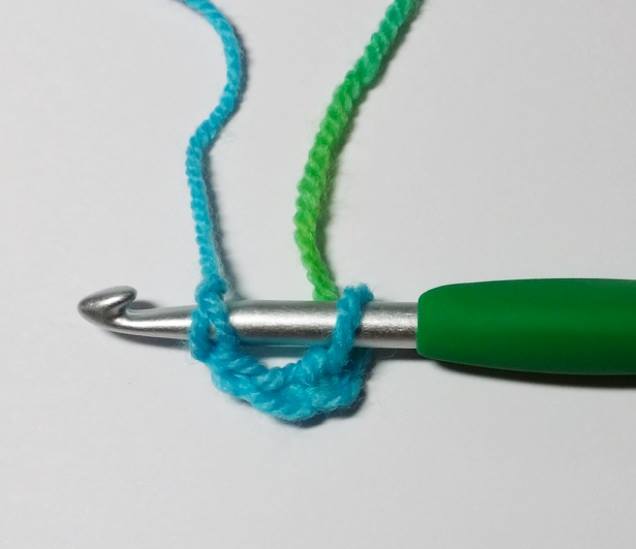
With AC (accent color), ch 4, sl st to 1st ch made to form ring: (I like to insert my hook under the two bars of the 1st chain, it just looks nicer to me!)
Rnd 1: ch 1 (does not count as stitch) 12 hdc in ring (this means in the center space, not into any chains), sl st to 1st hdc made. (12)
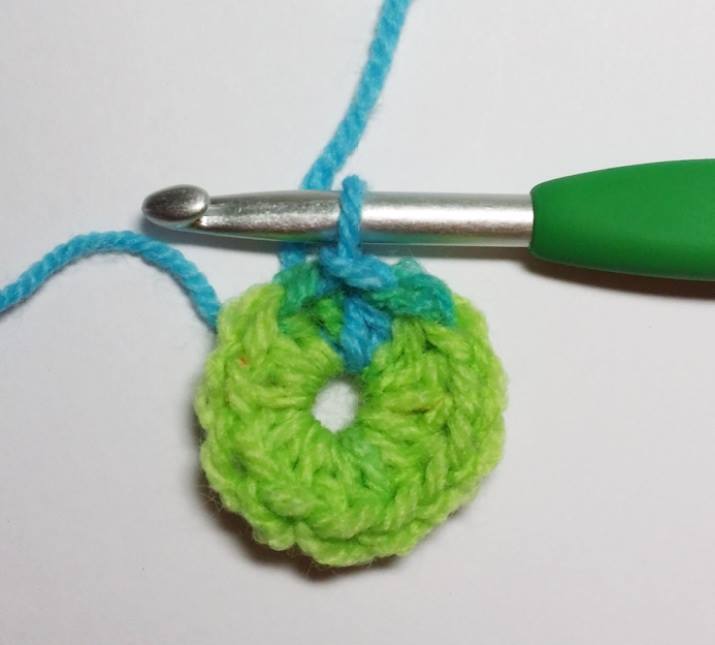
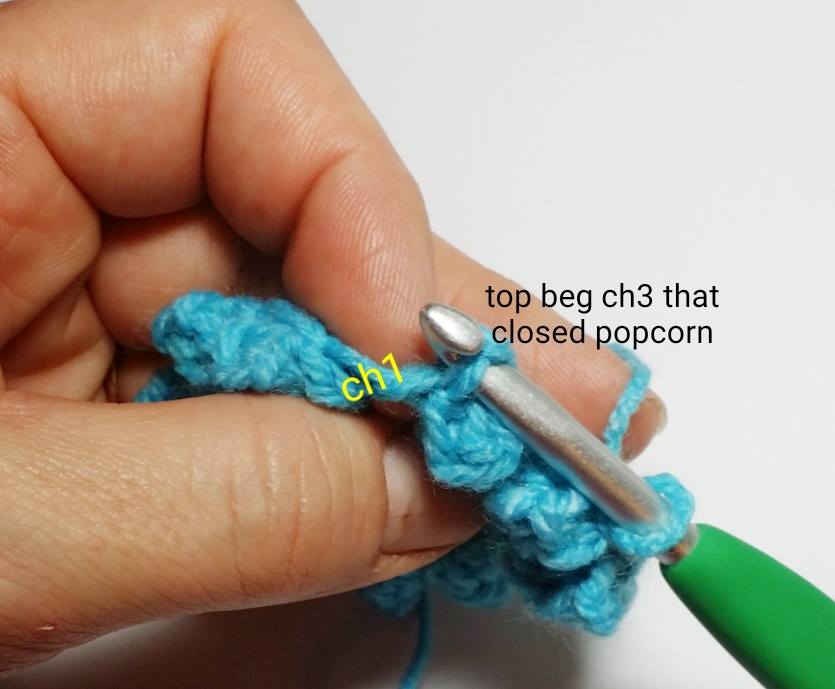
Rnd 2: beg pop (*see special sts above for photos and instructions) in the same stitch as the join, ch 1, *pop (*see special stitches) in the nxt st, ch 1, repeat from * 10 x more, sl st to closing stitch on top of beginning popcorn (insert hook into the same place as the sl st that closed the popcorn into the top of the beginning ch-3) and tie off. (12 popcorns, 12 ch-1 sps) *Do not worry if after this round the work “cups” a bit, this is ok*
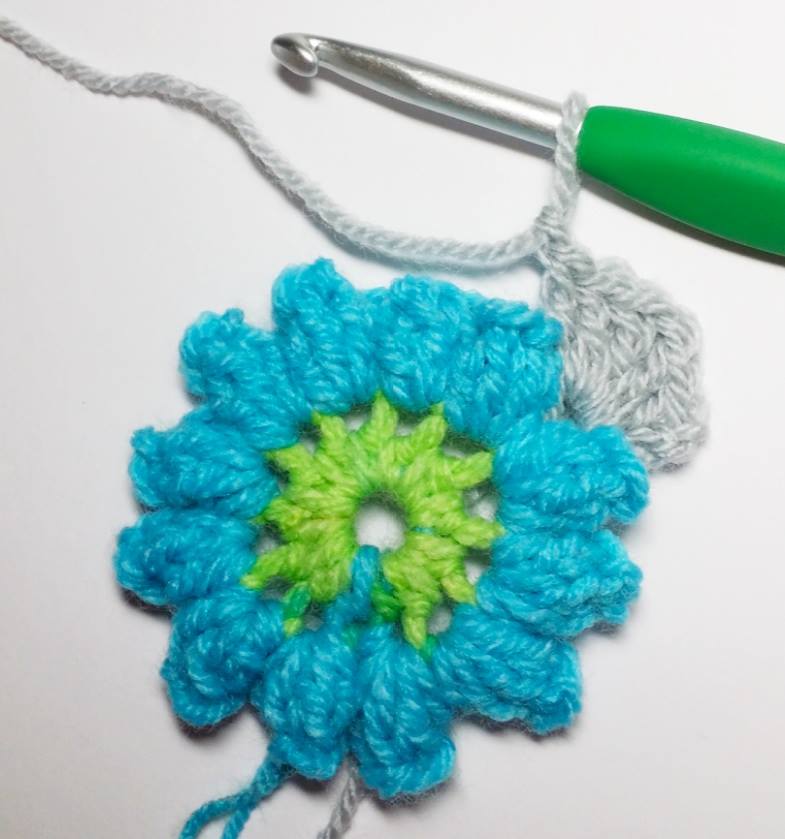
Rnd 3: join MC (main color) in any ch-1 sp around,(between the popcorns) with a sl st, ch 3 (counts as dc), (2 dc, ch 1, 3 dc, ch 1) in the same ch-1 sp, 3 dc in the nxt ch-1 sp, ch 1, 3 dc in the nxt ch-1 sp, ch 1, *(3 dc, ch 1, 3 dc, ch 1) in the nxt ch 1 sp, 3 dc in the nxt ch-1 sp, ch 1, 3 dc in the nxt ch-1 sp, ch 1, repeat from *, 2 times more, sl st to top of beg ch-3, tie off for XXS/XS, do not tie off for all other sizes. (4 groups of 3dc on each side) *STOP HERE FOR FIRST PART OF GAUGE CHECK AND SCROLL BACK UP TO CHECK HOOK SIZE*
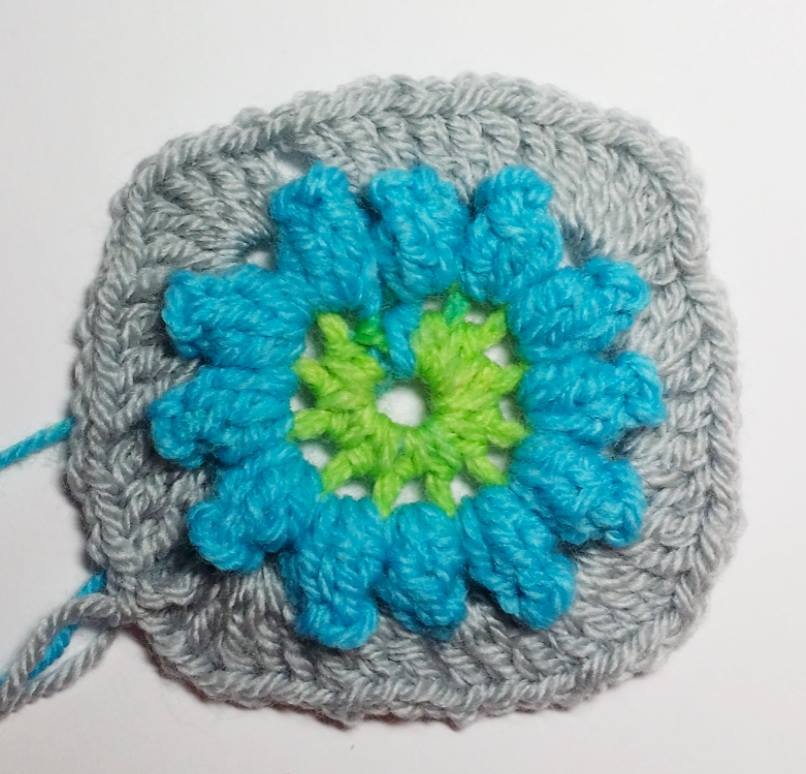
Rnd 4: sl st across next 2 dc and into ch-1 space at the corner, ch 3 (counts as dc) (2 dc, ch 1, 3 dc, ch 1) in the same sp, (3 dc, ch 1) in each ch-1 sp until next corner is reached, *(3 dc, ch 1, 3 dc, ch 1) in the nxt corner space, (3 dc, ch 1) in each ch-1 sp until next corner is reached, repeat from * around until 1st corner is reached and sl st to the top of the beg ch-3, tie off for S/M, continue for other sizes. (5 groups of 3dc on each side)
Rnd 5: repeat round 4, tie off for L/XL, continue for other sizes. (6 groups of 3dc on each side)
Rnd 6: repeat round 4, tie off for 2X/3X, continue for other sizes. (7 groups of 3dc on each side)
Rnd 7: repeat round 4, tie off for 4X/5X. (8 groups of 3dc on each side)
*Note: Fear not if your squares are not perfectly flat or straight on the edges, the blocking in Part 2 next week will fix all that!
Instructions: (Basic Written, Scroll to above for Step-by-Step)
Abbreviations used in the pattern, refer back here as needed:
AC accent color Nxt next
Beg beginning Pop popcorn
Beg pop beginning popcorn Rep repeat
Ch chain Rnd round
Dc double crochet Sl st slip stitch
Hdc half double crochet Sp(s) space(s)
MC main color
*Stitch Count Note: most counts will be given as the number of 3dc groups on one side. To count this, include the 1 3dc group of the corner on the side, the 3dc groups in between, and the last 3dc group of the next corner on the same side.
Special Stitches: (most popcorns, include a ch-1 as the last step, please note, this one does NOT)
Beginning Popcorn (beg pop): chain 3 (counts as a dc), make 4 dc in the same space, remove hook from loop on the hook. Insert hook from front to back in the top of the beg ch-3, pull the dropped loop through the chain to complete the popcorn.
Popcorn (pop): make 5 dc in the indicated stitch, remove hook from the loop on the hook. Insert hook from front to back under the 2 bars (as normal) of the 1st dc made of the group, pull the dropped loop through the 1st dc to complete the popcorn.
Pattern begins here:
Small Square: (Make 8 in your size) Do not turn rounds. Leave 6″ beginning and end tails.
Should you choose fewer colors: simply carry on by slip stitching to the correct spot in the pattern for the next round, as opposed to tying off and rejoining your new yarn.
Should you choose more colors: tie off as you choose, and rejoin your new yarn with a slip stitch in the correct spot for the next round.
With AC (accent color), ch 4, sl st to 1st ch made to form ring:
Rnd 1: ch 1 (does not count as stitch) 12 hdc in ring, sl st to 1st hdc made. (12)
Rnd 2: beg pop (*see special sts) in the same stitch as the join, ch 1, *pop (*see special stitches) in the nxt st, ch 1, repeat from * 10 x more, sl st to closing stitch on top of beginning popcorn and tie off. (12 popcorns, 12 ch-1 sps)
Rnd 3: join MC (main color) in any ch-1 sp around, ch 3 (counts as dc), (2 dc, ch 1, 3 dc, ch 1) in the same ch-1 sp, 3 dc in the nxt ch-1 sp, ch 1, 3 dc in the nxt ch-1 sp, ch 1, *(3 dc, ch 1, 3 dc, ch 1) in the nxt ch-1 sp, 3 dc in the nxt ch-1 sp, ch 1, 3 dc in the nxt ch-1 sp, ch 1, repeat from *, 2 times more, sl st to top of beg ch-3, tie off for XXS/XS, do not tie off for all other sizes. (4 groups of 3dc on each side)
*STOP HERE FOR FIRST PART OF GAUGE CHECK AND SCROLL BACK UP TO CHECK HOOK SIZE*
Rnd 4: sl st across next 2 dc and into ch-1 space at the corner, ch 3 (counts as dc) (2 dc, ch 1, 3 dc, ch 1) in the same sp, (3 dc, ch 1) in each ch-1 sp until next corner is reached, *(3 dc, ch 1, 3 dc, ch 1) in the nxt corner space, (3 dc, ch 1) in each ch-1 sp until next corner is reached, repeat from * around until 1st corner is reached and sl st to the top of the beg ch-3, tie off for S/M, continue for other sizes. (5 groups of 3dc on each side)
Rnd 5: repeat round 4, tie off for L/XL, continue for other sizes. (6 groups of 3dc on each side)
Rnd 6: repeat round 4, tie off for 2X/3X, continue for other sizes. (7 groups of 3dc on each side)
Rnd 7: repeat round 4, tie off for 4X/5X. (8 groups of 3dc on each side)
*Note: Fear not if your squares are not perfectly flat or straight on the edges, the blocking in Part 2 next week will fix all that!
That’s it for this week! Not too hard, I hope!
Please be sure to like the FACEBOOK PAGE HERE! This way, you won’t miss any updates or the next part’s release announcement!
Please join me back here next Wednesday April 27, 2016 for Part 2 of our Garden Party Jacket! I’ll await your return!
*** ARE YOU READY FOR PART 2? CLICK HERE!! ***
Much Love & Yarn,
Stephanie
Much Love & Credit Given to the Test Team: Nichole Chapel, Jamie Cowley, Janean Craig, Tammii Crosland, Maggie Diaz, Katherine Popowski, Amber Sarita, & Heather Sutton
The information and photos in this posting are the sole copyrighted property of Crochetverse©2016. Please do not copy and paste any of the information contained within either electronically, verbally, or written in part or in whole. Instead, please share the DIRECT LINK to this posting only, and if you do, I thank you for sharing. You of course may sell anything you make from this pattern that you have made with your own two hands, no contract labor or mass productions are permitted. If you credit Crochetverse as the designer when you sell, that is greatly appreciated. Thank you so much for respecting the hard work that goes into patterns, so that we may all remain creative 🙂



getting ready to get started ,i will be using caron simply soft due to my extremely large yarn collection and i dont wanna buy more til i have somewhere to store it, this is such a beautiful piece ,cant wait to wear it ,,,thank you for sharing and making this pattern available to all of us
That’s great! As you see with our tester, Maggie, It can be done with some adjustments and a bit of difference in end result, but absolutely gorgeous none the less!
Love the pattern! Such a fun CAL, thank you so much!
Thank you so much! So happy you are enjoying it!
Will there be PDF downloads of the pattern in English? I often have no wifi connection so I’m having trouble when I need to refer back to the pattern. I can download the PDF to my tablet and then refer to it without wifi as I work the weeks stitches. Thank you in advance for your answer, and another huge thanks for this lovely jacket pattern.
I am sorry, the English will only be available on the blog and not as a PDF. Some options for you would be to print it or save it to your device. Thank you!
Thank you. I have copied the directions and saved them. And, I’m really enjoying your design! Thanks again!
This pattern caught my eye about a week ago while I was looking for crochet jacket/coat patterns, so I decided it to give it a try but I’m putting my own spin it. I’m adding long bell sleeves and will be making the peplum almost floor length. Essentially turning it into the jacket I was originally looking for. I am loving how it is turning out and it fits like a dream 🙂
Thank you for such wonderful pattern with easy to follow instructions.
xxx
You are so welcome, and I would LOVE to see your progress as you go! I also had plans to drop that peplum nice and long, so I am SO SO happy that you will be doing that! I think it is going to be just STUNNING!!
Hello,
I have just found this pattern and think it is so beautiful. I would love to make it!
Is there a downloadable English PDF please?
Kind regards,
Trisha
Hi Trisha! Thank you for your kind words! The English version is only available here on the blog. Your visits help me keep this blog up and running and I do hope you understand, thank you!
Comments are closed.