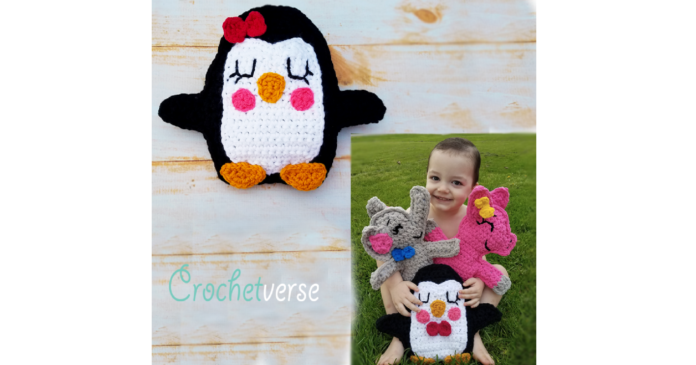
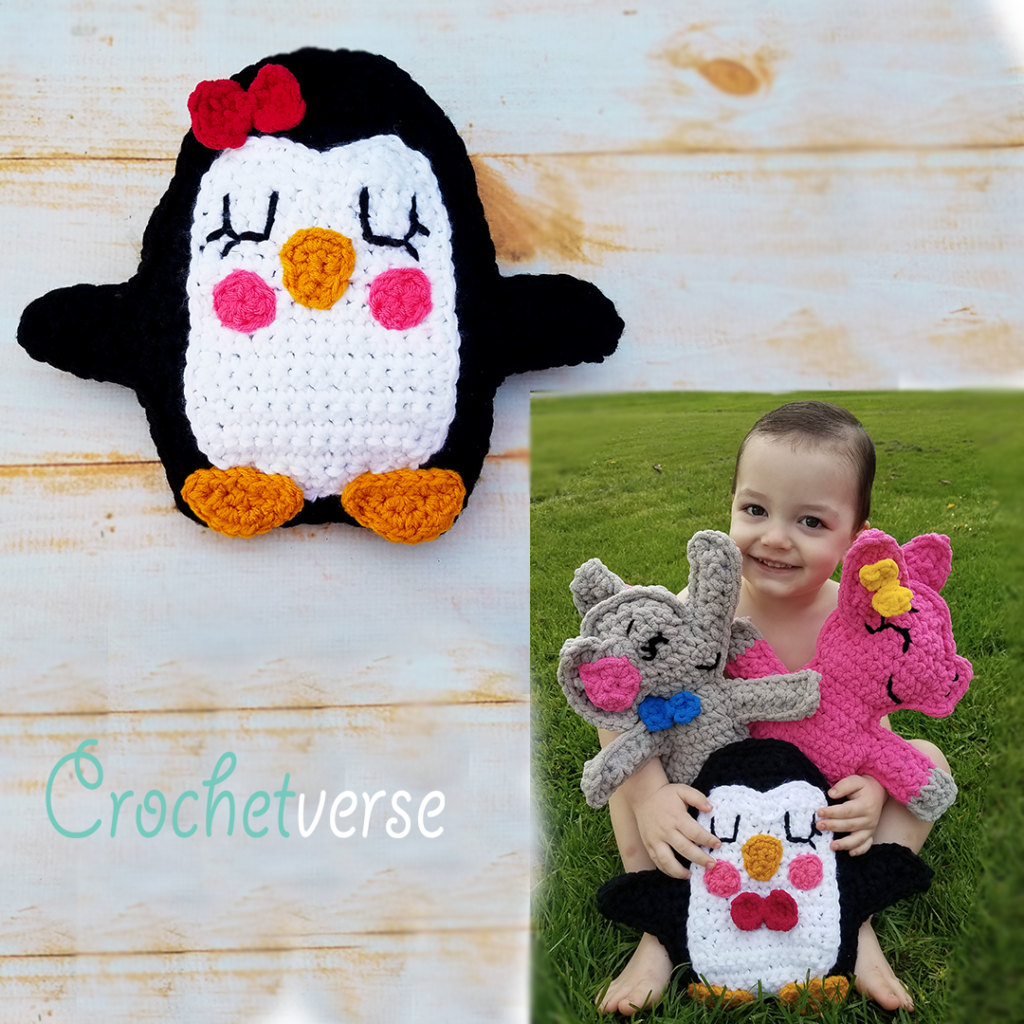
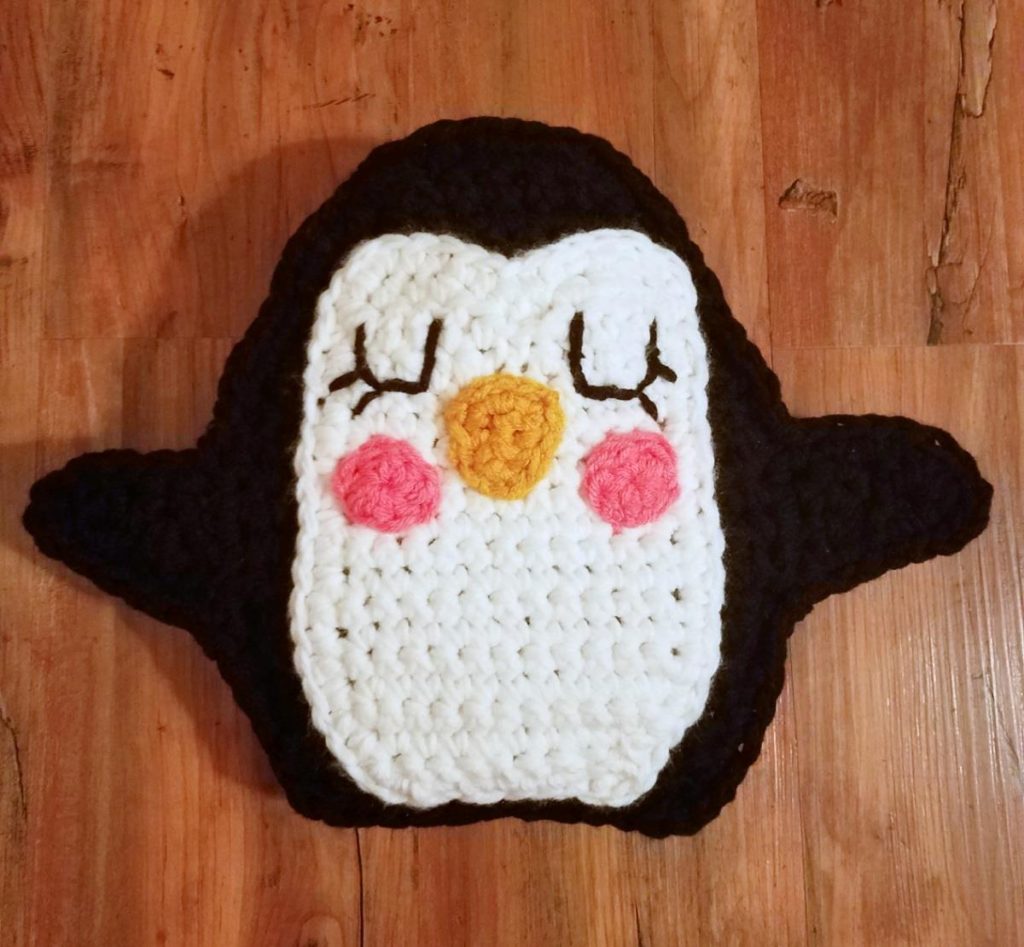
Ok! So good things come in threes…so…I decided to round out the trio of ragdolls with the super cute chubby little penguin!
And answer the main question I have got… “How can I sub in worsted weight yarn for these babies…I have TONS!”
Well, I have the answer! For the closest look to the blanket yarn, hold regular worsted weight yarn TRIPLE stranded and work as written for the blanket yarn! This penguin is worked with worsted yarn in a mix of triple and double stranded, but the pig and elephant would all be triple strand worsted if you would like to try that replacement! The triple strand worsted is a little less floppy than the blanket yarn, but no less adorable, cuddly, an cute!
Place the bow in the hair for a girl or at the neck for a bowtie for a boy!
The other patterns in the trio are free as well!
The pig pattern can be found here: https://crochetverse.com/ragdoll-piggy/
The elephant can be found here: https://crochetverse.com/elephant-ragdoll/
Check out ALL my designs here: http://www.ravelry.com/designers/stephanie-pokorny
THE PATTERN!:
MATERIALS:
– about 400 yards of black worsted weight yarn (Shown: Red Heart Super Saver in Black)
– about 100 yards of white worsted weight yarn (Shown: Red Heart Super Saver in White)
– about 40 yards of gold or yellow worsted weight yarn (Shown: Red Heart Super Saver in Gold)
– about 15 yards of pink worsted weight yarn (Shown: Red Heart Super Saver in Pretty N Pink)
– small amount of stuffing
– size N(9mm) crochet hook
– size K(6.5m) crochet hook
– basic tool kit of scissors, tape measure, and tapestry needle
FINISHED SIZE:
About 14” wide from wing tip to wing tip and about 13” tall
GAUGE:
While gauge is not imperative, you want to be sure your stitches are tight so that the stuffing does not show through. I am an average to tight crocheter. If you are looser in tension, you may want to adjust your hook size down from my suggestions to achieve the proper look.
INSTRUCTIONS:
*Each piece will instruct whether to work 2 or 3 strands and the K or N hook, please note these.*
Main Body Panels (Make 2)
With 3 strands of black and N(9mm) hook, chain 13:
Row 1: sc in 2nd ch from hook and each rem ch across. (12)
Row 2: ch 1, turn, 2 sc in the 1st st, sc in nxt 10 sts, 2 sc in the last st. (14)
Row 3: ch 1, turn, sc in each sc across. (14)
Row 4: ch 1, turn, 2 sc in 1st sc, sc in nxt 12 sc, 2 sc in last sc. (16)
Row 5-13: ch 1, turn, sc in each sc across. (16)
Row 14: ch 1, turn, sc dec over 1st 2 sc, sc in nxt 12 sc, sc dec over last 2 sc. (14)
Row 15: ch 1, turn, sc in each st across. (14)
Row 16: ch 1, turn, sc dec over 1st 2 sts, sc in nxt 10 sts, sc dec over last 2 sts. (12)
Row 17: ch 1, turn, sc in each st across. (12)
Row 18: ch 1, turn, sc dec over 1st 2 sts, sc in nxt 8 sts, sc dec over last 2 sts. (10)
Row 19: ch 1, turn, sc dec over 1st 2 sts, sc in nxt 6 sts, sc dec over last 2 sts. (8)
Row 20: ch 1, turn, sc dec over 1st 2 sts, sc in nxt 4 sts, sc dec over last 2 sts. (6)
Row 21: ch 1, turn, sc dec over 1st 2 sts, sc in nxt 2 sts, sc dec over last 2 sts. (4)
Create Wings: (Repeat for each Main Body Panel)
With 3 strands of black and N(9mm) hook:
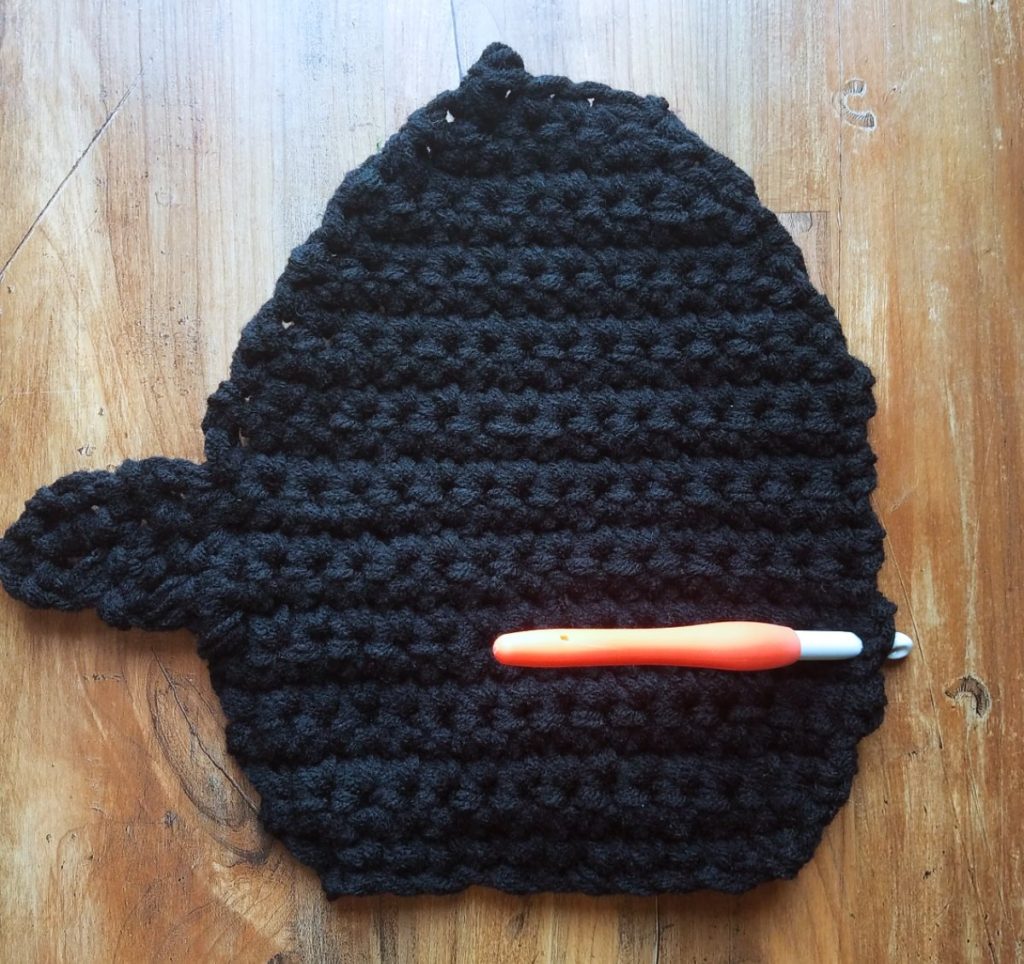
Wing 1: Position the body panel as shown and join the yarn with a sl st around the END of row of row 7 inserting the hook from front to back. You are working from the SIDE around the post of the stitch at the end of the indicated rows.
Row 1: ch 1, sc in the same row end and nxt 3 row ends. (4 sc)
Row 2: ch 1, turn, 2 sc in the 1st st, sc in the nxt st, sc dec over the last 2 sts. (4)
Row 3: ch 1, turn, sc dec over the 1st 2 sts, sc in the last 2 sts. (3)
Row 4: ch 1 (does not count as a st), turn, hdc in the 1st st, sc dec over the last 2 sts. (2)
Row 5: ch 1, turn, sc dec over the 2 sts, ch 1, then tie off. (1 st plus the 1 ch which is simply done to tighten up the wing point)
Wing 2: Flip the panel over as show in the image and join again as with wing 1 in the end of row 7.
Rows 1-5: Repeat exactly as for wing 1.
Make Cheeks (Make 2):
With 2 strands of pink and K(6.5mm) hook, make a magic circle:
Rnd 1: ch 1, make 8 hdc in the ring, sl st to the 1st hdc made, tie off leaving a long tail to seam in place later. (8)
Make White Tummy/Face Panel (Make 1)
Using 2 strands of white and a K(6.5mm) hook, chain 9:
Row 1: sc in 2nd ch from hook and each rem chain. (8)
Row 2: ch 1, turn, 2 sc in 1st st, sc in nxt 6 sts, 2 sc in last st. (10)
Row 3: ch 1, turn, 2 sc in 1st st, sc in nxt 8 sts, 2 sc in last st. (12)
Row 4-14: ch 1, turn, sc in each st across. (12)
Row 15: ch 1, turn, sc in 1st st, hdc in nxt st, dc in nxt 2 sts, hdc in nxt st, sl st loosely in nxt 2 sts, hdc in nxt st, dc in nxt 2 sts, hdc in nxt st, sc in last st. (12)
Row 16: ch 1 (does not count as a st), turn, hdc in 1st st, dc in nxt 3 sts, hdc in nxt st, sl st in nxt 2 sts loosely, hdc in nxt st, dc in nxt 3 sts, hdc in last st. (12)
Row 17: ch 3 (counts as 1st dc, so skip the st the ch-3 emerges from), hdc in nxt 3 sts, sl st loosely in nxt 4 sts, hdc in nxt 3 sts, dc in last st, do not tie off continue to edge round. (12)
EDGE ROUND:
Rnd 1: ch 1, working down the SIDE (working the post of the st at the ends of the rows) make 3 sc around the dc at the end of row 17, sc in each row end to the bottom, in the remaining loops from the beg across the bottom of row 1, make 3 sc in the 1st rem loop, sc in the nxt 6 loops, 3 sc in the last loop, make 1 sc in each row end up the second side until just before row 18 (last row) make 3 sc around the side of the dc at the end of row 1, sc in each st across the top, tie off leaving a long tail to seam together later.
Make Beak (Make 1)
With 2 strands of gold and K(6.5mm) hook, ch 3:
Row 1: sc in 2nd ch from hook and nxt ch. (2)
Row 2: ch 1, sc dec over the 2 sc. (1)
Edge Round: ch 1, turn, make 3 sc in the 1 sc from row 2, working down the side around the post of the stitch at the end of each row, make 1 sc in the end of row 1 and 2, make 3 sc in each of the 2 sc across the bottom, working up the 2nd side, make 1 sc in the end of each row, sl st to the 1st sc made, tie off leaving a long tail to seam to face.
Mid-Way Assembly:
So you do not need to be neat with your stitching, we will attach all features aside from the feet right now. It will not matter what the reverse of the panel looks like as it will be hidden inside once joined.
- Using the tail from the white tummy, seam it to one of the body panels all the way around leaving an even border of black on all sides.
- Using the tail from each cheek, seam one to either side of the face. Position them so the bottom edge of the circle is just at the midpoint of the white tummy panel and so that the outside edges are just inside the edge round of the white tummy.
- Stitch on eyes, using the photo as a guide. I went twice around for each part of the feature to add a bit of thickness to stand out well against the multi-strand body.
- Using the tail from the beak, stitch on beak, just between and centered to the eyes with row 1 facing the top of the head.
JOIN THE PANELS TOGETHER:
Now that all the features are on aside from feet and bow, we will join the two panels together by single crocheting around the entire piece working through both panels at once to join.
I did NOT weave in my ends, rather I knotted the tails to a nearby tail and tucked them inside the body as I worked the join round.
You will want to stuff your penguin so it has some body, but not overstuffed. Ragdolls are meant to be floppy and loose. Usually, I stuff my black crochet dolls with black yarn because the white tends to show through. You can do either that you like.
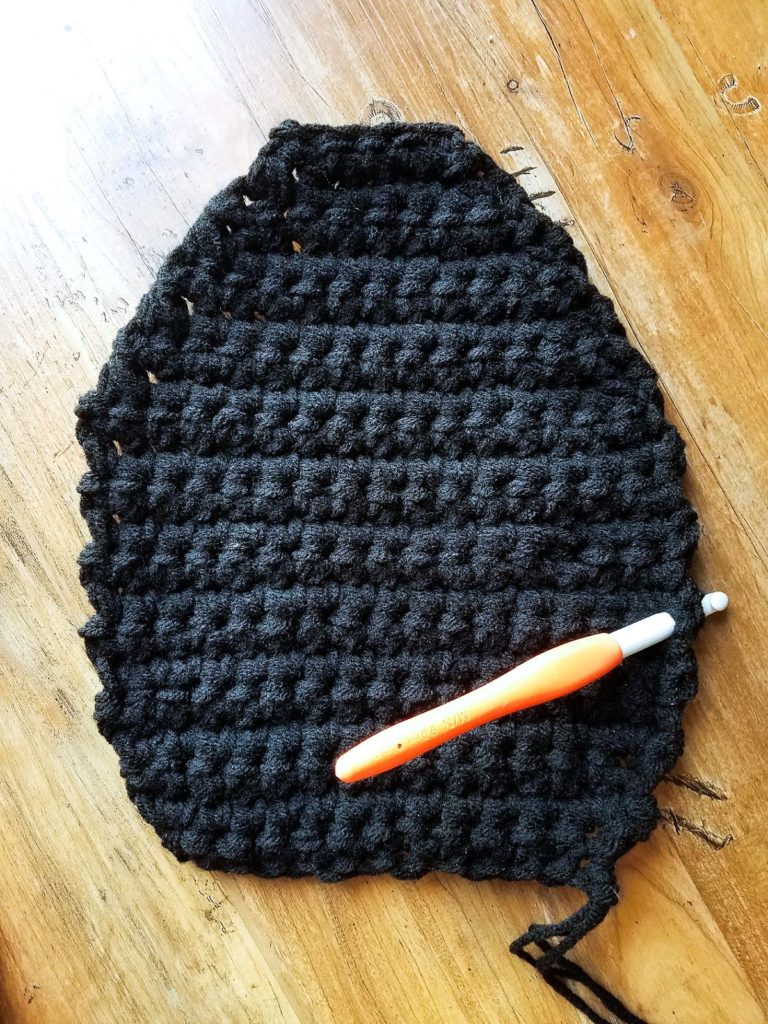
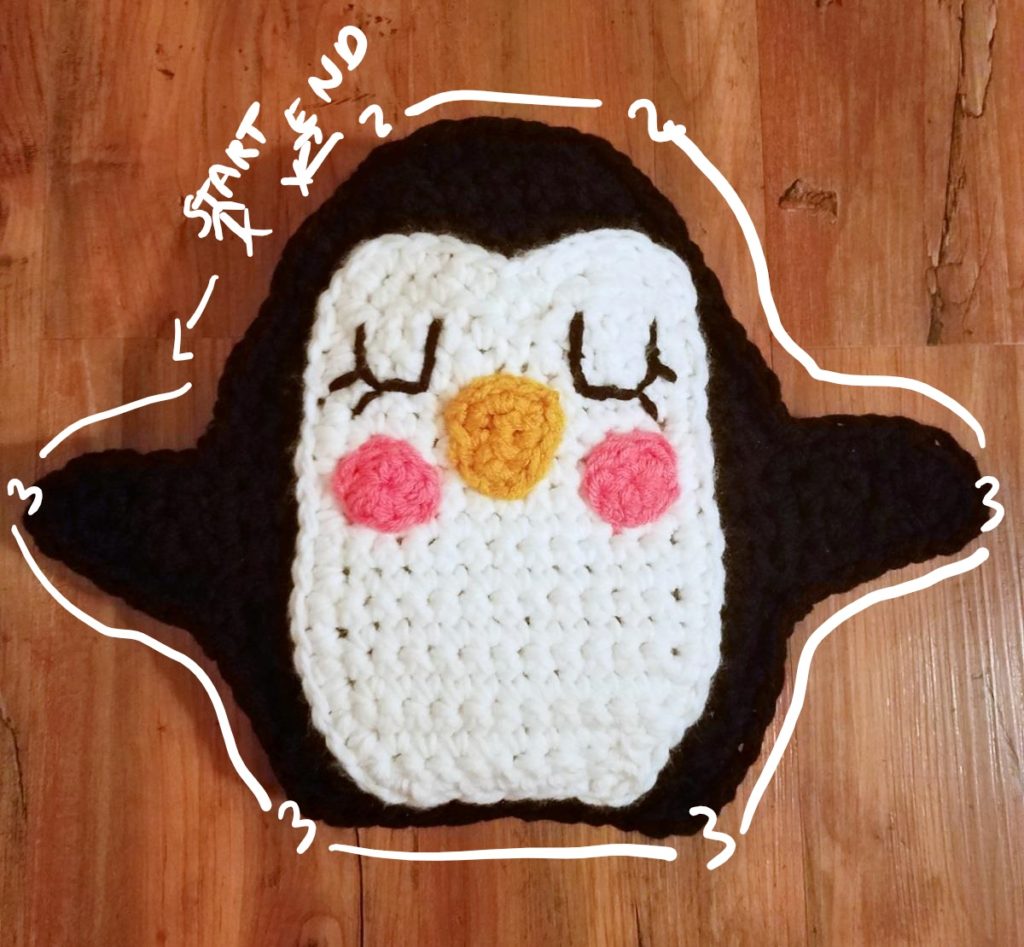
With the wrong sides of the body panels facing in, join the yarn near the “start” point on the image below, ch 1, then work 1 sc in each st and row and around, I worked 3 sts in the same st as I was rounding corners of the bottom of the body and wing tips. These positions are marked with a “3”. I worked 2 sc at the corner stitches of the final row of the body, this is marked with a “2” on the image. This is done so the panels did not buckle the work as I edged. When fully around the piece, sl st to the 1st sc made and tie off.
Make Feet (Make 2):
With 2 stand of gold and K(6.5m) hook, make a magic circle:
Row 1: ch 1 (does not count as a st here and throughout the piece), make 4 hdc in the ring, pull tail tightly to close. (4)
Row 2: ch 1, turn, work 2 hdc in each hdc across. (8)
Row 3: ch 1, turn, sl st in each st across, do not tie off. (8)
EDGE ROUND: do not turn/do not chain 1, make 3 sc around the end of row 2, 1 sc around end of row 1, sc in the magic circle ring, sc around the other end of row 1, 3 sc around the end of row 2, sl st to the nxt sl st from row 3 and tie off leaving a long tail to seam to body.
Using the tails, seam one foot to either side of the bottom of the body. The flat side faces up and the curved “U” shape faces downward.
Make Hairbow/Bowtie (Make 1):
With 2 strands of red or 1 strand of blanket yarn, chain 4:
Rnd 1: 2 sc in 2nd ch from hook, sl st in nxt ch, 2 sc in last ch, ch 2, make 2 sc in the same last ch, ch 2, make 2 more sc in the last ch (total of 6 sc in the last ch), now going to the opposite side of the beginning chain and working in the remaining free loops, sl st in the nxt ch, make 2 sc in the last ch, ch 2, make 2 more sc in the last ch, ch 2 more and sl st to the 1st sc made, tie off leaving a long tail.
Using the tail, weave it towards the center (the sl st) and wrap it around the middle tightly 3-4 times to enhance the bow shape. Using the same tails stitch it to the neck for a bowtie or the top of the head for a hair bow.
Weave in any remaining ends.
Thank you! Please show me your work on the Facebook Page “Crochetverse!”
If you are viewing this pattern anywhere but crochetverse.com or downloaded from the Official Crochetverse Ravelry or Etsy store, it is an illegal reproduction copy. Please help me stay on top of this by emailing me, so I may stay afloat and continue to share patterns and ideas with you all! <3
Much Love and Yarn,
Stephanie
The information and photos in this posting are the sole copyrighted property of Crochetverse©2017. Please do not copy and paste any of the information contained within either electronically, verbally, or written in part or in whole. Instead, please share the DIRECT LINK to this posting only, and if you do, I thank you for sharing. You of course may sell anything you make from this pattern that you have made with your own two hands, no contract labor or mass productions are permitted. If you credit Crochetverse as the designer, that is greatly appreciated!



Can you make this into a Duck by using yellow for the body and then the orange feet/beak and same way you did for the eyes?
I absolutely think he could be that! I would love to see if you give it a go!
Comments are closed.