My 3 year old son, Jake the Snake, thinks two things:
- His momma is a sheer wizard and can make ANYTHING, I mean ANYTHING out of yarn. His sweet little full fledged faith in me is pretty adorable.
- He is OBSESSED with “Baby 8” better known as BB-8, the cute little droid from Star Wars.
Things I think: (about 6 months ago)
- I LOVE that Red Heart Reflective yarn, I must buy it! *Buys it. *Sits in stash untouched for 6 months*
Today he said “Momma, I wanna dress up. I wanna be Baby 8, make me a Baby 8 head!”
And then the bell went off (i.e. I was trying to organize my yarn and it literally fell out of my cabinet at my feet, divine intervention? Yep. Has to be.) and I KNEW what to use that uber cool yarn for!
Seeing as I can’t go around disappointing cute little 3 years olds, that’s just super mean, I embarked on a crochetventure……
…..In a Galaxy, far far away…….
Not really, it was actually in my kitchen, but whatever.
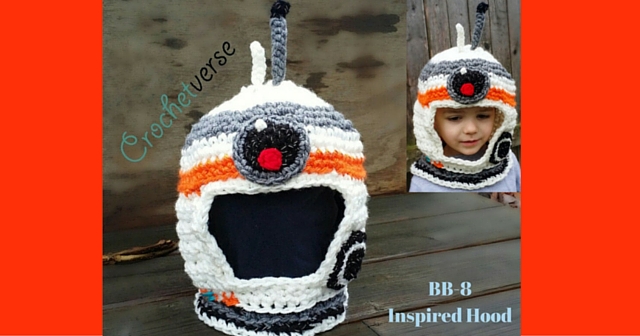
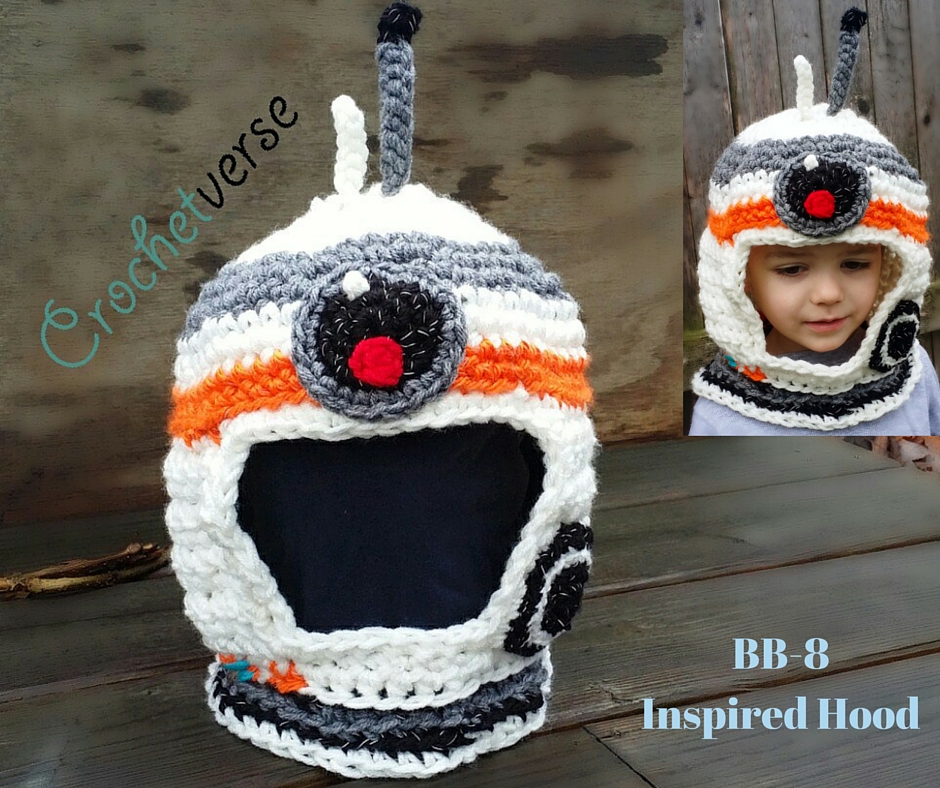
And here, my friends, is what I came up with!
He squealed when he saw it and hasn’t taken it off (even for bed) so I’m gonna go out on a limb (a short one, I’m a chicken) and say he loved it. He’s your average toddler, and it fits him like this. My oldest son is an average adult size and it also fit him more snuggly, but it still worked. So, don’t think this is only for tiny tots, the tiny tot at heart can rock this hood too!
This one is coming to you as a sweet little freebie. I hope it brings as many smiles to someone in your life as it did for me. Maybe next time someone asks if you want to donate a dollar for a good cause, say yes if you are able, as a little way to pay it forward 🙂
The Deets:
Materials:
– (1) skein Red Heart Super Saver in Heather Gray – held double
– (1) skein Red Heart Super Saver in Soft White – held double
– (1) skein Red Heart Reflective in Black – held single –OR- RHSS Black held DOUBLE
– (1) skein Red Heart Reflective in Neon Orange – held single –OR- RHSS Orange held DOUBLE
I work from the inside and outside of my single skein at the same time. Yes, sometimes it tangles, but not enough to where I will do it another way. You may buy two skeins of each or you may roll your single ball into two separate ones. Your choice!
– (5) yards each of any worsted weight yarn in red and light turquoise for accents
– Size N (9.0mm) and J (6.0mm)
– (1) stitch marker and needle to weave ends and stitch details
Gauge:
1st 5 rounds of main hood measure 5” in diameter
Sized to Fit:
Will fit an average toddler as seen in the photo and an average adult more snuggly
Instructions:
We will be changing colors on this a decent amount. Each time a color change is required, you will do it on the final yarn over and pull through of the stitch just PRIOR to the next round or stitch that needs a new color. When you sl st to the 1st stitch made of each round to complete the round, you will pull through the NEW color for the NEXT round here. In short, the round is done, you have one loop on the hook, insert the hook into the normal space on the 1st stitch of the round, lay the new color looped on the hook and pull THAT new color through to close the round, drop or cut the old color (the pattern will specify) and begin the next. This is a standard way to change color. If you need a visual, check a YouTube video on color changing, there are a TON!
Main Hood: (Use N Hook throughout)
With soft white held DOUBLE STRANDED, make a magic circle: DO NOT TURN ROUNDS UNLESS INSTRUCTED SPECIFICALLY. You may mark the beginning or end stitch of each round to keep track.
Rnd 1: 6 sc in ring, sl st to 1st sc made, pull gently to close ring. (6)
Rnd 2: ch 1, 2 sc in same sc and in each sc around, sl st to 1st sc made. (12)
Rnd 3: ch 1, sc in same st, 2 sc in nxt st, *sc in nxt st, 2 sc in nxt st, repeat from * around, sl st to 1st sc made. (18)
Rnd 4: ch 1, sc in same st and nxt st, 2 sc in nxt st, *sc in nxt 2 sts, 2 sc in nxt st, repeat from * around, sl st to 1st sc made. (24)
Rnd 5: ch 1, sc in same st and nxt 2 sts, 2 sc in nxt st , *sc in nxt 3 sts, 2 sc in nxt st, repeat from * around, sl st to 1st sc made. (30)
Rnd 6: ch 1, sc in same st and nxt 3 sts, 2 sc in nxt, *sc in nxt 4 sts, 2 sc in nxt st, repeat from * around, sl st to 1st sc made, changing to GRAY held double stranded at this sl st as described above, drop the white, but do not tie it off. (36)
Rnd 7: ch 1, sc in same st and nxt 4 sts, 2 sc in nxt st, *sc in nxt 5 sts, 2 sc in nxt st, repeat from * around, sl st to 1st sc made. (42)
Rnd 8: ch 1, sc in same st and nxt 5 sts, 2 sc in nxt st, *sc in nxt 6 sts, 2 sc in nxt st, repeat from * around, sl st to 1st sc made. (48)
Rnd 9: ch 1, sc in same st and nxt 4 sts, 2 sc in nxt st, *sc in nxt 5 sts, 2 sc in nxt st, repeat from * around, sl st to 1st sc made, changing to WHITE held double stranded, be careful not to pucker the work when you pick the white back up here, tie off the gray. (56)
Rnd 10: ch 1, sc in same st and in each st around, sl st to 1st sc made. (56)
Rnd 11: ch 1, sc in same st and in each st around, sl st to 1st sc made, changing to ORANGE held single stranded, tie off white. (56)
Rnd 12: ch 1, sc in same st and in each st around, sl st to 1st sc made. (56)
Rnd 13: ch 1, sc in same st and in each st around, sl st to 1st sc made, tie off orange. (56)
So as to keep our seam on the back (even though it does look nice!) we will rejoin the yarn so the seam is in the back when worn. We will also now change to ROWS to make the face opening.
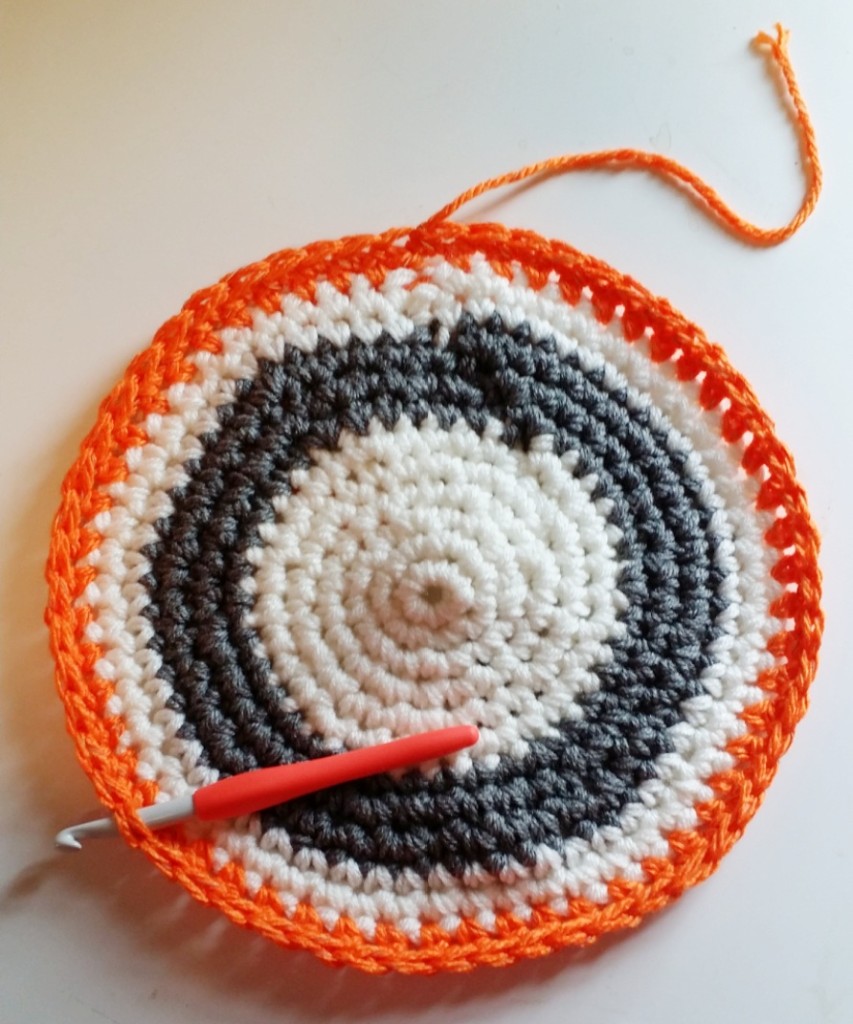
Position the piece, right side facing up, as shown here, and join the WHITE held double stranded in the BACK LOOP ONLY of 21st stitch counterclockwise to the LEFT of the end stitch of the round just completed. The space to join is shown with the hook in it in the below photo. Join with a sl st in the BACK LOOP ONLY and continue.
Row 14: ch 1, skip that stitch you just joined into (the ch-1 counts as the sl st for that stitch), sl st in the BACK LOOP ONLY of the next 15 stitches LOOSELY, sc in the BACK LOOP only of the next 40 sts, join w a sl st to the ch-1 made at the beginning of the round. (56)
Row 15: ch 1, turn, sc in same st and next 39 stitches. (40)
Rows 16-21: repeat row 15.
Row 22: ch 1, turn, sc decrease over 1st 2 sts, sc decrease over nxt 2 sts, sc in nxt 32 sts, (sc decrease over next 2 sts) twice (repeat just those parenthesis), chain 8 (this will close hood back up under chin) and join with a sl st to the 1st st made. (36 plus ch-8)
We will now go back to working rounds to form the bottom of the hood.
Rnd 23: ch 1, do NOT turn, sc in same st and nxt 35 sts, turning the ch-8 upside down so the HUMPS or RIDGE on the back of the chain is up, sc in each HUMP of the 8 chains across, sl st to 1st st made. (44)
The next round will alternate between the white and orange. Change color at the final yarn over pull through of the stitch PRIOR to the stitch where the new color is worked as you did above. The color NOT being used will lay behind and along the stitches you are working, encompass the stitches AROUND the yarn being carried.
Rnd 24: ch 1 (does not count as a stitch), do NOT turn, and work an HDC in the stitches in the following order, remembering to change to the next color at the final yarn over pull through of the PRIOR stitch: 6 white, 3 orange, 2 white, 2 orange, 9 white, 2 orange, 2 white, 2 orange, 2 white, 4 orange, 2 white, 2 orange, 6 white, sl st to the BACK LOOP only of the 1st hdc made, changing to BLACK held SINGLE strand. (44)
Rnd 25: ch 1, sk the 1st st (the ch-1 counts as the sl st for that st), sl st in the BACK LOOP only of each st around LOOSELY, sl st to the 1st ch-1 made in the BACK LOOP only, changing to gray held double. (44)
Rnd 26: ch 1, sc BACK LOOP only in same st and each st around, sl st to 1st st made, changing to BLACK held single. (44)
Rnd 27: ch 1, sc BACK LOOP only in each st around, sl st to the BACK LOOP only of the 1st st made, changing to WHITE held double. (44)
Rnd 28: ch 1, sc BACK LOOP only in same st and in each st around, sl st to 1st st made, tie off. (44)
Edge Face Opening:
With hood facing right side out, join white held double stranded in any stitch around the face opening.
Rnd 1: ch 1, sc in same st and in each st, sl st, and end of row around the opening, sl st to the 1st st made, tie off.
Weave in all ends on the hood. Use the tails to strategically tighten up any of the color changes that may appear loose.
Embellishments:
Eye (Forehead spot)
With J hook and black held single, make a magic circle: DO NOT TURN rounds.
Rnd 1: 8 sc in ring, sl st to 1st sc made. (8)
Rnd 2: ch 1, 2 sc in same sc and in each sc around, sl st to 1st sc made. (16)
Rnd 3: ch 1, sc same sc, 2 sc in nxt sc, *sc in nxt sc, 2 sc in nxt sc, repeat from * around, sl st to 1st sc made, tie off black. (24)
Rnd 4: join GRAY held double strand, to any stitch around with right side facing, ch 1, sc in same sc and in each sc around, sl st to 1st sc made, tie off gray, leave long tail to stitch to head later. (24)
Red Spot:
With RED held double strand, make a magic circle.
Rnd 1: 4 sc in ring, sl st to 1st sc made, tie off (4)
White Spot:
With WHITE held double strand, ch 2, and tie off.
Use the photo as a guide: Using the tails from each piece and knotting them firmly behind the main eye, stitch the red spot on at about the 7 o’clock position, stitch the white spot on at about the 11 o’clock position. Knot all the tails firmly in the back and trim them. Use the long gray tail to stitch the assembled eye to the face, tucking those trimmed tails behind and away forever as you stitch it on.
Cheek Spot:
With J hook and BLACK held single, make a magic circle:
Rnd 1: 8 sc in ring, sl st to 1st sc made. (8)
Rnd 2: ch 1, 2 sc in same st and 2 sc in each st around, sl st to 1st sc made, tie off. (16)
Rnd 3: join WHITE held SINGLE strand in any st around, ch 1, sc in same st, 2 sc in nxt st, *sc in nxt st, 2 sc in nxt st, repeat from * around, sl st to 1st sc made, tie off. (24)
Rnd 4: join BLACK held single strand to the BACK LOOP only of any stitch around, ch 1, sc in same st and nxt st, 2 sc in nxt st, *sc in nxt 2 sts, 2 sc in nxt st, repeat from * around, sl st to 1st st made tie off, leaving a long tail to stitch to face. (32)
Knot all the tails together behind the piece, except for the black tail you will use to stitch to the hood. Trim the ends. Using the photo as a guide, use the black tail and stitch it to the hood.
Antennae: BOTH with J hook
Short:
With WHITE held quadruple strand, ch 7:
Row 1: sl st in 2nd ch from hk and each ch to the end, tie off.
Long:
With GRAY held quadruple strand, ch 9:
Row 1: sl st in 2nd ch from hk and in each ch to the end, tie off.
Join BLACK held DOUBLE to the end opposite the beginning knot at the 1st sl st and ch 3, and sl st to the 1st ch made, tie off. Weave the tails of the black back down inside the gray chains to hide it.
Place the hood on yourself or someone else. Mark where the antennae should be stitched so they stand in the correct position. Stitch each one to the hat using the tails from them, knotting firmly inside the hood so they are snug and stand at attention.
Finally, use the needle and turquoise yarn and stitch two horizontal stitches (2x each) on the orange block that is 4 stitches wide at the bottom left of the hood.
Weave in any remaining tails.
PLEASE, feel free to share the watermarked photo and the link to this pattern anywhere you like. Pin the link or photo on Pinterest as well. Just DO NOT copy and paste any of the info within and post elsewhere. The character is a copyrighted character and one should not sell the finished items. Your discretion will apply here. Thank you!
Please join us on the FACEBOOK PAGE HERE!, I HAVE to see what you make!
Please follow us on INSTAGRAM HERE!!
Check us out on RAVELRY HERE!
Check us out on ETSY HERE!


I love it!! This is so adorable!! Thank you for sharing the pattern!!
You are so welcome! Please post your projects on the Facebook page Crochetverse so I can see!
[…] BB-8 Hood from Crochetverse […]
Thank you for linking to the pattern!
This is JUST what I was looking for to make for my grandson’s birthday! It is so perfect for him! Thank you!! I will try to get a photo of him to you. Maybe a link to my long unused blog. Maybe it will get me started posting on it again!
That’d wonderful! I’d love to have you post it on the Facebook page when you’re done, or ask questions if you need! Happy Birthday to your grandson!
U r the bomb. And yes, whence asked to donate a little next time to a charity, plz do it!! Gr8 idea. Wish more ppl would think of this. Thx I’m definitely going to donate this week! Thx again:)
Thank you, I am glad you like it!
Comments are closed.